
Managing several rental homes in Central Florida means unpredictable weather and humidity can wear down roofs fast. Overlooking routine maintenance puts your investments at risk for leaks, mold, and tenant complaints. Using a systematic roof inspection and maintenance plan catches issues early, prevents expensive repairs, and keeps tenants happy. This guide lays out step-by-step strategies proven to protect your properties and simplify ongoing roof care.
Table of Contents
- Step 1: Assess Roof Condition And Safety
- Step 2: Clear Debris And Gutters Thoroughly
- Step 3: Repair Visible Damage Promptly
- Step 4: Apply Protective Treatments
- Step 5: Verify Maintenance And Document Details
Quick Summary
| Key Takeaway | Explanation |
|---|---|
| 1. Schedule roof inspections regularly | Conduct inspections in spring and fall to catch small issues early. Regular checks prevent costly repairs. |
| 2. Document all findings and repairs | Keep detailed records with photos and notes to demonstrate maintenance efforts and protect against disputes. |
| 3. Clean gutters to prevent water damage | Remove debris and ensure proper drainage to avoid major leaks and foundation damage. Regular cleaning is crucial. |
| 4. Address repairs promptly | Act quickly on visible damage to avoid escalation into larger, more expensive structural problems. |
| 5. Use protective treatments wisely | Invest in quality treatments to extend your roof’s lifespan and reduce the risk of significant damage from severe weather. |
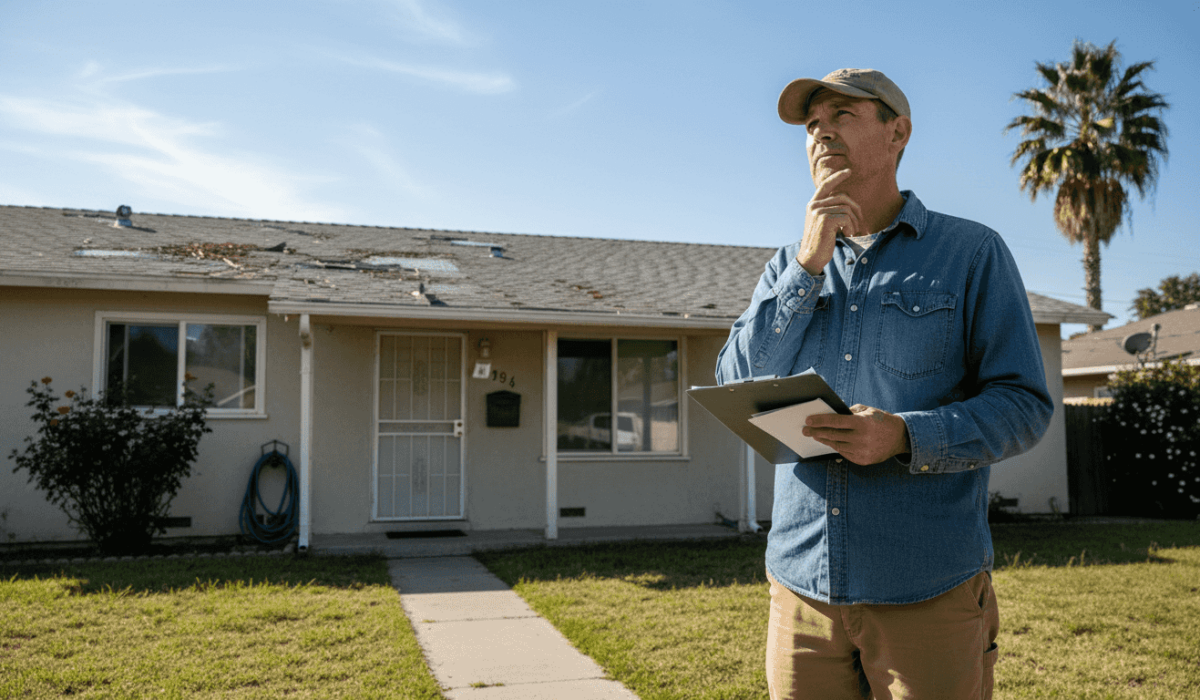
Step 1: Assess roof condition and safety
Before climbing onto your rental property’s roof, you need a clear plan. A proper assessment protects you, your tenants, and identifies problems before they become expensive repairs. This step involves safety preparation and a systematic inspection process.
Start by scheduling your inspection during clear weather with good daylight. Never rush this process or go alone. Use the buddy system—always have someone with you for safety reasons. One person stays on the ground while you work, or you both work together with proper precautions.
Gather these materials before heading up:
- Sturdy ladder in good condition with someone holding it
- Work gloves and rubber-soled shoes for grip
- Camera or smartphone for documentation
- Binoculars for viewing high sections from the ground
- Notebook or checklist
Once on the roof, conduct a safety sweep first. Look for roof hazards like wires, pipes, and penetrations that could trip you or cause injury. Watch for loose debris, wet spots, or unstable areas. Test the surface before putting full weight on it.
Now inspect the actual roof condition. Check for missing shingles, curled or cracked shingles, bare patches where granules have worn away, and signs of algae or moss growth. Look at the flashing around chimneys, vents, and skylights—these areas leak first. Examine gutters and downspouts for debris accumulation and damage.
Document everything with photos and notes. These records prove maintenance efforts and help when talking to contractors about repairs. Note the date, weather conditions, and any damage you observe. Florida’s humidity and heat accelerate roof aging, so take baseline photos to track deterioration.
Regular property inspections catch small problems before they damage your investment. Two annual inspections—spring and fall—keep you ahead of issues.
If your roof shows structural damage, sagging, or widespread deterioration, stop the inspection and contact a professional. Some conditions require expert evaluation rather than landlord assessment.
Here’s a summary of common roof problems, how to spot them, and appropriate next steps:
| Problem Detected | How to Identify | Action Required |
|---|---|---|
| Missing shingles | Noticed on visual check | Replace shingle promptly |
| Curled or cracked shingles | Edges bent, cracks seen | Replace or consult roofer |
| Algae or moss growth | Green or black streaks | Clean and consider treatment |
| Damaged flashing | Gaps, rust, or visible separation | Reseal or call a professional |
| Staining inside property | Water marks or discoloration | Investigate for leaks |
| Sagging roof section | Visible dip or bounce | Stop inspection, get expert help |
Pro tip: Document your inspection with dated photos and keep detailed notes for each property. This creates a maintenance history that helps justify repair expenses to tenants and protects you if disputes arise about property condition.
Step 2: Clear debris and gutters thoroughly
Clean gutters are the difference between a protected roof and water damage spreading through your rental property. Clogged gutters cause water to overflow, potentially damaging foundations, siding, and interior structures. This step keeps water flowing properly away from your building.
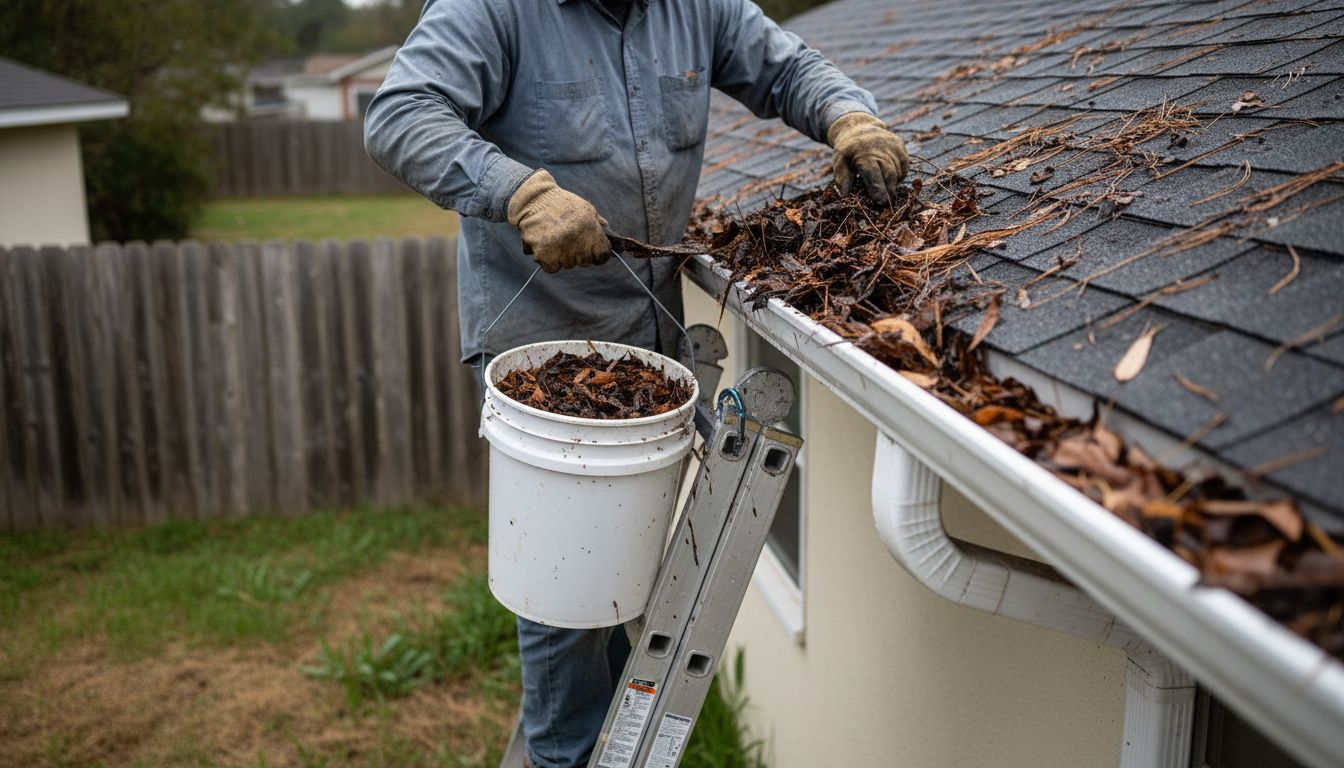
Start by removing large debris by hand. Wear gloves and scoop out leaves, twigs, dirt, and any accumulated material. Work from one end of the gutter toward the downspout, pushing debris into a bucket or tarp below. For multi-story properties, work carefully from a stable ladder with someone spotting you.
Once you remove the bulk material, flush the gutters with water. Use a garden hose to rinse remaining dirt and check for proper drainage. Watch how water flows toward downspouts—it should move steadily without pooling anywhere along the gutter line.
Inspect your gutters while cleaning:
- Look for rust spots or holes that allow water to escape
- Check that gutters slope properly toward downspouts
- Verify downspouts direct water 4 to 6 feet away from the foundation
- Ensure no debris blocks downspout openings
Your downspouts are equally important. Water should flow freely through them without any blockages. If water backs up or overflows during heavy rain, the downspout likely needs clearing or repositioning. Poor drainage here causes foundation damage that costs thousands to repair.
For Florida properties, consider installing gutter guards to reduce debris accumulation, though you’ll still need occasional maintenance. Metal gutters are preferable to aluminum in our climate due to durability. Even with guards, inspect twice yearly—spring and after fall weather—since accumulated materials can still reduce effectiveness.
Clean gutters prevent water damage that exceeds the cost of regular maintenance by tenfold. One clogged gutter can lead to foundation cracks, mold, and costly repairs.
Document your gutter cleaning with photos. This creates a maintenance record proving you’re protecting the property, which supports your position if tenant damage disputes arise.
Pro tip: Schedule gutter cleaning before your region’s peak rain season and immediately after heavy storms. In Central Florida, spring and late summer are critical times when debris accumulation happens fastest.
Step 3: Repair visible damage promptly
Damaged shingles, flashing, and leaks don’t fix themselves. Every day a problem sits unrepaired, water seeps deeper into your roof structure, creating mold, wood rot, and costly structural damage. Acting quickly stops small problems from becoming expensive disasters.
Start by identifying what needs repair. Missing or cracked shingles are obvious, but look for curled edges, bald spots where granules are gone, and any gaps where water can enter. Check around vents, chimneys, and skylights carefully since these areas are prone to leaking.
Small repairs you can handle yourself include replacing individual shingles and resealing minor gaps. For shingle replacement, carefully lift the damaged shingle, remove nails, and slide out the old piece. Slide the replacement in place, nail it down, and apply roofing cement under the edges. This takes 15 minutes and costs minimal money.
However, some damage requires professional help:
- Flashing damage around penetrations like chimneys and vents
- Large areas with multiple damaged shingles
- Sagging sections or soft spots indicating rot
- Water stains inside the property showing active leaks
- Damage from severe storms affecting multiple areas
When repairing roof flashing and penetrations, ensure proper sealing creates a continuous water control layer. Damaged flashing must be replaced, not just patched, to prevent future leaks. This is where professional roofers excel, and the cost of hiring them prevents exponentially larger repair bills later.
Small repairs today prevent major structural damage tomorrow. Water damage compounds quickly, turning a $200 fix into a $5,000 problem within months.
Document all repairs with photos showing before and after conditions. Keep receipts for materials and contractor invoices. This documentation proves you maintained the property properly, which protects you legally if disputes arise about property condition.
Pro tip: Schedule repairs within 48 hours of discovering damage, especially after storms. The longer water sits in your roof structure, the more it spreads into insulation, framing, and interior spaces where damage becomes hidden until it’s severe.
Step 4: Apply protective treatments
Protective treatments are your roof’s defense system against Central Florida’s intense weather. These aren’t optional upgrades—they’re practical investments that prevent water infiltration, wind damage, and costly repairs. The right treatments work together to extend your roof’s lifespan significantly.
Start with ice and water barriers at vulnerable areas. These peel-and-stick membranes go under shingles at roof valleys, edges, and around penetrations like vents and chimneys. Valleys are where two roof sections meet and channel water downward, making them leak-prone. Barriers here catch water before it enters the structure. On multi-story rentals, the bottom edge of upper roof sections needs barriers too.
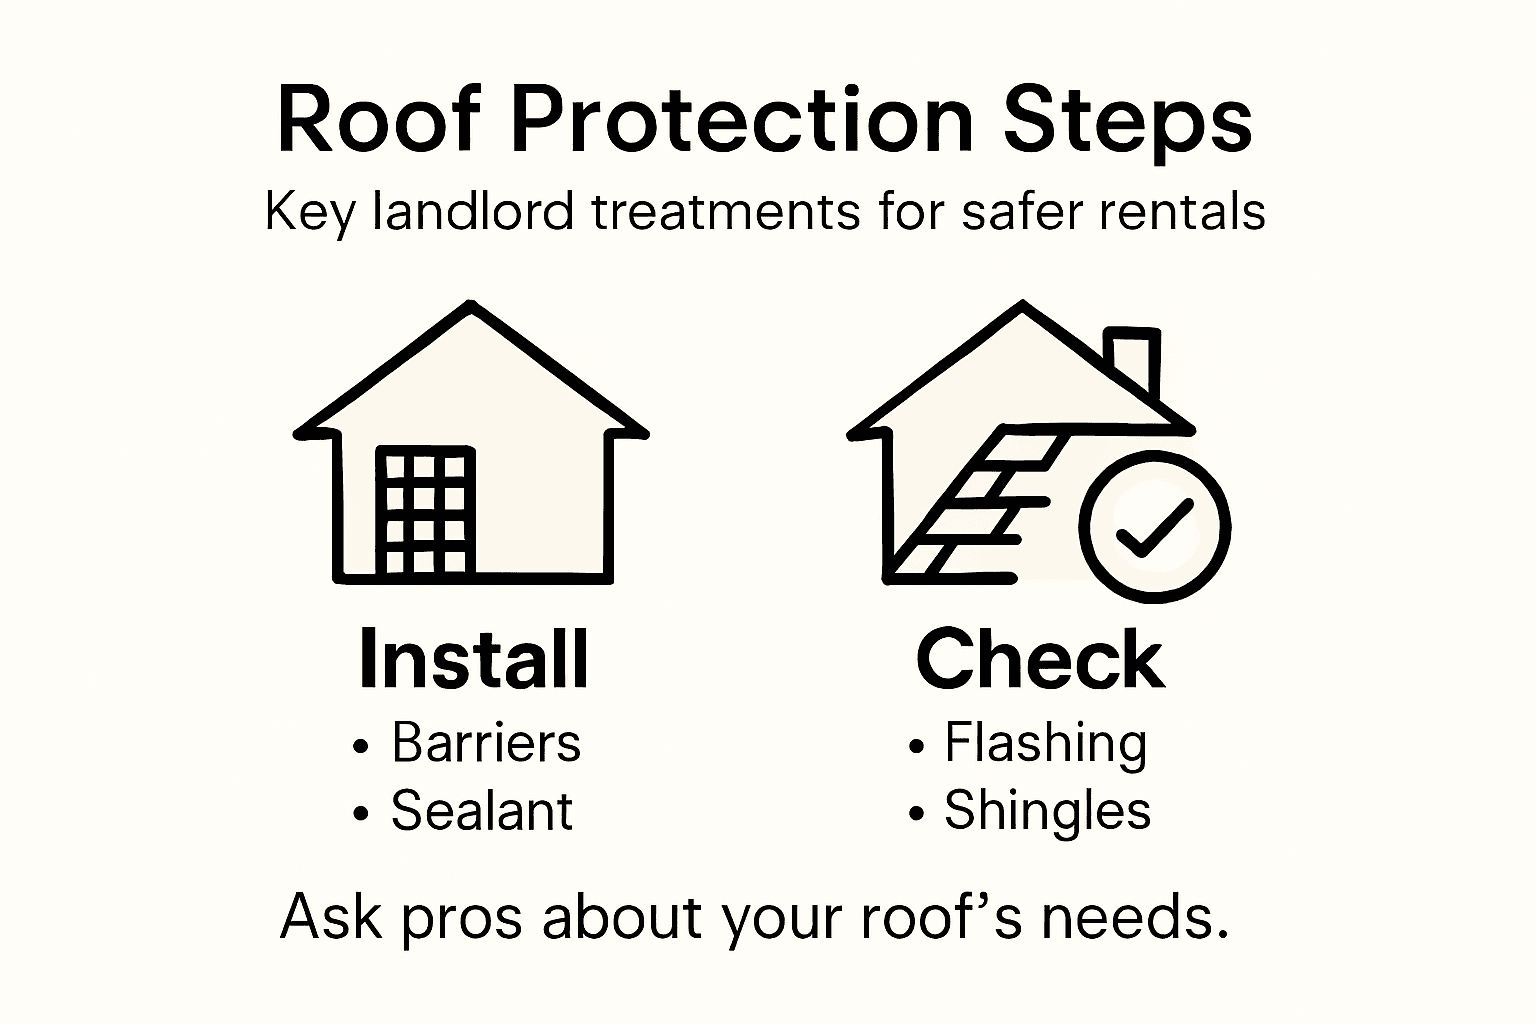
Next, ensure proper flashing installation around all penetrations. Metal flashings direct water away from vents, chimneys, and skylights. These pieces must overlap shingles in the correct sequence and be sealed with roofing cement. Poor flashing causes the majority of roof leaks, so this step matters tremendously.
Consider these additional protective measures:
- Wider drip edges that extend further from roof edges to channel water away
- Ring-shank nails instead of smooth nails for stronger attachment against wind uplift
- Fully adhered starter strips at the roof’s bottom edge for maximum wind resistance
- Sealed roof decks that create a secondary water barrier under shingles
Wind and hail-resistant roofing covers tested to high standards provide measurable protection in severe weather. Florida’s hurricane season makes this especially valuable for rental properties. Higher-rated roofing resists impact damage from hail and wind-driven debris better than basic options.
Professional protective treatments cost 10-15% more upfront but prevent damage claims costing thousands. One major leak repair often exceeds the cost of preventive treatments.
These treatments work best when installed during new roof installation or major repairs. If your roof is relatively new, focus on maintaining existing protective layers. If you’re planning replacement, specify maximum protective treatments in your contract.
Pro tip: Ask your roofing contractor which protective treatments your rental property currently lacks and prioritize installing them during your next maintenance window. Central Florida’s salt air and hurricane winds make these treatments essential for protecting your investment.
Step 5: Verify maintenance and document details
Documentation transforms scattered maintenance efforts into a powerful legal and financial record. When disputes arise with tenants or insurance companies, your detailed records prove you maintained the property properly. This step protects your investment and simplifies future management decisions.
Create a maintenance log for each property. Record every inspection date, weather conditions, observations, repairs completed, and contractor information. Include photos showing roof conditions before and after work. These records answer critical questions later about when problems started and what was done to fix them.
Your documentation should include:
- Inspection dates and condition notes
- Photos of the entire roof from multiple angles
- Roof type, age, and warranty information
- Contractor names and contact information
- Repair descriptions and completion dates
- Material costs and labor expenses
- Any damage observations from weather events
When hiring contractors, get detailed roof inspection reports with photos and findings documenting what they observed and repaired. These professional reports carry weight if you ever need to prove maintenance compliance. Ask contractors to include warranty information on materials and workmanship.
Verify that all work meets your local building codes and any warranty requirements. Keep manufacturer instructions for roofing materials and installation specifications. If you ever need to make an insurance claim, these documents prove you used quality materials and proper installation.
Store everything digitally with copies in the cloud. Use folders organized by property address and year. Email copies of major work orders and inspection reports to yourself as backup. This protects against losing records if your physical files are damaged.
Documented maintenance proves you’re a responsible landlord and protects you legally. Courts and insurance companies trust detailed records more than memories.
Review your records annually before the inspection season. This helps you spot patterns in repairs and plan preventive work. Properties with consistent documentation see fewer disputes and insurance complications.
Pro tip: Create a simple spreadsheet tracking inspection dates, costs, and repairs for each rental property. This one document becomes invaluable for tax deductions, showing maintenance history to prospective buyers, and defending yourself against tenant claims about property condition.
Compare the benefits of thorough documentation versus poor record-keeping for roof maintenance:
| Practice | Legal Protection | Financial Impact | Maintenance Planning |
|---|---|---|---|
| Thorough documentation | Strong evidence in disputes | Easier insurance claims and deductions | Predicts repair needs |
| Poor record-keeping | Difficult to prove maintenance | Coverage and claims often denied | Misses repair patterns |
Protect Your Central Florida Rental with Expert Roof Care from Thomas Roofing and Repair
Maintaining a rental property’s roof is critical to preventing costly damage from leaks, storm impact, and weather wear. This guide highlights how regular inspections, prompt repairs, and protective treatments save landlords from unexpected expenses and tenant disputes. If you face challenges like roof deterioration, clogged gutters, or flashing damage, trust the roofing experts who understand Central Florida’s unique climate and landlord needs.
Thomas Roofing and Repair offers comprehensive solutions including detailed roof inspections, reliable repairs, and hurricane-ready protective upgrades designed to extend your roof’s life. We stand for integrity, quality craftsmanship, and responsive service tailored to landlords and property managers in Brevard, Volusia, Orange, and beyond. Start documenting and safeguarding your investment with a team dedicated to your peace of mind.

Don’t wait until small roof problems turn into expensive disasters. Visit Thomas Roofing and Repair today to schedule a free inspection or get a personalized maintenance plan. Our expert team will help you stay ahead of roof damage, protect your tenants, and uphold your property’s value with quality roofing services and repairs. Secure your rental investment now with reliable professional roofing support.
Frequently Asked Questions
How often should I inspect my rental property’s roof?
Inspect your rental property’s roof at least twice a year, in the spring and fall. This ensures you catch small problems before they escalate into costly repairs. Schedule inspections during clear weather to allow for comprehensive checks.
What materials do I need before inspecting the roof?
Gather sturdy ladders, work gloves, rubber-soled shoes, a camera or smartphone for documentation, binoculars for distant views, and a notebook or checklist. Having these materials ready improves safety and helps you document any issues effectively.
What should I do if I find structural damage during an inspection?
If you discover structural damage, such as sagging areas or widespread deterioration, stop your inspection immediately and contact a professional. These conditions require expert evaluation to prevent further issues and ensure safety.
How do I clean and maintain gutters effectively?
Start by removing large debris from your gutters by hand, and then flush them with water using a garden hose to ensure proper drainage. Check that water flows freely towards downspouts and clears away from your building’s foundation for optimal drainage and protection.
What protective treatments should I apply to my roof?
Apply ice and water barriers, particularly in vulnerable areas like valleys and around penetrations. Additionally, ensure proper flashing installation and consider wider drip edges to channel water properly, enhancing your roof’s protection against severe weather.
Why is documentation important in roof maintenance?
Documenting all inspections, repairs, and maintenance creates a reliable record that proves you maintained the property properly. This can protect you legally and simplify insurance claims if disputes arise about property condition or maintenance practices.