Aging roofs in Central Florida present a major challenge, especially as severe weather approaches. Studies show that over 60 percent of American homeowners experience unexpected roof repairs after storms. Taking a proactive, hands-on approach can help you avoid last-minute expenses and protect your home’s value. This guide uncovers practical steps to help American homeowners extend their roof’s lifespan through strategic inspection, timely repairs, and regular upkeep before the next hurricane season.
Table of Contents
- Step 1: Inspect Roof Surfaces And Identify Issues
- Step 2: Clear Debris And Clean Gutters Thoroughly
- Step 3: Repair Damaged Shingles And Flashings
- Step 4: Apply Protective Coatings And Sealants
- Step 5: Verify Repairs And Schedule Regular Checkups
Quick Summary
| Key Message | Explanation |
|---|---|
| 1. Regular Roof Inspections are Essential | Conduct bi-annual inspections, especially before and after hurricane season, to identify potential issues before they escalate. |
| 2. Clean Gutters to Prevent Damage | Remove debris and ensure downspouts direct water away from the foundation to prevent moisture buildup and structural damage. |
| 3. Promptly Repair Shingles and Flashings | Address any damage immediately to prevent water infiltration, ensuring repairs are done correctly to maintain roof integrity. |
| 4. Use Protective Coatings Wisely | Apply high-quality sealants that match your roofing material to create a barrier against environmental wear and extend roof lifespan. |
| 5. Maintain Detailed Repair and Inspection Records | Document all repairs and inspections to track your roof’s condition and assist with future maintenance and insurance claims. |
Step 1: Inspect Roof Surfaces and Identify Issues
Inspecting your roof surfaces requires careful observation and strategic assessment to catch potential problems before they become expensive repairs. By systematically examining your roof, you can detect early warning signs of damage and prevent significant structural issues.
Start by conducting a visual inspection from ground level using binoculars or a sturdy ladder. Look for visual signs of roof damage such as missing, cracked, or curling shingles, areas of discoloration, and potential water stains. Pay close attention to your roof’s edges, valleys, and areas around chimneys or vents where leaks commonly develop. Check for moss growth, which indicates moisture retention, and inspect metal flashings for signs of rust or separation.
If you can safely access your roof, perform a closer examination. Walk carefully and avoid stepping on damaged or fragile sections. Look for granule loss on asphalt shingles, which signals aging, and check for any soft or spongy areas that might indicate underlying water damage. Document your findings with photographs to track changes over time and help professional roofers understand the specific issues during future inspections.
Pro tip: Schedule roof inspections twice yearly in Central Florida, ideally before and after hurricane season to catch potential storm damage early.
Here’s a quick comparison of common roof problems and their typical visual warning signs:
| Roof Problem | Key Visual Warning Sign | Potential Risk |
|---|---|---|
| Missing shingles | Bare spots or gaps | Water infiltration |
| Curling shingles | Edges lift and curve | Reduced wind resistance |
| Discolored areas | Dark or streaky patches | Moisture or algae growth |
| Rusted flashing | Orange stains or flaking | Flashing failure, leaks |
| Moss growth | Green patches or clumps | Trapped moisture, rotting |
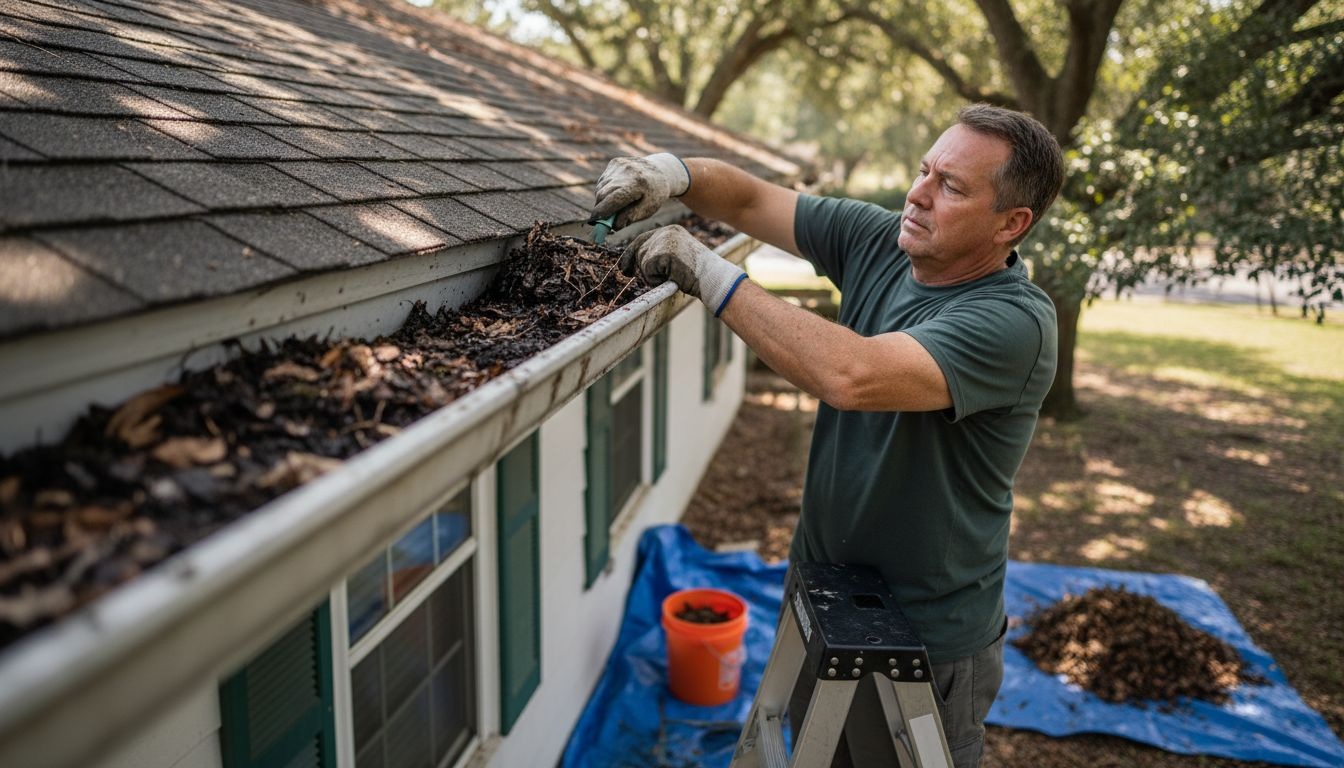
Step 2: Clear Debris and Clean Gutters Thoroughly
Cleaning your gutters is a critical maintenance task that prevents water damage and protects your home’s structural integrity. By removing debris and ensuring proper water flow, you can prevent potential costly repairs and maintain your roof’s overall health.
Begin by using a sturdy ladder to access your gutters safely, wearing work gloves to protect your hands. Remove leaves, twigs, and other accumulated debris by hand or with a small plastic scoop, placing the waste in a bucket or dropping it onto a ground tarp. After clearing loose materials, use a garden hose to flush gutters and check drainage thoroughly. Watch for any standing water or slow drainage, which could indicate improper slope or hidden blockages. Pay special attention to downspouts, ensuring they direct water at least 4 to 6 feet away from your home’s foundation to prevent moisture buildup.
Inspect your gutter system for signs of damage such as rust, cracks, or separation from the roofline. Look for areas where water might be overflowing or causing streaks on your home’s exterior walls. If you notice significant wear or complex issues, consider scheduling a professional inspection to address potential problems before they escalate.
Pro tip: Install gutter guards to reduce future debris accumulation and minimize the frequency of manual cleaning.
Step 3: Repair Damaged Shingles and Flashings
Repairing damaged shingles and flashings is crucial to preventing water infiltration and protecting your home’s structural integrity. Addressing these issues promptly can save you from costly water damage and extend your roof’s overall lifespan.
Begin by carefully examining your roof for damaged shingle replacement techniques. Lift the damaged shingle gently and remove any existing fasteners using a pry bar or roofing nail puller. Slide the new shingle into place, ensuring it aligns perfectly with surrounding shingles. Secure the new shingle with roofing nails placed just beneath the adhesive strip, taking care not to puncture the exposed area of the shingle below. For widespread damage or older roofs with brittle shingles, consider consulting a professional roofing specialist who can assess the overall condition of your roof.
When addressing flashings, pay special attention to areas where your roof meets walls or other structures. Check for proper overlap and any signs of rust or separation. Properly installed step flashing should direct water away from vulnerable areas and extend behind exterior cladding. If you notice significant flashing damage or gaps, it might be best to have a professional repair or replace the existing flashing to ensure complete water protection.
Pro tip: Always keep spare matching shingles from your original roof installation for more seamless future repairs.
Step 4: Apply Protective Coatings and Sealants
Protective coatings and sealants are your roof’s ultimate defense against environmental wear and potential damage. By creating an additional barrier between your roofing materials and harsh external conditions, you can significantly extend your roof’s lifespan and prevent costly repairs.

Choose a high-quality roof coating for UV protection that matches your specific roofing material. For asphalt shingle roofs, select elastomeric coatings designed to provide flexibility and seamless coverage. Clean the roof surface thoroughly before application, removing all dirt, debris, and loose granules. Use a roller or sprayer to apply the coating evenly, working in consistent sections and ensuring complete coverage without pooling. Pay special attention to areas around vents, chimneys, and other potential leak points, applying an extra layer of sealant to reinforce these vulnerable zones.
When applying protective coatings, work during mild temperatures with low humidity for optimal adhesion. Avoid applying sealants during direct sunlight or extreme heat, which can cause uneven drying and reduce the coating’s effectiveness. Allow each layer to dry completely before applying additional coats, typically waiting 4 to 6 hours between applications. Inspect the coating periodically for signs of wear or cracking, touching up as necessary to maintain continuous protection.
Pro tip: Choose reflective roof coatings to reduce heat absorption and potentially lower your home’s cooling costs.
Step 5: Verify Repairs and Schedule Regular Checkups
Validating roof repairs and establishing a consistent maintenance schedule are critical steps in protecting your home’s most important structural shield. By systematically documenting and tracking your roof’s condition, you can catch potential issues before they escalate into costly problems.
Begin by thoroughly reviewing roof maintenance protocols immediately after completing any repairs. Carefully examine each repaired section, checking for proper sealant application, shingle alignment, and overall structural integrity. Take clear photographs documenting the repair work, noting the date and specific areas addressed. Look for any signs of uneven surfaces, potential moisture intrusion, or incomplete coverage that might compromise your repair efforts. Pay special attention to areas around vents, chimneys, and other penetration points where water might potentially seep through.
Create a comprehensive maintenance calendar that includes bi-annual professional inspections and your own quarterly visual assessments. Schedule professional evaluations before and after Central Florida’s intense storm seasons to ensure your roof remains in optimal condition. Maintain a detailed logbook with inspection dates, repair records, and any observations about your roof’s performance. This documentation not only helps you track your roof’s condition but also provides valuable information for future maintenance and potential insurance claims.
Pro tip: Set digital reminders on your smartphone for roof inspection dates to ensure you never miss a critical maintenance checkpoint.
To help you schedule roof maintenance, here’s a sample maintenance calendar for a Central Florida home:
| Month | Task Description | Benefit |
|---|---|---|
| April | Professional roof inspection | Pre-hurricane checkup |
| July | Clean gutters and check drainage | Prevent summer blockages |
| October | Professional roof inspection | Assess post-storm damage |
| January | Visual inspection and minor repairs | Address winter wear |
Protect Your Home with Expert Roof Maintenance and Repair
Maintaining your roof can feel overwhelming when facing challenges like damaged shingles, clogged gutters, or worn flashings that threaten your home’s safety. This article highlights key steps such as inspecting roof surfaces, clearing debris, making timely repairs, and applying protective coatings to extend your roof’s life and avoid costly damage. At Thomas Roofing and Repair, we understand how important it is to protect your investment and home comfort, especially in Central Florida’s demanding weather.

Don’t wait until small issues become major problems. Our team is ready to help with professional inspections, expert repair services, and custom solutions tailored to your roof’s needs. Gain peace of mind knowing your roof is in the hands of dependable specialists offering top-quality craftsmanship and service guarantees. Schedule your free estimate today at Thomas Roofing and Repair and start extending your roof’s life now. Learn more about our roof inspection services and trusted storm damage repair options designed for your safety and home protection.
Frequently Asked Questions
How often should I inspect my roof to extend its life?
Regular roof inspections should occur at least twice a year, ideally before and after hurricane season. Schedule these inspections to catch potential storm damage early, ensuring your roof remains in optimal condition throughout the year.
What visual signs indicate that my roof needs maintenance?
Look for missing, cracked, or curling shingles, discolorations, and areas of rust on metal flashings. Identifying these warning signs early can help you determine when to conduct repairs and prevent costly water damage.
How can I properly clean my gutters as part of roof maintenance?
To clean your gutters, safely access them with a sturdy ladder and remove debris by hand or with a small scoop. Flush the gutters with water from a garden hose to check for proper drainage, ensuring that water flows freely and directs away from your home’s foundation.
What steps should I take if I find damaged shingles during my roof inspection?
If you find damaged shingles, carefully lift them and remove any fasteners. Replace the damaged shingle by sliding a new one into place and securing it with nails, ensuring proper alignment with surrounding shingles to maintain roof integrity.
How can I apply protective coatings to my roof?
Choose a high-quality roof coating suitable for your roofing material and clean the surface thoroughly before application. Use a roller or sprayer to apply the coating evenly, paying special attention to vulnerable areas, and conduct touch-ups as needed to maintain protection.
What documentation should I keep for my roof maintenance activities?
Maintain a logbook with dates of inspections, repairs made, and observations about your roof’s performance. This documentation is crucial for tracking your roof’s condition and may be beneficial for future maintenance or insurance claims.