
Florida weather puts your roof to the test year round. From pounding rain and relentless sun to sudden windstorms, every season brings new challenges for your shingles and support structure. Catching roof problems early can mean the difference between a quick fix and a major, expensive overhaul.
You need clear ways to recognize trouble before it spirals out of control. This guide unlocks practical knowledge on how to detect subtle but serious signs like cracking, leaks, wind damage, and more. By the end, you’ll know exactly what to look for and how to protect your home from hidden threats.
Get ready to discover straightforward steps that help you spot damage fast and keep your roof strong for years to come.
Table of Contents
- 1. Identifying Shingle Damage and Cracking
- 2. Spotting Roof Leaks and Water Stains
- 3. Detecting Wind and Storm Impact Damage
- 4. Understanding Granule Loss and Surface Wear
- 5. Recognizing Sagging and Structural Issues
- 6. Checking for Mold, Algae, and Moss Growth
Quick Summary
| Key Insight | Explanation |
|---|---|
| 1. Inspect Shingles Regularly | Look for visible cracks, splits, and granule loss to catch damage early, preventing costly repairs. |
| 2. Monitor for Water Stains | Check for interior water stains or discoloration to identify leaks before they cause significant damage. |
| 3. Assess for Wind Damage Post-Storm | Inspect roof edges and ridges after storms for lifted shingles, which indicate potential wind damage. |
| 4. Understand Granule Loss | Significant granule loss can signal the need for urgent roof replacement due to compromised protection. |
| 5. Act on Sagging Roofs Immediately | Sagging indicates structural problems requiring urgent inspection and professional assessment to ensure safety. |
1. Identifying Shingle Damage and Cracking
Shingle damage doesn’t always announce itself with dramatic curling or missing pieces. Sometimes the damage starts small, hidden within the structure itself. Learning to spot early signs of cracking and splitting can save you thousands in repair costs down the road.
Your asphalt shingles experience constant stress from weather. Heat, cold, rain, and UV exposure all take their toll. The key to catching damage early is understanding what you’re looking for and why it happens.
Why Shingles Crack and Split
Here’s what happens inside your roof that most homeowners never think about: your asphalt shingles and the roof deck beneath them expand and contract at different rates. When temperatures swing—especially in Florida’s intense sun—this creates internal stress. Thermal expansion and contraction causes the materials to move separately, and eventually something has to give.
Over time, asphalt becomes brittle. The binder that holds everything together degrades from UV exposure and oxidation. Once brittleness sets in, even small stress points become cracks.
The difference between shingle splitting and cracking matters: splits run along the grain and usually point to structural stress, while random cracks indicate aging and brittleness.
What Damage Looks Like
Here’s what to look for when inspecting your roof:
- Visible cracks running horizontally or at angles across the shingle surface
- Splits that follow the shingle’s grain, often starting at the edges
- Checkering patterns where multiple small cracks create a web-like appearance
- Loss of granules clustered around crack areas, showing exposed asphalt beneath
- Lifted edges where cracks have widened enough to separate the shingle from its base
Cracks often start small and grow larger with each temperature cycle. What looks minor in spring might become a leak by summer if left unaddressed.
How to Conduct Your Own Inspection
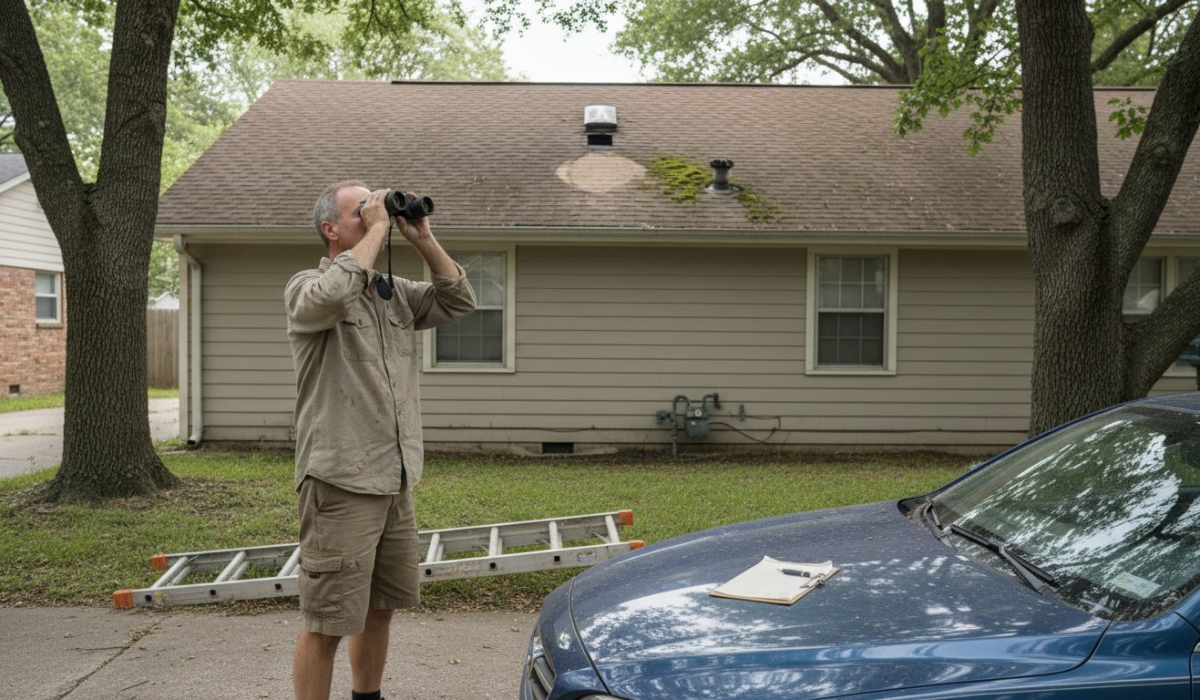
You don’t need to climb onto your roof, though having clear photos helps. Use binoculars to examine shingles from the ground, focusing on south and west-facing sides (these get the most sun exposure). Look for any deviation from the smooth, regular pattern you see across most of your roof.
Pay special attention to areas around roof penetrations—vents, chimneys, skylights. Stress concentrates at these weak points, making cracks more likely there.
If you spot damage or feel unsure about what you’re seeing, a professional inspection provides clarity. Thomas Roofing & Repair offers detailed roof inspections to catch problems before they become expensive repairs.
Pro tip: Document any damage with dated photos showing the location and close-up detail; this becomes invaluable evidence if you need to file an insurance claim.
2. Spotting Roof Leaks and Water Stains
Water stains on your ceiling might seem minor, but they’re your roof’s way of sending an urgent message. By the time you see visible damage inside your home, the leak has already been working behind the scenes for days or weeks. Catching these signs early prevents expensive water damage to your home’s structure and contents.
Leaks don’t always drip straight down into a bucket. Water travels along rafters, follows the underside of decking, and can appear far from where it actually enters your roof. This is why spotting the signs requires knowing where to look and what to look for.
Interior Warning Signs
Start your inspection inside your home, where evidence is easiest to spot. Check your attic during daylight hours and look for discoloration on insulation, rafters, and decking. Water stains appear as dark patches or rings, sometimes with a musty odor nearby.
Ceilings and walls tell stories too. Look for yellowing, bubbling paint, or soft spots that feel spongy when you press them. These indicate water is saturating materials behind the surface. Don’t dismiss a single small stain—it often signals a much larger problem above.
Water damage accelerates once it starts, so addressing stains within days rather than weeks prevents structural rot and mold growth.
Exterior Inspection Points
Use binoculars to examine your roof’s exterior without climbing onto it. Focus on these vulnerable areas:
- Valleys where two roof slopes meet (water naturally flows here)
- Around vents, chimneys, and skylights (flashing gaps are common leak sources)
- Shingle edges and undersides visible from gutters and ground level
- Gutters and downspouts for debris that traps moisture
- Roof penetrations where pipes or wires pass through
Look for granule loss clustered around seams, which indicates water is pushing underneath shingles. Missing or lifted shingles create direct pathways for water infiltration.
Professional Detection Methods
If you suspect a leak but can’t locate it, professionals use systematic approaches. Comprehensive roof inspections include visual examination combined with checking surrounding building components for evidence of water intrusion. Thermal imaging and moisture meters can reveal hidden wet spots invisible to the naked eye.
Thomas Roofing & Repair specialists perform detailed leak detection that identifies not just where water enters, but why it’s entering. This prevents recurring problems after repair.
Pro tip: Check your attic or crawl space monthly, especially after heavy rain or extreme weather, since new leaks often develop near existing damage.
3. Detecting Wind and Storm Impact Damage
Windstorms don’t always leave dramatic destruction. Sometimes they cause subtle damage that gradually worsens, turning a minor repair into a major expense. Learning to spot wind damage right after a storm helps you catch problems before they cascade into costly issues.
Wind creates forces that lift and pull at your roof in ways normal weather doesn’t. Understanding how this damage appears helps you identify it quickly and accurately for insurance claims.
How Wind Damages Roofs
Wind doesn’t push straight down on your roof like you might imagine. Instead, it creates uplift forces that try to peel shingles away from the deck. When wind flows over your roof’s edges and ridges, it accelerates and loses pressure underneath, creating suction that pulls upward with tremendous force.
This is why certain areas get damaged more than others. Wind damage appears most frequently at eaves and ridges where uplift forces are strongest. Corners and edges experience far more stress than roof centers.
Wind damage concentrates at vulnerable points like edges and roof corners, making these your priority inspection areas after any storm.
Recognizing Wind Damage Patterns
Wind damage has distinctive characteristics that separate it from other roof problems. Here’s what to look for:
- Shingles lifted or peeled back at edges and corners (not scattered randomly across the roof)
- Missing shingles clustered in specific areas rather than isolated spots
- Torn or split shingles with damage pointing in the direction wind traveled
- Exposed nails where shingles have been pulled away
- Granule loss concentrated in corner and edge zones
- Lifted flashing around vents, chimneys, or skylights
True wind damage follows patterns. Damage that’s scattered randomly or appears only in isolated spots usually indicates age or other causes, not wind.
Inspection After a Storm
Wait at least 24 hours after a storm before inspecting. This lets debris settle and gives you a clearer picture. Use binoculars from ground level to examine your roof’s edges, corners, and ridges carefully.
Pay special attention to the side of your roof facing the wind direction during the storm. Document everything with dated photos showing the damage location and close-up details. This documentation becomes critical for insurance claims.
If you’re uncertain whether damage is storm-related, professional assessment clarifies the issue. Specialists can differentiate wind damage from aging or other causes, ensuring your insurance claim succeeds.
Pro tip: Photograph your roof on clear days before severe weather approaches, creating a baseline of normal conditions that makes storm damage obvious by comparison.
4. Understanding Granule Loss and Surface Wear
Granules are tiny colored rocks embedded in asphalt shingles, and they’re doing more work than you realize. They protect your shingles from UV radiation, weathering, and temperature swings. When granules disappear, your roof’s lifespan shrinks dramatically.
Granule loss is one of the easiest damage types to spot once you know what to look for. The challenge is determining whether you’re seeing normal aging or a sign that replacement is urgent.
Why Granules Matter
Those small pebbles covering your shingles serve critical functions. They reflect sunlight away from the asphalt underneath, keeping shingles cooler and reducing heat damage. They also shield the asphalt binder from UV rays that cause brittleness and cracking.
Without adequate granules, your shingles deteriorate much faster. The underlying asphalt becomes exposed and vulnerable to every weather event. Granule loss is a sign of aging shingles and often indicates your roof is approaching the end of its serviceable life.
Significant granule loss means your roof’s protective barrier is compromised and replacement becomes urgent rather than optional.
Normal Versus Premature Loss
All shingles shed granules over time, but the rate matters. New shingles naturally release loose granules during their first year, which you’ll see in gutters. This is normal and doesn’t indicate a problem.
Premature granule loss appears as bare patches across multiple shingles, not just in gutters. You’ll notice exposed asphalt showing through the shingle surface. Here’s the difference:
- Normal aging shows gradual, uniform granule loss across the entire roof
- Premature loss appears in clusters or specific areas, often indicating hail damage or manufacturing defects
- Accelerated deterioration happens in high-exposure areas (south and west-facing slopes get more sun)
Uniform loss across your roof typically means your shingles are simply reaching the end of their expected lifespan, usually 15 to 25 years depending on quality and climate.
Assessing Your Roof
View your roof from the ground using binoculars to look for bare spots where granules have vanished. Compare different sections. If loss is uniform across the entire roof, aging is the cause. If specific areas show heavy loss while others look fine, environmental factors or damage are at play.
Central Florida’s intense sun and afternoon thunderstorms accelerate granule loss beyond what homeowners in milder climates experience. Your roof may need replacement sooner than national averages suggest.
Pro tip: Check your gutters after rain to see how many granules are collecting; a handful is normal, but buckets full indicate accelerated wear requiring professional assessment.
5. Recognizing Sagging and Structural Issues
A sagging roof is your home sending a distress signal. Unlike cosmetic damage that can wait, sagging indicates serious structural problems that demand immediate attention. This is the damage type that should never be ignored, as it affects your home’s safety and value.
Sagging happens gradually, which is why many homeowners miss it until the problem becomes severe. Learning to spot early warning signs puts you ahead of costly repairs and potential safety hazards.
What Causes Roof Sagging
Your roof’s structure relies on support beams and trusses working together. When these components weaken or deteriorate, the roof loses its ability to support itself and weight from rain, debris, or snow accumulation.
Common causes include rotted wooden beams from prolonged water exposure, inadequate support structure for the roof’s span, and excessive loading from material buildup. Poor maintenance that allows water damage to progress unchecked is often the culprit. Sagging roofs result from inadequate support, deterioration, or overloading, all conditions that worsen without intervention.
Roof sagging is never cosmetic damage—it signals structural failure that threatens your home’s integrity and safety.
Visual Warning Signs
You don’t need to climb onto your roof to spot sagging. View your roofline from your yard, driveway, or street. Here’s what to look for:
- Visible dips or low spots in what should be a smooth, even profile
- Uneven roofline where sections appear to slope differently
- Sagging gutters that hang lower than they should
- Interior ceiling cracks appearing suddenly or growing wider
- Doors and windows that stick or don’t close properly
- Visible bowing of roof deck or structural members when viewed from attic
Compare your roofline against the straight edge of a window or door frame. Even minor sagging becomes obvious this way.
Interior Indicators
Structural problems show inside your home before the roof looks dramatically different outside. Check your attic for signs of wood deterioration, water stains, or soft, spongy beams. Any beam you can press your finger into indicates rot that compromises structural support.
Cracks in interior drywall that follow a straight line across ceiling or walls often indicate structural stress. New or rapidly widening cracks deserve professional inspection immediately.
Don’t wait for obvious sagging to appear. Early detection of rot, water damage, or structural stress prevents catastrophic failure. Professional inspection identifies problems while solutions are still manageable and affordable.
Pro tip: Walk through your attic during daylight quarterly to inspect beams for soft spots, water damage, or visible deterioration before structural failure becomes obvious.
6. Checking for Mold, Algae, and Moss Growth
That green or dark discoloration creeping across your roof isn’t just unsightly—it’s a warning sign that moisture is accumulating where it shouldn’t be. Mold, algae, and moss thrive in damp conditions and can compromise your roof’s integrity if left unchecked. Central Florida’s humid climate makes this problem especially common for homeowners here.
These growths might seem harmless, but they trap moisture against shingles and accelerate deterioration. Catching them early prevents the damage from spreading underneath your roof’s surface.
Understanding the Difference
Mold, algae, and moss are three distinct problems, though they often appear together. Algae creates black or green streaks running down your roof, following water flow patterns. Moss grows in thick, spongy clumps that feel soft and retain significant moisture.
Mold is typically black and appears in isolated spots rather than patterns. Algae and moss growth on asphalt roofing usually clusters in shaded areas and valleys where moisture collects. Each requires slightly different prevention and removal approaches.
Moisture control is the key to stopping all three types of growth, making ventilation and drainage your best defense.
What Causes Growth in Central Florida
Your roof creates the perfect environment for these problems. Shaded areas under trees stay damp longer, and humid Florida air provides constant moisture. Morning dew lingers on north-facing slopes where sunlight never reaches, especially if trees provide additional shade.
Poor drainage amplifies the problem. When gutters are clogged or downspouts direct water onto the roof, moisture accumulates. Leaves and debris on the roof trap water and create organic material these organisms love.
Here’s what promotes growth:
- Shade from overhanging trees that keeps shingles perpetually damp
- Clogged gutters and valleys where water pools instead of flowing
- Poor attic ventilation that creates moisture-rich conditions
- Accumulated leaves and debris that trap moisture and provide nutrients
- Northern and western roof slopes that receive less UV protection
Spotting the Problem Early
Regular visual inspection catches growth before it spreads widely. View your roof from the ground using binoculars, looking for dark streaks, green patches, or soft, thick growth. Early-stage algae appears as thin discoloration that you might mistake for dirt.
Check shaded areas and roof valleys first, as growth concentrates there. If you spot any discoloration that doesn’t wash away with rain, growth has likely established itself and needs attention.
Mold poses health risks if spores enter your home, so moisture control prevents mold growth and associated health concerns. Professional cleaning removes established growth while preventive measures stop recurrence.
Pro tip: Trim tree branches hanging over your roof to increase sunlight exposure and airflow, which naturally discourages moss, algae, and mold growth.
Below is a comprehensive table summarizing the key details and preventative measures discussed throughout the article regarding roofing damage and related issues.
| Aspect | Details | Recommended Actions |
|---|---|---|
| Identifying Shingle Damage | Look for cracks, splits, checkering patterns, and granule loss on shingles. | Use binoculars for inspection and document with photos for professional assessment. |
| Spotting Roof Leaks | Be alert to interior signs like stains, bubbling paint, and roof penetrations for damage. | Inspect vulnerable areas and contact professionals for thorough evaluations. |
| Assessing Wind Storm Impact | Check for lifted shingles, granule loss, or exposed nails indicative of wind damage. | Document damage promptly and secure expert verification for insurance claims. |
| Recognizing Granule Loss | Observe for exposed asphalt or bare patches, indicating early shingle wear or aging issues. | Perform routine visual inspections and address premature deterioration swiftly. |
| Detecting Structural Issues | Identifying sagging sections or uneven rooflines as indicators of serious problems. | Inspect support structures in attics and consult engineers for immediate solutions. |
| Managing Mold, Algae, and Moss | Examine for discolorations or growth accumulating on shingle surfaces. | Improve drainage, clear debris, and trim trees to minimize microbial growth. |
Protect Your Home from Common Roofing Damage with Expert Care
The challenges discussed in the article highlight how common roofing problems such as shingle cracking, leaks, wind impact, granule loss, sagging, and moss growth can threaten your home’s safety and value. These issues often start subtly yet worsen quickly under Central Florida’s harsh weather conditions. Ignoring early signs like visible cracks, water stains, or granule loss can lead to costly repairs or structural failure. Homeowners need reliable solutions that address both immediate damage and underlying causes to protect their investment.
Thomas Roofing and Repair understands these specific pain points and offers comprehensive services tailored to detect, repair, and prevent the most frequent types of roofing damage detailed here. Whether you need a thorough roof inspection to catch hidden problems early, expert storm damage repair to restore wind-impacted shingles, or a full roof replacement to stop accelerated granule loss and sagging, we deliver high-quality workmanship with integrity and dependability.
Trust our Central Florida experts to not just fix symptoms but provide lasting solutions that increase your home’s resilience against future weather challenges.
Looking to safeguard your home from costly roofing issues before they escalate?

Request your free detailed roof evaluation now at Thomas Roofing and Repair and experience peace of mind knowing your roof is in expert hands. Act quickly because early detection and timely repair make all the difference to your home’s comfort, safety, and value.
Frequently Asked Questions
What are the common signs of shingle damage and cracking?
Shingle damage and cracking often appear as visible cracks, splits along the grain, and loss of granules. Inspect your roof regularly for these signs to catch issues early.
How can I spot roof leaks and water stains in my home?
Look for discoloration on ceilings and walls, especially in the attic where light penetrates. Check for yellowing or bubbling paint, which signals that water has been saturating materials behind the surface.
What should I examine after a windstorm for potential roof damage?
Inspect the edges and corners of your roof for lifted or missing shingles, as wind damage often concentrates in these areas. Document any issues with photos for insurance claims.
How can I assess granule loss on my roof?
Examine your shingles from the ground using binoculars and look for bare patches where granules have disappeared. If you find significant granule loss, it may indicate that your roof’s protective barrier is compromised.
What are the signs of a sagging roof, and how should I respond?
Visible dips or low spots in your roofline are clear indicators of sagging that requires immediate attention. Conduct a thorough inspection of the structure from both inside and outside your home.
How do I recognize mold, algae, or moss growth on my roof?
Look for discoloration such as dark streaks or green patches, primarily in shaded areas or roof valleys. Regularly inspect these regions to catch growth early and remove it before it spreads.