
Spray foam applied directly to the underside of the roof sheathing typically eliminates the need for ridge and soffit vents, but only when the installation meets IRC unvented attic rules. The code allows this trade because the foam itself becomes the air barrier and, in most cases, the primary insulation layer. Climate zone dictates the minimum thickness. Existing vents must be sealed, not left open, and many jobs still need mechanical dehumidification to stay moisture-safe long-term.
TL;DR:
- Proper application of spray foam directly on the roof sheathing must be continuous and sealed to prevent moisture accumulation and ensure code compliance.
- Unvented attics using spray foam are more prone to moisture issues if interior humidity isn’t carefully controlled with dehumidification or supply air.
- The required foam thickness increases with colder climate zones, with specific R-value targets varying based on local code and climate conditions.
- Workmanship flaws such as gaps, under-thickness, or unsealed vents are leading causes of failures, not the spray foam material itself.
- Verifying installation quality through documentation, moisture testing, and thermal imaging is essential to ensure long-term durability and code adherence.
Table of Contents
- How Spray Foam Changes the Ventilation Strategy
- What Building Code Requires Under IRC R806.4 and R806.5
- Climate Zones, Moisture Risk, and What the Hygrothermal Data Shows
- Converting a Vented Attic to Unvented: A Practical Checklist
- Common Mistakes, Warranty Issues, and How to Verify the Work
- How Thomas Roofing and Repair Approaches Ventilation Decisions
- Long-Term Maintenance and Monitoring for Spray-Foamed Roofs
- Health and Indoor Air Quality Considerations
- Cost Considerations Compared to Traditional Roof Insulation
- The Real Lesson Buried in the Code Language
- Get a Code-Aware Roof Inspection From Thomas Roofing and Repair
- Sources
How Spray Foam Changes the Ventilation Strategy
Traditional attic design moves air from soffit to ridge to flush out heat and moisture, keeping the insulation layer at the attic floor while the roof deck stays exposed to outside temperatures. Spray foam flips that model. Once foam is sprayed directly onto the roof sheathing, the attic becomes part of the conditioned envelope rather than a vented buffer space, and the insulation boundary moves from the floor to the roofline.
That shift only works because closed-cell and, with the right vapor strategy, open-cell foam form a continuous air-impermeable layer. Air can’t move through it the way it moves through fiberglass batts or loose-fill cellulose. This is why building scientists classify the result as an unvented, conditioned attic rather than a “sealed vented attic.” Once that layer is in place, soffit and ridge vents stop doing their job. Worse, they can start working against the system.
Here’s the physics problem most homeowners never get explained: an open soffit vent under a spray-foamed roof deck can pull humid outside air into an assembly that no longer has a way to flush it back out through the ridge. In hot, humid climates, that moist air meets a cooler foam surface and the moisture has nowhere productive to go. Practitioner accounts from the roofing trade back this up directly. Fine Homebuilding’s contractor commentary on the subject is blunt: leaving vents open after spraying foam is one of the most common and dangerous installation mistakes crews make, and sealed attics frequently outperform vented ones in warm climates when done correctly.
Coverage quality matters as much as the decision to go unvented. A few things separate a durable installation from a callback waiting to happen:
- Foam must contact the sheathing continuously, with no gaps at hips, valleys, or dormer transitions where crews often rush the pass.
- Thin spots near roof edges and eaves are the most common place inspectors find under-thickness foam, since spray technicians tend to ease off near trim.
- Any remaining vent, whether a static roof vent, a ridge vent, or a soffit strip, has to be physically blocked and air-sealed, not just covered.
- Wood-to-wood joints in the decking need foam bridging the gap, since shrinkage over time can reopen a hairline seam into an air leak path.
Pro Tip: Walk the attic with a flashlight after the crew leaves and look for daylight at the eaves. If you can see a sliver of exterior light around the perimeter, the foam didn’t get full contact with the deck, and that’s exactly where condensation problems start two winters later.
Partial conversions, where a contractor foams the field of the roof but skips the awkward corners, are the single biggest source of unvented-attic complaints. The Building America Solution Center treats continuous air barrier coverage as a prerequisite for the whole approach to work, not an optional upgrade.
What Building Code Requires Under IRC R806.4 and R806.5
The International Residential Code doesn’t leave unvented attic assemblies to guesswork. Section R806.4 governs vented attics, while R806.5 specifically permits unvented attic and enclosed rafter assemblies, provided the installation meets a defined set of conditions rather than a contractor’s judgment call.
The core rule: air-impermeable insulation, meaning spray foam, has to be applied in direct contact with the underside of the structural roof sheathing across the entire attic plane. The code then sets minimum R-values that scale with climate zone. Colder zones require thicker foam because the dew point inside the assembly shifts closer to the roof deck as outdoor temperatures drop, and the insulation has to keep that deck warm enough to avoid condensation. This is not a flat, one-size-fits-all number. The Building America Solution Center’s guidance on below-deck spray foam lays out the specific R-value tables tied to each zone.
A few other code provisions matter just as much as the R-value tables:
- In colder climate zones, open-cell foam applications often trigger a Class II vapor retarder requirement, since open-cell foam is vapor-permeable and needs an added layer to control wintertime moisture drive from the conditioned space below.
- Any spray foam product used has to carry an approved ignition barrier or thermal barrier, since foam left exposed in an attic is a fire code issue independent of its insulation performance.
- Products need current ICC-ES evaluation reports, and installers should reference the ICC 1100 standard for spray-applied polyurethane foam to confirm the specific product meets physical and performance requirements for the application.
Local jurisdictions adopt the IRC on their own schedule and sometimes with amendments, so the version enforced in your county may lag the current national model code by a cycle or two. Before signing a contract, ask which IRC edition your local building department has adopted and get the product’s ICC-ES report number in writing. That single document protects you if an inspector or a future buyer’s inspector ever questions the installation.
Climate Zones, Moisture Risk, and What the Hygrothermal Data Shows
Whether an unvented spray-foam roof stays dry for 20 years or grows mold in year three comes down to two variables working together: how airtight the assembly is and how well interior humidity gets controlled. Hygrothermal modeling done under the Building America program used WUFI simulation software to test unvented roof performance across US climate zones, and the conclusion was more optimistic than older rules of thumb suggested. Airtightness combined with wintertime humidity control enables a wide range of unvented roof solutions to perform safely, not just the coldest or driest climates.
The catch is that the required thickness of air-impermeable insulation climbs as you move into colder zones. A roof in a warm, humid zone can often get by with less closed-cell foam than the same roof design in a northern climate zone, because the dew point risk inside the assembly is more severe where winter temperature swings are larger. The same modeling work found that hybrid approaches, a thinner layer of closed-cell spray foam directly on the deck, topped with a layer of fibrous insulation, can expand the climate range where unvented systems perform safely while still meeting the minimum air-impermeable R-value ratio required in the code tables.
There are limits worth knowing before you assume foam solves everything. The modeling flagged higher risk in situations with sustained high interior relative humidity, think indoor pools, poorly ventilated bathrooms venting into the attic space, or homes running humid conditions for other reasons, and in certain metal roofing assemblies where the deck’s thermal behavior differs from asphalt shingle roofs. In those cases, the margin for error shrinks and the design needs closer attention to interior humidity control rather than insulation thickness alone.
That’s why interior humidity management isn’t an afterthought in a well-designed unvented system. It’s part of the design. A dehumidifier tied into the conditioned space, or a supply duct bringing conditioned air into the attic, keeps interior RH low enough that even a small amount of residual air leakage doesn’t turn into a moisture problem. Skip that step and you’re relying entirely on the foam layer having zero flaws, which no installation achieves in practice.
Converting a Vented Attic to Unvented: A Practical Checklist
Converting an existing vented attic into an unvented, spray-foam-conditioned space is a sequence, not a single job. Skipping steps out of order is how good products end up in bad installations.
- Confirm the roof deck is dry before anything else. Spraying foam over damp sheathing traps that moisture permanently. A moisture meter reading on the sheathing, not a visual check, is the only reliable way to confirm this.
- Pull your local code requirements and climate zone R-value minimums. Your building department can tell you which IRC edition applies and what R806.5 requires for your zone specifically.
- Get the permit and request the ICC-ES report for the specific foam product your contractor plans to use, not a generic product line.
- Physically block and seal every existing vent, soffit strips, ridge vents, gable vents, before spraying begins. Foam sprayed around an open vent still leaves an air path.
- Air-seal all penetrations first, plumbing stacks, electrical runs, chimney chases, so the foam layer isn’t compensating for gaps elsewhere in the envelope.
- Select foam type and thickness to meet the code ratio for your zone. Closed-cell foam typically runs 1.5 to 2 inches per code-minimum R-value increment depending on the product’s rated R-value per inch; open-cell needs more depth and, in colder zones, an added vapor retarder.
- Install the required ignition or thermal barrier over any exposed foam, per the product’s ICC-ES listing.
- Verify with moisture and thermal checks after installation, ideally including a thermal imaging pass to spot any cold bridging where foam coverage is thin.
- Tie in mechanical conditioning, a supply duct, dehumidifier, or balanced ventilation system, so the newly conditioned attic space has a way to manage humidity load. A partner ventilation specialist can help size dehumidification or balanced ventilation correctly for the converted space.
- Get installer certification and warranty paperwork in writing, including the product’s evaluation report number and the applied thickness by area.
Pro Tip: Ask your contractor to photograph the bare roof deck at every rafter bay before spraying starts, and again immediately after. That photo record is worth more than a verbal assurance if a warranty or insurance dispute ever comes up down the line.
Deck dryness and code verification aren’t paperwork formalities. The Building America retrofit guidance on converting existing roofs to below-deck spray foam treats them as prerequisites, not optional steps, precisely because skipping them is how conversions fail.
Common Mistakes, Warranty Issues, and How to Verify the Work
Most spray foam roof failures trace back to a short list of avoidable errors, not to the material itself. Incomplete coverage at eaves and valleys tops the list, followed by foam shrinkage over time that opens hairline gaps at wood joints nobody notices until a moisture reading flags it. Unsealed wood-to-wood seams in the decking are a close second, and skipping mechanical conditioning after the conversion rounds out the pattern. Every one of these is a workmanship or design gap, not evidence that unvented spray foam is inherently risky.
Warranty and insurance issues deserve attention before you sign a contract, not after. Some shingle manufacturers write warranty language assuming a ventilated deck, and some insurers have grown cautious about homes with below-deck spray foam, occasionally citing coverage concerns tied to moisture risk around unvented assemblies. Call your shingle manufacturer’s technical line and your homeowner’s insurer before installation, not after, and get any exceptions in writing.
To verify a job was done right, insist on documentation, not just a finished ceiling. That means:
- A copy of the ICC-ES evaluation report for the exact foam product used.
- Proof of installer certification or manufacturer-authorized applicator status.
- Post-install moisture content readings on the sheathing.
- Thermal imaging showing uniform foam coverage without cold spots.
Homeowners dealing with ventilation questions on a standard vented roof, not a spray-foam conversion, can start with a broader primer on why roofing ventilation matters for the basics before deciding which path fits their home.
How Thomas Roofing and Repair Approaches Ventilation Decisions
Every unvented conversion we evaluate starts with a permit and code review specific to the property’s jurisdiction, followed by a moisture check on the existing deck. From there, we seal and block existing vents, specify foam type and thickness against the local climate zone requirement, and confirm ignition barrier compliance before a single pass of foam goes down. HVAC coordination happens before installation, not after, so dehumidification or supply-air tie-ins are ready when the attic space closes up. One recent Central Florida conversion needed a hybrid foam approach after the initial deck moisture reading came back higher than expected. Drying it out first, then documenting thermal imaging results after the spray, avoided a callback. For homeowners weighing an update, our page on updating roof ventilation for Florida homes walks through the local climate considerations in more detail.
Long-Term Maintenance and Monitoring for Spray-Foamed Roofs
An unvented spray foam roof doesn’t need soffit vent cleaning or bird-guard maintenance the way a traditional vented attic does, but it trades that upkeep for a different kind of vigilance. The foam layer itself is largely maintenance-free once cured correctly. What needs monitoring is the mechanical conditioning system keeping interior humidity in check, since that’s the component doing the ongoing work a ridge vent used to do passively.
Check the dehumidifier or supply-air tie-in annually, the same way you’d service an HVAC unit, since a failed dehumidifier in a sealed attic has no backup moisture-removal path. Watch for musty odors or visible staining on the underside of the foam near rafters, which can signal a coverage gap that’s been slowly collecting moisture rather than a new leak. A five-year checkup with a moisture meter on the deck, not just a visual inspection, catches slow problems before they become expensive ones.
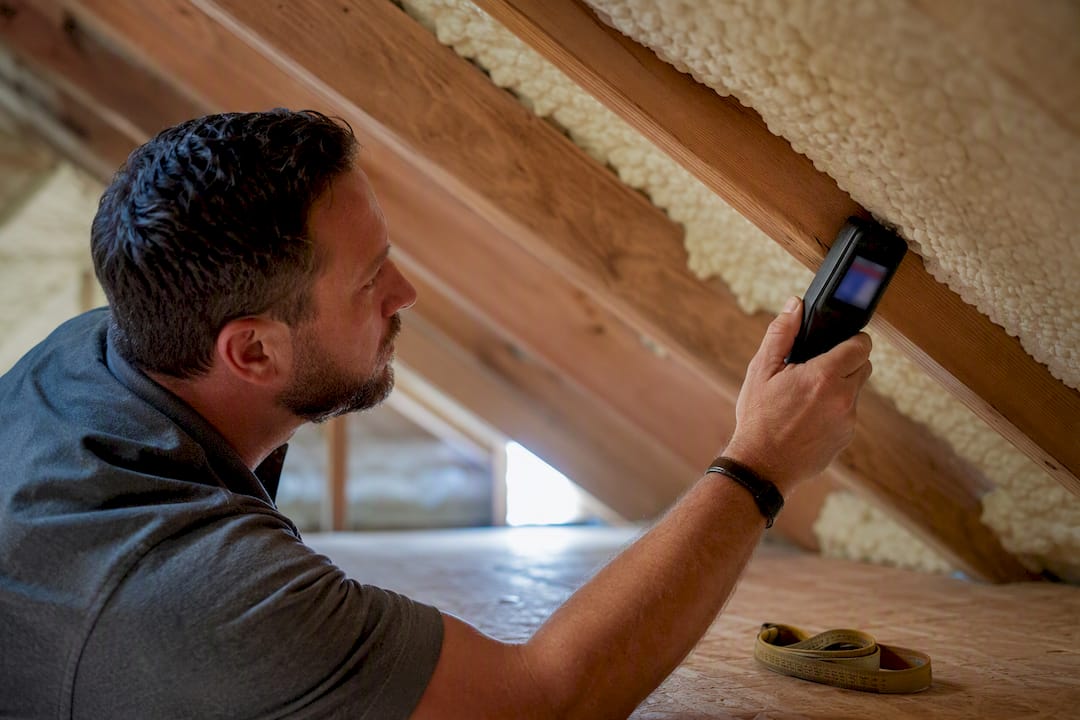
Roof coverings above the foam layer still age normally, so periodic inspection of shingles or metal panels for wear stays on the same schedule as any other roof. The insulation choice underneath doesn’t extend or shorten how often the roof surface itself needs a look.
Health and Indoor Air Quality Considerations
Cured spray foam is chemically inert and doesn’t off-gas at meaningful levels once fully set, but the curing process itself is the part that deserves respect. Fresh spray foam installation releases isocyanates and other volatile compounds during application and for a period afterward, which is why reputable installers evacuate the structure and ventilate it for the manufacturer-specified re-entry period, typically 24 hours, before anyone spends extended time in the space.
Because an unvented attic becomes part of the conditioned envelope, air quality inside that space now matters more than it did when it was a vented, unconditioned buffer zone. If ductwork or mechanical equipment lives in that attic, make sure the space is properly conditioned and monitored rather than left to develop stagnant, humid air pockets. This is one more reason the mechanical conditioning step in a conversion isn’t optional. It keeps the space healthy for anyone who accesses it for maintenance, not just moisture-safe for the roof structure itself.
Homeowners with respiratory sensitivities should ask their installer about the specific foam formulation being used and request the product’s safety data sheet ahead of installation, since formulations vary by manufacturer.
Cost Considerations Compared to Traditional Roof Insulation
Spray foam costs more per square foot than fiberglass batts or blown cellulose installed at the attic floor. There’s no way around that upfront gap, and any contractor who tells you otherwise isn’t being straight with you. The cost difference reflects both the material and the labor of a spray application versus laying batts or blowing loose fill.
Where spray foam earns that premium back is in the assembly it creates, not just the R-value it adds. A conditioned, unvented attic often runs cooler in summer and holds mechanical equipment, ductwork, and HVAC components inside the thermal envelope instead of in a scorching, unconditioned space. That reduces duct losses and can lower cooling loads, an advantage traditional floor insulation with a vented attic simply doesn’t offer, since ducts up there still sit outside the conditioned envelope.
Traditional insulation methods remain the right call for straightforward vented-attic retrofits where the ductwork already lives inside conditioned space, or where budget constraints make a full unvented conversion impractical. The decision isn’t purely about upfront cost. It’s about what problem you’re actually solving, duct performance, attic heat load, moisture control in a specific climate, and matching the insulation strategy to that problem rather than defaulting to whichever option costs less per square foot on paper.
The Real Lesson Buried in the Code Language
The conventional wisdom on this topic treats venting as a binary: either your attic breathes or it doesn’t. That framing misses what the hygrothermal research actually shows, which is that airtightness and humidity control matter more than the presence or absence of a vent. A poorly sealed vented attic can fail just as badly as a poorly executed unvented one.
What gets underweighted in most homeowner research is workmanship. The code tables and R-value minimums matter, but they assume a competent, continuous installation. A thin spot at one eave or a shrinkage gap at a rafter joint undoes the modeling’s assumptions just as fast as picking the wrong foam type. Prioritize verification, moisture readings, thermal imaging, documented ICC-ES compliance, over chasing the cheapest quote or the highest advertised R-value. That’s where the actual risk lives.
— Results
Get a Code-Aware Roof Inspection From Thomas Roofing and Repair
Deciding between a vented and unvented attic isn’t a decision to make from a blog post alone, and getting it wrong costs more to fix than it would have cost to do right the first time. Thomas Roofing and Repair handles the entire conversion process in-house across Central Florida: code review against your local jurisdiction’s adopted IRC edition, moisture testing on the existing deck, spray foam specification matched to your climate zone’s R-value requirements, ignition barrier compliance, and HVAC coordination so mechanical conditioning is in place before the attic seals up.

We document every step, ICC-ES report numbers, thermal imaging results, moisture readings, so you have the paperwork your insurer or shingle manufacturer might ask for later. If you’re weighing a vented-to-unvented conversion or just need a straight answer on whether your current roof assembly meets code, start with our code-aware roof installation guide and request a free inspection. We’ll walk your attic, take the readings, and tell you what your specific roof actually needs.
Sources
- Unvented conditioned attic — Below-deck spray foam | Building America Solution Center (BASC)
- Moisture-safe unvented roofs — Building America (WUFI study)
- Should I Vent a Roof Insulated With Spray Foam? — Fine Homebuilding