A sudden drip overhead or a growing stain on the ceiling can turn a peaceful evening in your Brevard County home into a race against water damage. Roof leaks often reveal themselves after Florida’s relentless storms or through subtle signs that are easy to miss at first. Spotting these issues quickly is crucial for avoiding expensive repairs and strengthening your insurance claim. This guide highlights the most reliable ways to identify and address visible signs of roof leaks so you can protect your home and move forward with confidence.
Table of Contents
- Step 1: Assess Visible Signs of Roof Leak
- Step 2: Locate Source of Water Intrusion
- Step 3: Clear Surface and Prepare Repair Area
- Step 4: Apply Professional Leak-Sealing Methods
- Step 5: Test for Successful Leak Repair
Quick Summary
| Key Point | Explanation |
|---|---|
| 1. Inspect for visible signs of leaks | Check inside your home and on the roof for water stains, mold, and physical damage to catch leaks early. |
| 2. Trace water’s source accurately | Follow the path of water stains to find the leak’s point of entry, as water can travel before pooling visibly. |
| 3. Prepare surfaces thoroughly before repair | Clean and dry the area to ensure sealants and materials bond properly for lasting repairs. |
| 4. Use professional repair methods | Apply high-quality sealants and flashing techniques to ensure effective waterproofing of your roof. |
| 5. Test repairs for success | Conduct water simulation tests after repairs to confirm there are no leaks or vulnerabilities remaining. |
Step 1: Assess Visible Signs of Roof Leak
Before you can fix a roof leak, you need to spot it. This step is your detective work, and the good news is that most roof leaks leave obvious clues if you know where to look. Whether you’re dealing with water damage from Florida’s intense afternoon thunderstorms or the slow, sneaky kind of leak that develops over time, learning to recognize the warning signs early can save you thousands in structural damage. Start by examining both the inside of your home and the roof itself, focusing on areas where water naturally collects or enters.
Begin your inspection inside your home, particularly in the attic or crawl space where leaks often reveal themselves first. Use a flashlight to scan the underside of your roof decking for water stains, which typically appear as dark brown or black discoloration. Look for water stains and other visible damage indicators that might signal active or past leaks. Check around roof penetrations like vent pipes, chimneys, and skylights, as these are common leak entry points. You’re also looking for signs of mold or mildew, which thrive in damp conditions and often appear as fuzzy growth on wood or insulation. If your attic smells musty or feels unusually humid, moisture is likely present even if you don’t see obvious stains yet. Don’t forget to check your garage, the building perimeter, and any ceiling spots directly below the attic, since water travels downward and sideways before showing up at the lowest point.
Next, move to the roof exterior if you can safely access it. Inspect for blistering, rust spots, and surface deterioration that could indicate compromised roofing material. Look for missing shingles, cracked or curled edges, punctures, and areas where granules appear worn away. In Brevard County’s humid climate, algae or moss growth can accelerate deterioration, so check for discoloration patterns that might hide underlying damage. Pay special attention to valleys and low spots where water collects, as well as areas around flashing where your roof meets walls or other structures. Take photos of anything suspicious, as these will be invaluable when filing insurance claims or discussing repairs with a professional. The goal here is identification, not diagnosis yet. You’re simply documenting what you observe so you understand the scope of the problem before deciding on next steps.
Here’s a quick reference comparing typical roof leak causes and where they most commonly appear:
| Leak Cause | Most Common Locations | Associated Signs |
|---|---|---|
| Damaged flashing | Valleys, roof penetrations | Rust stains, water entry |
| Missing/cracked shingles | Roof surface, low spots | Curling, exposed decking |
| Clogged gutters/downspouts | Edges, near foundation | Overflow, pooling water |
| Poorly sealed penetrations | Around vents, chimneys | Moisture, mildew, stains |
| Moss/algae growth | Shaded, humid roof areas | Green/black discoloration |
Pro tip: Document every visible sign with dated photos and note any recent weather events or water intrusion patterns in your home, since this information strengthens insurance claims and helps contractors understand your leak’s origin and severity.
Step 2: Locate Source of Water Intrusion
Spotting water damage is one thing. Finding out exactly where the water is coming from is another challenge entirely. This step requires you to trace the water back to its entry point, which isn’t always obvious since water travels along surfaces and through gaps before pooling in visible locations. The source of your leak might be several feet away from where you actually see the damage, making this detective work critical before you attempt any repairs. Once you understand where water is entering your home, you can address the root cause instead of just treating symptoms.
Start by examining the path water takes through your home. Water stains often point upward toward the leak source rather than downward, so look at the ceiling, walls, and roof structure above wet spots. Check for soft spots in drywall or wood, which indicate saturation and can help you trace the water’s journey. Water intrusion can originate from multiple sources, so identify the type and location of water entry points by examining your roof penetrations, exterior walls, and plumbing systems. In Florida’s humidity, condensation can masquerade as leaks, so feel surfaces carefully. Cold pipes might sweat during air conditioning, and vents can drip condensation. Look for water stains, musty odors, and moisture patterns that reveal the true source. Pay special attention to areas where your roof transitions meet walls, where gutters overflow, and where flashing has separated from the roofline.
Next, move your inspection to the exterior. Look at your gutters and downspouts to see if they’re clogged or directing water toward your foundation instead of away from it. Check for gaps around pipes, vents, and where your siding meets the roof. In Brevard County’s storm season, wind can drive rain sideways, so leaks sometimes appear on walls below where water actually entered. Trace any visible water stains on exterior walls back upward to find the entry point. If your leak appears after heavy rain but dries up during dry spells, you’re dealing with rainwater intrusion rather than a plumbing issue. Listen for the sound of running water in walls or attics if you suspect active leaks. Once you pinpoint the source, you’ve won half the battle. Now you know what needs sealing, flashing replacement, or structural repair before water continues damaging your home.
Pro tip: Wait for or simulate rain conditions to observe exactly where water enters, since dry inspections can miss active leak sources that only appear during moisture events.
Step 3: Clear Surface and Prepare Repair Area
Before you apply any sealant, patch, or repair material, the surface has to be clean and dry. This step separates successful repairs from ones that fail within months. A dirty or damp roof surface prevents adhesives and sealants from bonding properly, which means your repair won’t hold when the next Florida downpour arrives. Taking time to prepare the area correctly guarantees that whatever repair method you choose will actually work and last for years instead of becoming a temporary band aid that needs redoing.
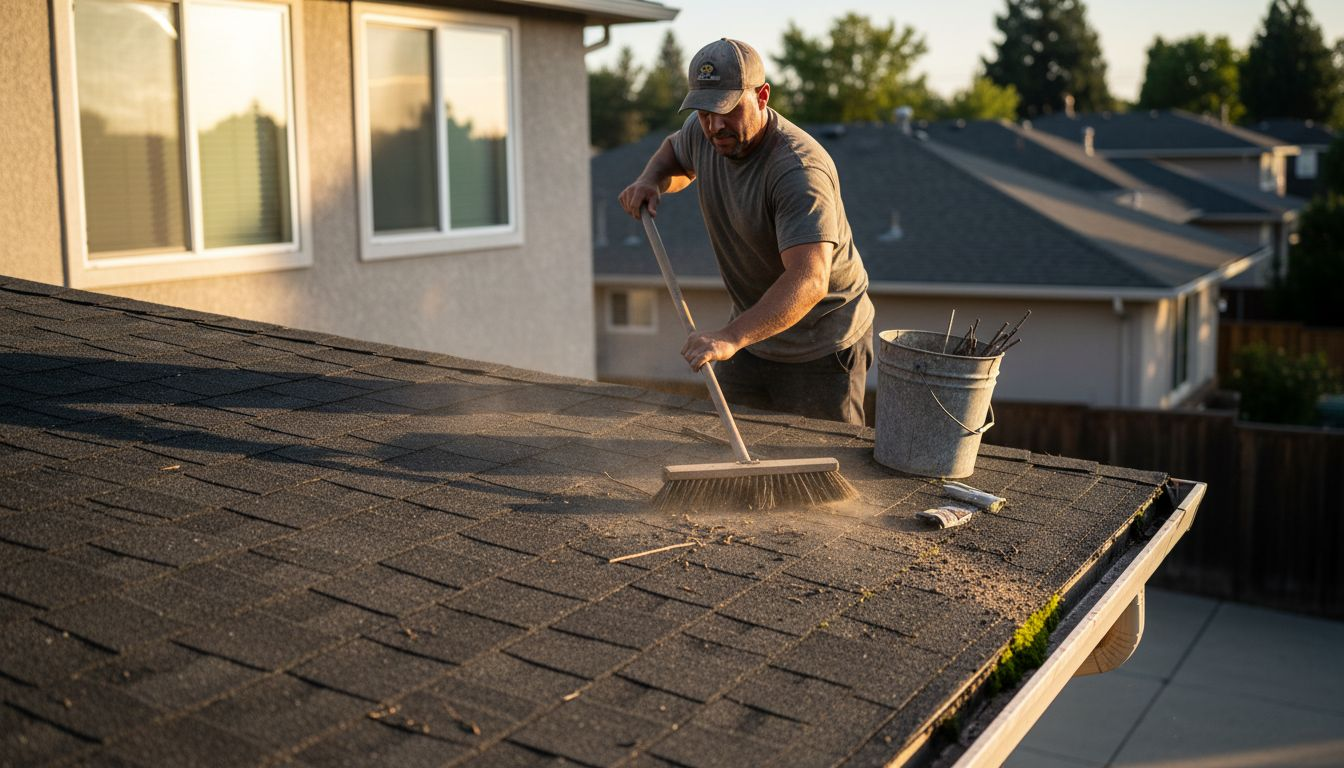
Start by removing all debris from the repair area and surrounding sections. Use a stiff brush or broom to sweep away dirt, leaves, moss, algae, and any loose material that accumulated on your roof. If you find standing water or ponding near the leak, clear foreign matter and debris before starting repairs to ensure proper water drainage and prevent trapping moisture underneath your patch. Pay close attention to the spaces around the damaged area, as hidden dirt or vegetation can prevent sealants from creating a waterproof bond. For stubborn moss or algae growth common in Brevard County’s humid climate, use a soft pressure wash on a low setting, but avoid blasting the roof material itself, which can cause additional damage. Once swept clean, allow the surface to dry completely. If you’ve just cleaned the area with water, wait at least 24 hours in dry conditions before proceeding. If rain is forecast, wait until after the weather clears and the surface has fully dried. Wet or damp surfaces trap moisture under repair materials, which leads to mold and the same leak problem you’re trying to fix.
Next, examine the prepared area more closely under good lighting. Look for any loose or curled shingles, deteriorated flashing, or crumbling caulk that needs removal before you apply new materials. Clean roof surfaces and ensure dryness before applying patching or sealing products to guarantee adhesion and longevity. If you’re repairing around flashing, gently lift the shingles and clean underneath as well. Remove any old, hardened sealant or caulk that has cracked or separated, since new material won’t bond to deteriorated old material. Use a putty knife or scraper to carefully extract old caulk without gouging the underlying surface. This thorough surface preparation might seem tedious, but it’s the difference between a repair that lasts one season and one that protects your home for years.
Pro tip: Schedule your repair work during dry weather windows, and plan to complete the entire process before rain returns, since even brief moisture exposure before materials fully cure can compromise the repair.
Step 4: Apply Professional Leak-Sealing Methods
Now comes the actual repair work. This is where you’ll apply sealants, patch materials, or install flashing to stop water from entering your home. The methods you use depend on where the leak is located and how extensive the damage is. Some leaks require simple caulking around penetrations, while others demand proper flashing installation or membrane application. Using professional-grade materials and techniques ensures your repair will withstand Florida’s harsh sun, humidity, and heavy seasonal rainfall instead of deteriorating within a year.
Start with the most common leak source: areas around roof penetrations. These include vent pipes, chimneys, HVAC units, and satellite dishes. Proper installation of flashing and sealants around roof penetrations is critical to preventing leaks and maintaining waterproofing integrity. If old flashing is damaged or missing, remove the nails carefully and lift away the old flashing without tearing the surrounding shingles. Slide new flashing under the shingles above and over the shingles below, following the roofing material’s natural overlap pattern. Secure it with roofing nails spaced about 12 inches apart, and cover each nail head with roofing cement to prevent water seepage. For caulking around other penetrations, use a professional-grade polyurethane or silicone sealant compatible with your roof material. Apply caulk in a continuous bead along cracks, gaps, and transitions. Don’t skimp on the amount. A generous, smooth bead seals better than a thin line. Use a caulk tool or your finger to smooth it into place before it dries.
For larger damaged areas or membrane repairs, professional-grade materials and certified installation techniques provide the best protection and longevity. Apply roofing cement or adhesive according to manufacturer instructions, which typically specify thickness, cure time, and temperature requirements. If you’re patching asphalt shingles, apply roofing cement under and over the patch, then nail it down securely. For membrane repairs, follow the product guidelines exactly, as improper application voids warranties and compromises the repair. Work in small sections, allowing each application to set properly before moving forward. Take your time. Rushing through sealant application often leads to missed spots or improper coverage that causes water to reenter your home. Once you’ve completed the sealing or flashing work, inspect it thoroughly before considering the repair finished. Run your finger along sealant beads to ensure they’re smooth and continuous. Check that all nails are covered with roofing cement. Look for any gaps or thin spots where water could still seep through.
Pro tip: Purchase roofing materials from a professional supplier rather than a general hardware store, and ask the staff about products best suited to your specific repair type and Florida’s climate conditions.
Step 5: Test for Successful Leak Repair
You’ve completed the repair work, but how do you know it actually worked? Testing your repair before considering the job finished is the difference between a temporary fix and a lasting solution. This step verifies that water can no longer penetrate the repaired area, giving you confidence that your leak won’t return during the next heavy rain or tropical storm. Without proper testing, you might discover weeks later that water is still seeping in, forcing you to repeat the entire process.
Begin with a simple visual inspection of all your repair work. Look at caulk beads, flashing seams, and patched areas in bright daylight to ensure there are no gaps, thin spots, or uncovered areas. Run your hands over sealant surfaces to feel for irregularities or incomplete coverage. Check that all nails are covered with roofing cement and that no fasteners are exposed. Inspect the underside of your repair area from inside your attic to confirm no water is dripping through. Once visual inspection passes, it’s time to test the actual water resistance of your repair. Simulate rainfall by running water over the repaired area using a garden hose. Start slowly and gradually increase water volume to replicate moderate to heavy rain conditions. Have someone observe the underside of the repair from the attic while you spray, watching for any water penetration. Pay special attention to seams, fasteners, and transitions where water might find a path through. Testing methods for water penetration resistance at seams and penetrations help confirm the adequacy of leak repairs by simulating water intrusion under conditions that reveal vulnerabilities.
If water appears inside after testing, stop immediately and identify where it’s entering. You may need to add more sealant, adjust flashing, or reapply materials. Once you’ve made corrections, allow proper cure time according to the product instructions before testing again. Field test procedures verify that repair materials and adhesives have been applied correctly and will perform effectively long term. Continue testing for at least 15 to 20 minutes with steady water flow to ensure the repair holds under sustained moisture exposure. If your repair passes the water test without any interior leaking, you can confidently move forward knowing the work is complete and your roof is protected again.
The table below summarizes professional leak repair and testing methods, helping you select the best approach:
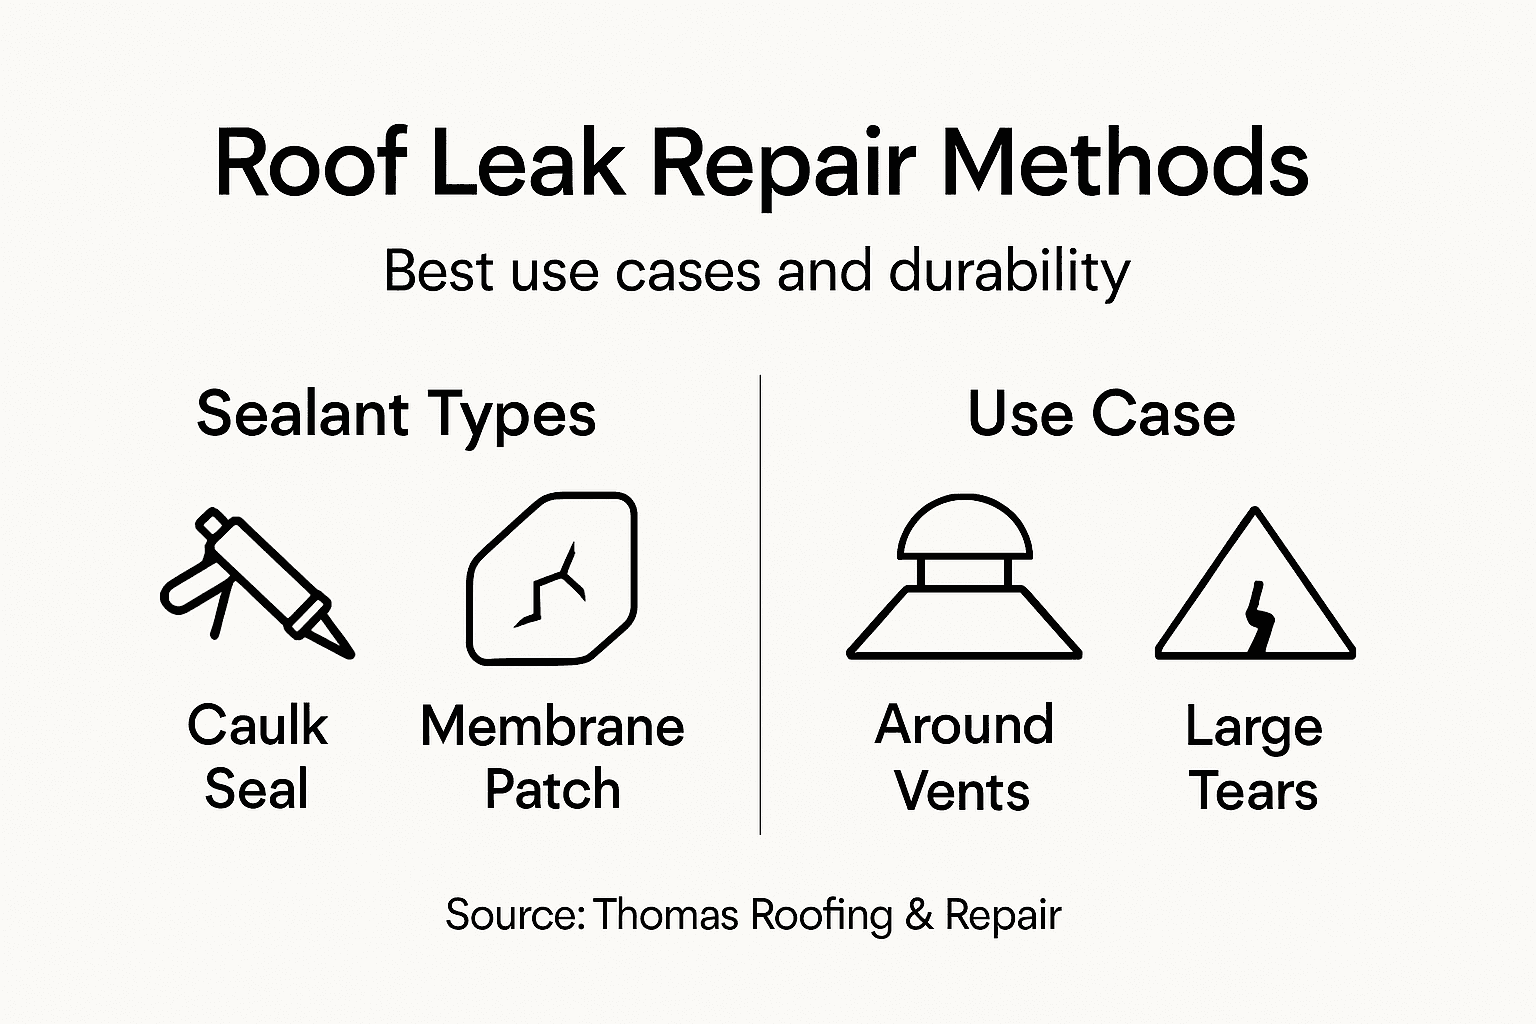
| Repair Method | Best Use Case | Expected Longevity |
|---|---|---|
| Roofing cement/patch | Small shingle damage | 2-5 years |
| Flashing replacement | Around penetrations | 10-20 years |
| Polyurethane sealant | Gaps, minor cracks | 5-10 years |
| Membrane application | Large, flat roof leaks | 20+ years |
| Water simulation testing | Validating repairs | Immediate feedback |
Pro tip: Document your testing process with photos and video, especially if filing an insurance claim, since visual evidence of successful water testing demonstrates that repairs are complete and effective.
Expert Help for Lasting Roof Leak Repairs You Can Trust
Dealing with a roof leak is stressful because the damage can quickly worsen if not properly fixed. This guide showed you how important it is to identify the source of the leak, prepare the area carefully, and use professional sealing methods to stop water intrusion. Many homeowners struggle with tracing water paths and applying repairs that hold up against Florida’s heavy rains and humidity. If you want to avoid temporary fixes that leave you worried about the next storm, expert help is the key.
At Thomas Roofing and Repair, we specialize in durable roof leak repairs designed to protect your home for years. Our team understands local weather challenges and uses only professional-grade materials and proven techniques to seal leaks, replace flashing, and restore roofing integrity. We offer detailed roof inspections to pinpoint hidden leaks and deliver precise repairs tailored to your needs. Don’t let a small leak turn into an expensive disaster.

Contact us today at Thomas Roofing and Repair to schedule a free estimate. Get peace of mind knowing your roof is in the hands of trusted Central Florida experts committed to craftsmanship, reliability, and clear communication. Act now before the next heavy rain strikes and protect your home with confidence. Learn more about our comprehensive roof repair services designed for homeowners just like you.
Frequently Asked Questions
How do I assess visible signs of a roof leak?
To assess visible signs of a roof leak, examine both the inside and exterior of your home. Look for water stains in the attic or crawl space, and inspect the roof for missing shingles, rust spots, or algae growth. Document any suspicious areas with photos for future reference and repairs.
What steps should I take to locate the source of a roof leak?
To locate the source of a roof leak, trace the water back to its entry point by examining water stains and soft spots on ceilings and walls. Check around roof penetrations and the condition of your gutters, downspouts, and flashing. This will help pinpoint the exact area needing repair.
How should I prepare the repair area before sealing a roof leak?
Before sealing a roof leak, clear all debris from the repair area and ensure the surface is clean and dry. Use a stiff brush to remove dirt and vegetation, then wait for at least 24 hours after cleaning to ensure that the area is fully dry before making repairs.
What are the best methods for applying professional leak-sealing solutions?
The best methods for sealing leaks include using high-quality sealants and properly installing flashing around roof penetrations. Apply caulk generously along cracks and seams, and ensure that all materials are compatible with your roof type for long-lasting results. Follow manufacturer instructions for best practices.
How can I test if my roof leak repair was successful?
To test if your roof leak repair was successful, conduct a water simulation test by running a garden hose over the repaired area. Observe the interior for any signs of water penetration during the test, and check thoroughly to ensure that all repairs hold up under sustained moisture exposure.
How long should I expect my roof leak repair to last?
The longevity of a roof leak repair depends on the method used. For example, a patch with roofing cement may last 2 to 5 years, while properly installed flashing can last 10 to 20 years. Regular maintenance and inspections can further extend the life of your repairs.
Recommended
- 7 Practical Examples of Roof Repairs for Homeowners
- Roof Repair Process Guide for Homeowners: Step-by-Step Success
- Emergency Roof Repair Workflow for Fast Storm Solutions
- Reliable Roof Repair in Leesburg, FL | Storm, Leak and Emergency Repairs
- Roofing Company Orlando FL
- Roofing Company Titusville FL
- Roofing Company DeLand FL