
TL;DR:
- A well-organized storm damage claim process involves prompt mitigation, thorough documentation, and expert assessments to maximize settlement.
- Active participation and technical evidence collection during each stage help homeowners secure fair insurance payouts and avoid costly oversights.
The storm damage claim workflow is the structured process homeowners follow to document, report, and settle insurance claims after a storm damages their property. Getting this process right separates a full settlement from a check that barely covers half your repairs. This guide walks you through every stage, from the first 24 hours after impact to final payment, with specific documentation strategies, adjuster interaction tips, and common mistakes that cost homeowners thousands. You will work with insurance adjusters, licensed contractors like Thomasroofingandrepair, and possibly public adjusters to build the strongest possible claim.
What is the storm damage claim workflow?
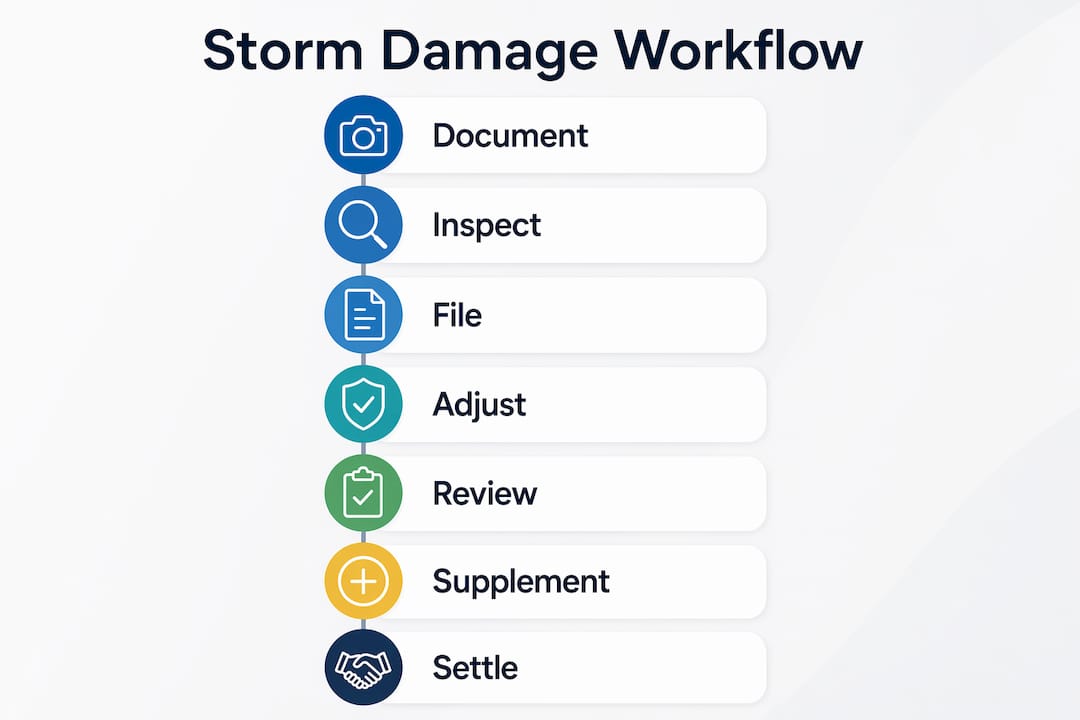
The storm damage claim workflow moves through seven distinct stages: Initial Documentation, Estimate Preparation, Carrier Submission, Under Review, Supplement Cycle, Negotiation, and Settlement Processing. Each stage has a specific purpose and a specific risk of delay if you skip steps or rush ahead. Most homeowners lose money not because their damage was minor, but because they did not follow the process in the right order. Knowing the full map before you start puts you in control from day one.

What should you do in the first 24 hours after storm damage?
The first 24 hours after a storm are the most consequential hours of your entire claim. Your insurance policy contains a duty to mitigate clause, which requires you to take reasonable steps immediately to prevent further damage. You do not need your insurer’s approval to begin emergency mitigation. Waiting for a callback before tarping a damaged roof or extracting standing water can void portions of your coverage.
Here are the emergency actions to take right away:
- Tarp exposed roof sections to stop water intrusion. Use heavy-duty polyethylene tarps secured with wood battens, not just tape.
- Extract standing water from interior spaces using a wet vac or a water extraction service. Water left for 24–48 hours begins causing secondary damage like mold.
- Board up broken windows and doors to prevent wind-driven rain and unauthorized entry.
- Photograph every repair you make, including the materials used and the area before and after. Keep every receipt.
- Start a claim folder immediately, capturing photos, videos, written notes, and a contact log with dates and times of every call you make.
Claims specialists confirm that a well-organized claim folder built in the first hours is one of the strongest predictors of a successful settlement. Think of it as your case file. Every piece of evidence you add makes your position harder to dispute.
Pro Tip: Take a short video walkthrough of every damaged area within the first hour after the storm passes. Video captures context that still photos miss, including the extent of water spread and the relationship between roof damage and interior leaks.
For homeowners in Central Florida dealing with roof exposure, Thomasroofingandrepair’s emergency roof repair guide covers the specific steps to protect your home before the adjuster arrives.
How do you conduct a thorough storm damage assessment?
A thorough storm damage assessment is the foundation of a strong insurance claim for storm damage. Homeowners who get an independent professional inspection before contacting their insurer consistently receive higher settlements because they walk into the process with documented evidence rather than waiting for the adjuster to define the scope.
Follow these steps to build a complete damage picture:
- Inspect the roof first. Look for missing shingles, lifted flashing, cracked ridge caps, and granule loss in gutters. Granule loss is easy to miss but signals accelerated aging and future leaks.
- Check structural elements. Examine fascia boards, soffits, and exterior walls for impact damage or separation.
- Assess interior ceilings and walls. Water stains, bubbling paint, and soft drywall all indicate active moisture intrusion.
- Inspect HVAC units and outdoor equipment. Hail and wind debris frequently damage condenser fins and disconnect electrical connections.
- Document contents damage. List every damaged personal item with model numbers, approximate values, and photos.
- Use technical tools. Thermal imaging cameras reveal moisture behind walls that is invisible to the naked eye. Moisture meters confirm wet readings with specific numbers that adjusters cannot easily dismiss.
Technical documentation like moisture readings and thermal imaging is far more persuasive to insurance companies than a large volume of generic photos. One moisture meter reading showing 28% moisture content in a wall cavity is worth more than 50 photos of a wet ceiling. Separate pre-existing wear from storm-caused damage in your notes. Adjusters will flag pre-existing conditions, so labeling them honestly protects your credibility.
Pro Tip: Schedule your independent inspection within 48–72 hours of the storm. Thermal imaging and moisture mapping become less accurate as materials dry out, and hidden damage that disappears from readings is nearly impossible to supplement later.
How do you file a storm damage claim and work with your adjuster?
Filing your insurance claim for storm damage is a formal process that requires specific information and deliberate preparation. Call your insurer only after you have completed your independent assessment and organized your documentation. Calling before you have your own evaluation means the carrier’s adjuster report becomes the primary record, and that report is very difficult to challenge after the fact.
When you call to open your claim, have the following ready:
- Your policy number and the date of loss (the date the storm hit, not the date you noticed damage)
- A brief, factual summary of the damage. Do not speculate about causes or costs.
- Your contact information and preferred inspection times
Insurance adjusters typically inspect storm damage within 3–7 days after claim filing. Use that window to prepare. Print your photo documentation, organize your itemized damage list, and have your independent assessment ready to share.
During the adjuster’s inspection, walk the property with them. Point out every item on your damage list. Do not minimize damage to seem cooperative, and do not exaggerate. Stick to what your documentation shows. Take your own notes during the meeting, including what the adjuster says they will and will not include. Ask directly: “What is your timeline for sending the estimate?” Write down the answer.
Maintaining a clear communication log of every interaction with your insurer, including dates, names, and methods of contact, is not optional. It is your protection if the claim is later disputed or denied.
Pro Tip: Adjusters are stretched thin after major storms and often conduct rushed inspections. Your prepared documentation and physical presence during the walkthrough directly influence what gets included in their report.
How do you review estimates, submit supplements, and reach settlement?
The adjuster’s initial estimate is rarely the final number. Initial insurance estimates frequently underrepresent damage scope due to missed line items such as square footage calculations, antimicrobial treatment, code upgrade requirements, and contractor overhead. Reviewing that estimate line by line against your own documentation is the most important financial task in the entire claim process.
| What Insurers Often Miss | What You Should Document |
|---|---|
| Antimicrobial treatment costs | Moisture meter readings confirming wet materials |
| Code upgrade requirements | Local building code citations requiring upgrades |
| Contractor overhead and profit | Contractor estimates showing full scope |
| Interior damage tied to roof breach | Thermal images linking roof entry to interior damage |
| Full square footage of damaged areas | Measured diagrams or contractor takeoffs |
When you find discrepancies, submit a supplement. A supplement is a formal request to add missed items to your claim, backed by technical evidence. Attach your moisture readings, thermal images, contractor estimates, and photos. Public and independent adjusters regularly use this technical data to identify hidden damage that changes claim scope and payouts significantly.
Most claims settle in two payment phases. The first payment covers emergency mitigation and demolition costs minus your deductible. The second payment arrives after final repairs are complete. If your mortgage company is named on your policy, they will likely be listed as a co-payee on the settlement check, which requires their endorsement before you can deposit it. Plan for that step so it does not delay your contractor.
If your claim is underpaid or denied, request a written explanation and compare it against your policy language. You have the right to invoke the appraisal process or hire a public adjuster to negotiate on your behalf.
Pro Tip: Do not close your claim until all repairs are complete and inspected. Hidden damage behind walls detected after settlement is extremely difficult to supplement without prior documentation. Keep your claim open until you are certain nothing was missed.
Common mistakes that reduce your storm claim value
The most expensive mistakes in the storm damage claim process are not dramatic errors. They are quiet oversights that compound over time.
- Filing before your assessment is complete. Rushing to call your insurer before you have documentation hands control to the adjuster.
- Under-documenting hidden damage. Homeowners consistently over-document obvious damage like broken windows while ignoring moisture intrusion behind walls, which later causes denied supplements.
- Failing to log communications. Every call, email, and text with your insurer should be recorded with dates and names.
- Accepting the first estimate without review. The first number is a starting point, not a final offer.
- Ignoring supplemental damage discovered after initial closure. If you find new damage after your claim closes, reopen it immediately with fresh documentation.
“The homeowners who get full settlements are the ones who treated their claim like a project. They had folders, timelines, and receipts. The ones who struggled called their insurer first and documented later.”
When damage is complex or your claim is disputed, hiring a public adjuster or engaging an independent roofing contractor for a second assessment is a legitimate and often financially sound decision. For tree-related debris removal that complicates your assessment, a safe tree removal guide can help you manage that piece of the cleanup safely.
Key takeaways
A successful storm damage claim workflow requires organized documentation, independent assessment before filing, and active participation at every stage from mitigation to final settlement.
| Point | Details |
|---|---|
| Mitigate within 24 hours | Tarp, extract water, and document emergency repairs before insurer approval. |
| Assess before you file | Get an independent inspection to catch hidden damage before the adjuster sets the scope. |
| Use technical evidence | Moisture readings and thermal imaging outperform generic photos in adjuster negotiations. |
| Review every estimate line | Initial estimates routinely miss line items; supplements with evidence recover those costs. |
| Log every communication | A dated contact log protects you in disputes, appraisals, and bad faith scenarios. |
What i have learned watching homeowners navigate claims
After working alongside Central Florida homeowners through hurricane seasons and severe storm events, one pattern stands out clearly. The homeowners who recover the most money are not the ones with the most damage. They are the ones who treated the claim process like a job.
The biggest shift I have seen is what happens when a homeowner shows up to the adjuster inspection with a printed damage report, moisture readings, and a contractor estimate already in hand. The adjuster’s behavior changes. The inspection takes longer. More items get written into the report. That is not a coincidence. Adjusters are professionals working under time pressure, and a prepared homeowner signals that shortcuts will not go unnoticed.
The advice I give every homeowner is this: slow down in the first 48 hours. Do the mitigation, build the folder, get the independent inspection. That preparation pays back more than any single supplement you could file later. Patience and organization are your two most valuable tools in this process.
For homeowners who want a detailed breakdown of what proper roof damage documentation looks like before the adjuster arrives, that resource is worth reading before you make your first call.
— Thomasroofingandrepair
How Thomasroofingandrepair supports your storm claim
Thomasroofingandrepair works directly with homeowners across Brevard, Volusia, and Orange counties to document storm damage, perform emergency repairs, and support the insurance claim process from start to finish.

When your roof is exposed after a storm, speed matters. Thomasroofingandrepair provides same-day emergency tarping and water protection services, along with detailed written assessments that insurance adjusters recognize and respect. The team documents damage with photos, measurements, and moisture data that support your claim scope and reduce the risk of underpayment. Whether you need emergency storm repairs or a full roof installation in Palm Bay after a total loss, Thomasroofingandrepair delivers the craftsmanship and documentation your claim requires. Contact us for a free estimate today.
FAQ
What is the first step in a storm damage claim?
The first step is emergency mitigation, including tarping, water extraction, and boarding up openings, completed within 24 hours to satisfy your policy’s duty to mitigate clause. Document every repair with photos and receipts before contacting your insurer.
Should i call my insurer before getting an inspection?
No. Getting an independent professional assessment before filing gives you documented evidence that prevents the adjuster’s report from becoming the only record of damage scope.
How long does a storm damage claim take to settle?
Most claims settle in two payment phases over several weeks to a few months, depending on damage complexity and supplement cycles. Staying organized and following up consistently shortens the timeline.
What is a supplement in a storm insurance claim?
A supplement is a formal request to add missed damage items to an existing claim, supported by technical evidence like moisture readings, thermal images, and contractor estimates. Multiple supplement rounds are common on larger claims.
When should i hire a public adjuster?
Hire a public adjuster when your claim is denied, significantly underpaid, or when damage is complex enough that you cannot effectively negotiate the scope on your own. They work on a percentage of the settlement and have technical tools to identify hidden damage.