Unnoticed roof problems silently drain your budget and put your commercial property at risk. A small leak today becomes a structural nightmare tomorrow, while non-compliance with local codes can halt operations entirely. Regular inspections are your first line of defense against costly damage and regulatory headaches. This guide arms Central Florida property managers and business owners with practical inspection techniques to maintain durable, compliant roofs that protect your investment for years to come.
Table of Contents
- Preparing To Inspect Your Commercial Roof
- Step-By-Step Guide To Inspecting Your Commercial Roof
- Common Roofing Problems And How To Identify Them
- Documenting Inspections And Planning Next Steps
- Why Choose Thomas Roofing And Repair For Your Commercial Roof Needs?
- Frequently Asked Questions
Key takeaways
| Point | Details |
|---|---|
| Proactive inspections save money | Regular roof checks catch damage early and extend roof life by preventing minor issues from escalating. |
| Safety and preparation matter | Use proper protective equipment and inspection tools to conduct thorough, safe evaluations. |
| Focus on critical components | Inspect membranes, flashings, drainage systems, and structural elements systematically for comprehensive assessment. |
| Document everything | Photograph findings, prioritize repairs by severity, and maintain detailed records for compliance and planning. |
| Know when to call experts | Professional inspections ensure thorough evaluation and help you stay compliant with Central Florida building codes. |
Preparing to inspect your commercial roof
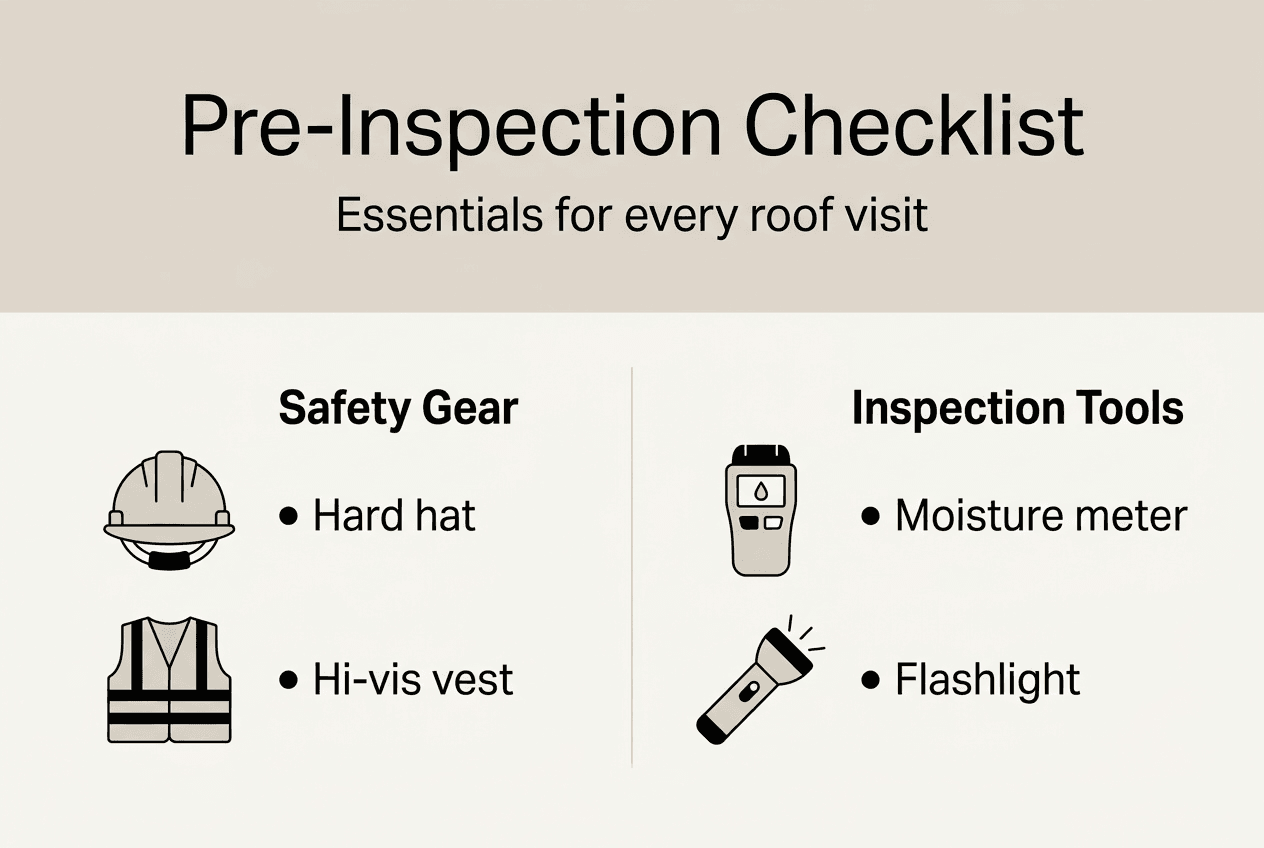
Before you climb onto your roof, proper preparation separates a productive inspection from a dangerous waste of time. Commercial roof inspections require proper preparation including safety equipment and regulatory compliance. Your first priority is personal safety. Invest in quality personal protective equipment including a properly fitted safety harness, hard hat, non-slip boots with good tread, and safety glasses. Never attempt an inspection alone. Always have a spotter on the ground who can call for help if needed.
Your inspection toolkit should include essential items that help you spot problems others miss. Pack a moisture meter to detect hidden water intrusion, a sturdy pair of binoculars for viewing distant areas safely from the ground, a high-resolution camera or smartphone for documentation, a bright flashlight or headlamp for dark corners, a tape measure for sizing damaged areas, and a notepad or tablet for recording observations. These tools transform a casual glance into a systematic evaluation.
Central Florida’s building codes and roofing standards exist for good reason. Review your local jurisdiction’s requirements before starting. Orange, Brevard, and Volusia counties each have specific regulations regarding roof maintenance, wind resistance standards, and inspection documentation. Understanding these requirements helps you identify compliance issues during your walkthrough. Familiarize yourself with the most common commercial roof types in the region: flat membrane systems like TPO and EPDM, standing seam metal roofs popular for their hurricane resistance, modified bitumen systems, and built-up roofing.
Timing your inspection strategically maximizes what you discover. Schedule evaluations after major storms when damage is fresh and visible. Conduct seasonal inspections in spring before hurricane season intensifies and in fall after summer heat stress. Early morning inspections offer cooler temperatures and better lighting conditions. Avoid inspecting during rain, high winds, or extreme heat when conditions become dangerous and findings unreliable.
Pro Tip: Create a pre-inspection checklist that you review before every roof visit. Include weather conditions, required tools, safety equipment verification, and emergency contact numbers. This routine prevents forgotten items and reinforces safety habits that protect you and your team.
Essential inspection tools comparison:
| Tool Category | Basic Level | Professional Level | Purpose |
|---|---|---|---|
| Safety Equipment | Hard hat, gloves | Full harness system, anchor points | Fall protection and injury prevention |
| Detection Tools | Visual inspection, flashlight | Moisture meter, thermal camera | Identify hidden damage and water intrusion |
| Documentation | Smartphone camera, notepad | Tablet with inspection app, drone | Record findings and track changes over time |
| Measurement | Tape measure | Laser distance meter | Quantify damaged areas accurately |
Step-by-step guide to inspecting your commercial roof
A systematic approach ensures you miss nothing critical during your inspection. Following a systematic inspection process ensures comprehensive assessment of roof conditions. Start every inspection from the ground using binoculars to survey the entire roof surface. Look for obvious sagging, missing materials, or debris accumulation. This ground-level view often reveals problems you might overlook once you’re on the roof itself. Document what you see before ascending.
Once safely on the roof, begin your detailed examination with these sequential steps:
- Inspect the roof membrane or covering first. Walk the entire surface looking for cracks, blisters, punctures, or areas where the material has separated from the substrate. Pay special attention to high-traffic zones near rooftop equipment where foot traffic causes wear. Check for ponding water, which indicates drainage problems and accelerates membrane deterioration. Any standing water remaining 48 hours after rain signals a drainage issue requiring correction.
- Examine all flashing and sealant carefully. Flashing protects vulnerable roof penetrations like vents, pipes, HVAC units, and skylights. Look for gaps, cracks, rust, or areas where sealant has dried and pulled away. These spots are prime entry points for water. Test sealant flexibility by gently pressing it. Brittle, cracked sealant needs immediate replacement.
- Assess the drainage system thoroughly. Clear gutters, scuppers, and downspouts of leaves, debris, and sediment. Blocked drainage causes water backup that damages roofing materials and creates leaks. Check that gutters slope properly toward outlets. Look inside downspouts with your flashlight to spot clogs invisible from above.
- Check for structural concerns. Look for sagging areas that suggest damaged decking or compromised structural support. Soft spots when you walk indicate water damage to underlying materials. Note any areas where the roof feels spongy or unstable underfoot. These require immediate professional evaluation.
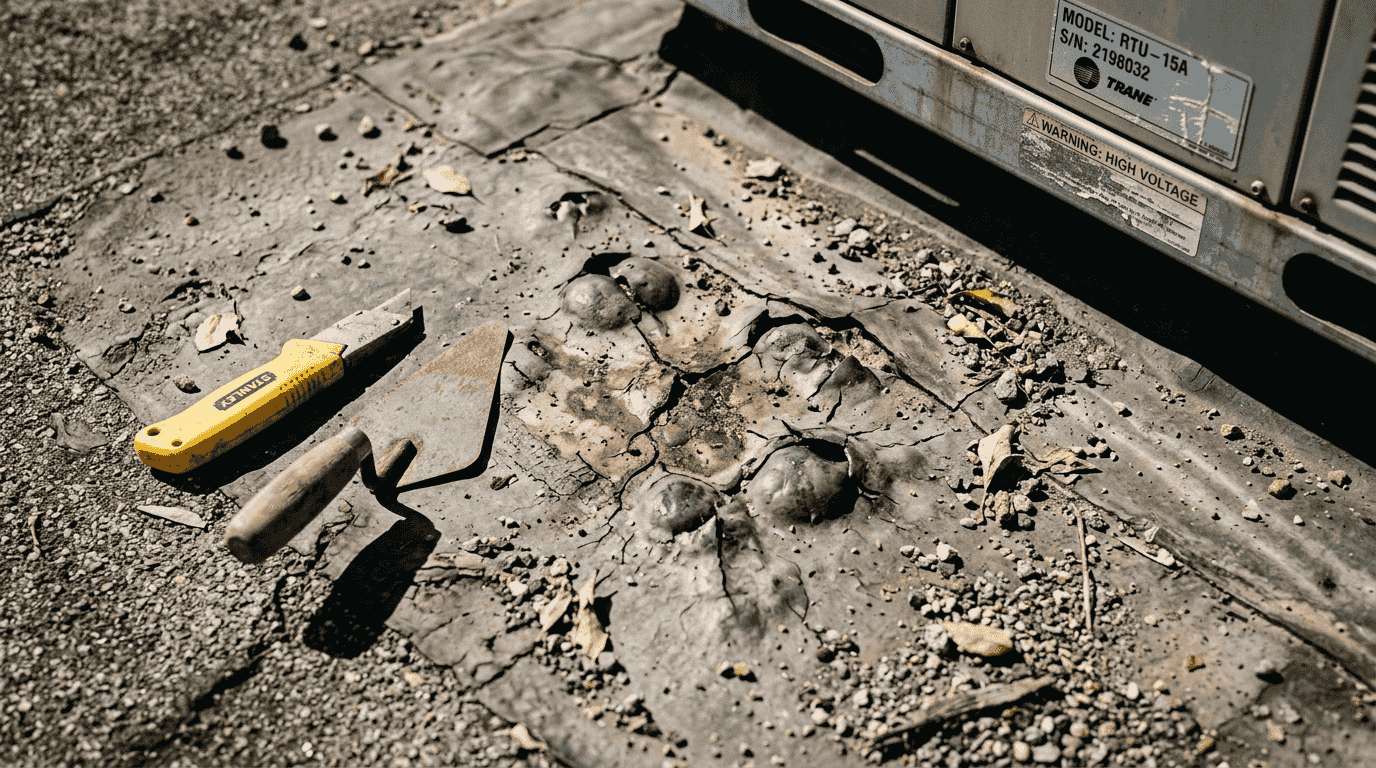
- Inspect rooftop equipment and attachments. HVAC units, exhaust fans, satellite dishes, and solar panels all penetrate your roof membrane. Check the areas around equipment bases for rust, loose bolts, deteriorated gaskets, or gaps where water could enter. Verify that equipment drains properly and doesn’t pool water.
- Examine roof edges and perimeters. Edge metal, copings, and fascia protect roof boundaries from wind and water. Look for loose fasteners, bent metal, or areas where wind has lifted materials. Check that edge flashing extends properly over walls and creates a complete seal.
Pro Tip: Take photos from the same locations during each inspection. This creates a visual timeline that helps you track deterioration rates and identify slow-developing problems before they become emergencies. Date stamp every image for accurate record keeping.
Inspection priority zones:
| Roof Area | Risk Level | Common Issues | Inspection Frequency |
|---|---|---|---|
| Penetrations and flashings | High | Sealant failure, gaps, rust | Every inspection |
| Drainage systems | High | Clogs, ponding, overflow | Every inspection |
| High-traffic zones | Medium | Membrane wear, punctures | Every inspection |
| Field areas | Medium | Blisters, cracks, aging | Every inspection |
| Roof edges | Medium | Wind damage, loose fasteners | Every inspection |
Common roofing problems and how to identify them
Knowing what problems look like helps you catch them early when repairs cost less. Identifying different types of roofing damage early helps prevent costly repairs and ensures compliance. Water ponding is your roof’s worst enemy. Any area where water stands more than 48 hours after rainfall will eventually fail. Ponding accelerates membrane aging, promotes algae growth, and adds structural load your roof wasn’t designed to carry. Look for dark stains, vegetation growth, or visible depressions where water collects.
Blistering and cracking membranes signal material failure. Blisters appear as raised bubbles in the roofing material, caused by trapped moisture or air between layers. They eventually rupture, creating entry points for more water. Cracks develop from thermal cycling, UV exposure, or material aging. Small cracks spread quickly, especially in Central Florida’s intense sun and temperature swings. Both conditions require prompt repair before water penetration damages the roof deck.
Damaged flashing creates the majority of commercial roof leaks. Flashing fails when sealant dries out and cracks, metal corrodes and develops holes, or fasteners work loose from thermal expansion. Look for rust stains, gaps between flashing and roof surface, brittle or missing sealant, and lifted flashing edges. Water follows the path of least resistance, so even small flashing gaps can channel significant moisture into your building.
Roof punctures and tears happen more often than you might think. HVAC technicians drop tools, delivery personnel drag equipment across membranes, and wind-blown debris impacts surfaces during storms. Small punctures are easy to miss but allow water to saturate insulation and decking. Look for holes, tears, or areas where the membrane surface appears scraped or gouged. Check around all rooftop equipment where maintenance activity concentrates.
UV damage and material aging affect every commercial roof eventually. Central Florida’s intense sunlight degrades roofing materials faster than in northern climates. Signs include faded color, brittle texture, surface chalking or powdering, and loss of protective granules on modified bitumen systems. Aged materials lose flexibility and waterproofing effectiveness. When you notice widespread aging, start planning for replacement rather than continuing to patch individual failures.
Common roofing problems comparison:
| Problem Type | Visual Signs | Severity | Typical Repair Timeline |
|---|---|---|---|
| Ponding water | Standing water, dark stains, algae | High | Immediate |
| Membrane blistering | Raised bubbles, ruptured areas | Medium to High | Within 30 days |
| Flashing failure | Gaps, rust, missing sealant | High | Within 14 days |
| Punctures and tears | Holes, cuts, exposed underlayment | High | Within 7 days |
| UV degradation | Fading, brittleness, surface chalking | Medium | Plan replacement |
Documenting inspections and planning next steps
Your inspection only creates value when you document findings and take action. Accurate documentation and timely action after inspections greatly improve roof maintenance outcomes. Use a standardized inspection report form or digital checklist that captures consistent information every time. Include date, weather conditions, inspector name, roof areas examined, and detailed findings for each zone. Consistency lets you compare inspections over time and spot developing trends.
Photograph everything noteworthy during your inspection. Take wide shots showing overall roof condition and close-ups of specific problems. Capture images from multiple angles to provide context. Enable date stamping on your camera or phone so every image carries a time reference. Organize photos by roof section or problem type for easy retrieval later. These images become invaluable when discussing repairs with contractors or documenting conditions for insurance claims.
Prioritize repairs based on severity and risk to your building. Use this framework:
- Emergency repairs: Active leaks, major structural damage, large punctures, complete flashing failure. Address within 24 to 48 hours to prevent further damage.
- Urgent repairs: Ponding water, small leaks, damaged flashing, membrane blisters, clogged drainage. Schedule within one to four weeks before conditions worsen.
- Routine maintenance: Minor sealant cracks, superficial wear, debris removal, minor surface damage. Address during your next scheduled maintenance cycle.
- Long-term planning: Widespread aging, approaching end of service life, outdated systems. Begin budgeting and planning for major repairs or replacement.
Plan regular maintenance schedules that address minor issues before they escalate. Quarterly inspections catch problems early. Annual professional evaluations provide expert assessment of overall roof health. After every major storm, conduct a damage assessment even if no problems are immediately visible. Preventive maintenance costs a fraction of emergency repairs and extends your roof’s service life significantly.
Know your limits and when to call certified roofing professionals. Complex repairs, structural concerns, warranty work, and issues requiring specialized equipment all demand professional expertise. Attempting repairs beyond your skill level often makes problems worse and can void warranties. A qualified contractor brings experience, proper tools, and insurance protection that DIY efforts lack.
Pro Tip: Create a digital roof maintenance file that includes all inspection reports, photos, repair invoices, warranty documents, and contractor contact information. Cloud storage ensures you can access this information from anywhere and never lose critical records. Update the file after every inspection or repair.
Why choose Thomas Roofing and Repair for your commercial roof needs?
After learning how to inspect and maintain your roof, consider partnering with local experts who understand Central Florida’s unique challenges. Thomas Roofing and Repair brings decades of commercial roofing experience to property managers and business owners throughout Orange, Brevard, and Volusia counties. Our team knows exactly what Central Florida weather does to commercial roofs and how local building codes protect your investment.

We offer comprehensive commercial roof services including expert inspections that catch problems you might miss, repairs that restore your roof’s integrity and extend its service life, and professional roof installation in Horizon West and surrounding areas using materials proven to withstand Florida’s climate. Our commercial roof repair services in Orlando respond quickly to minimize business disruption. We specialize in commercial metal roofing systems that deliver superior hurricane resistance and longevity. When storms strike, our emergency response team protects your property fast. Every project meets or exceeds local code requirements, ensuring your roof remains compliant and insurable. Contact Thomas Roofing and Repair today for a thorough professional inspection and protect your commercial property investment.
Frequently asked questions
How often should commercial roofs be inspected in Central Florida?
Inspect your commercial roof at least twice yearly, ideally in spring and fall. Central Florida’s hurricane season, intense UV exposure, and heavy rainfall demand more frequent monitoring than northern climates. Always conduct additional inspections after major storms, even if no visible damage appears from the ground. This schedule catches problems early when repairs cost less.
What are the key signs that a commercial roof needs professional repair?
Call professionals immediately when you notice active leaks, extensive membrane damage covering large areas, widespread flashing failure, significant ponding water, or any structural sagging. These conditions exceed basic maintenance and require expert assessment and repair. Delaying professional intervention escalates damage costs exponentially and risks interior property damage.
Can property managers conduct roof inspections themselves, or should they hire professionals?
Property managers can safely perform basic visual inspections using proper safety equipment and the systematic approach outlined in this guide. These regular checks help you monitor roof condition and catch obvious problems. However, schedule professional inspections annually or biannually for thorough evaluation using specialized equipment like moisture meters and thermal cameras. Professionals identify hidden damage and ensure code compliance.
What safety precautions are essential during a commercial roof inspection?
Always use personal protective equipment including a properly fitted safety harness, hard hat, non-slip boots, and safety glasses. Never inspect alone; keep a spotter on the ground who can summon help if needed. Avoid roof inspections during rain, high winds, lightning, or extreme heat when surfaces become dangerously slippery or conditions impair judgment. Check weather forecasts before scheduling inspections and postpone when conditions are unsafe.
Recommended
- Roof inspection benefits for Central Florida properties
- Central Florida roofing code requirements 2026: 130 mph standard
- 6-Step Commercial Roofing Checklist for Florida Property Managers
- Articles – Thomas Roofing & Repair Inc.
- Roofing Company Orlando, FL
- Roofing Company Titusville, FL
- Roofing Company DeLand, FL