TL;DR:
- Concrete roof tile repair involves removing, sealing, or replacing damaged tiles to maintain waterproofing and structural strength. Florida homeowners face accelerated tile aging from UV, wind, and heat, making early damage detection essential to prevent costly future repairs. Proper tools, safety gear, and inspection of underlayment are critical to ensure durable repairs and avoid unnecessary expenses.
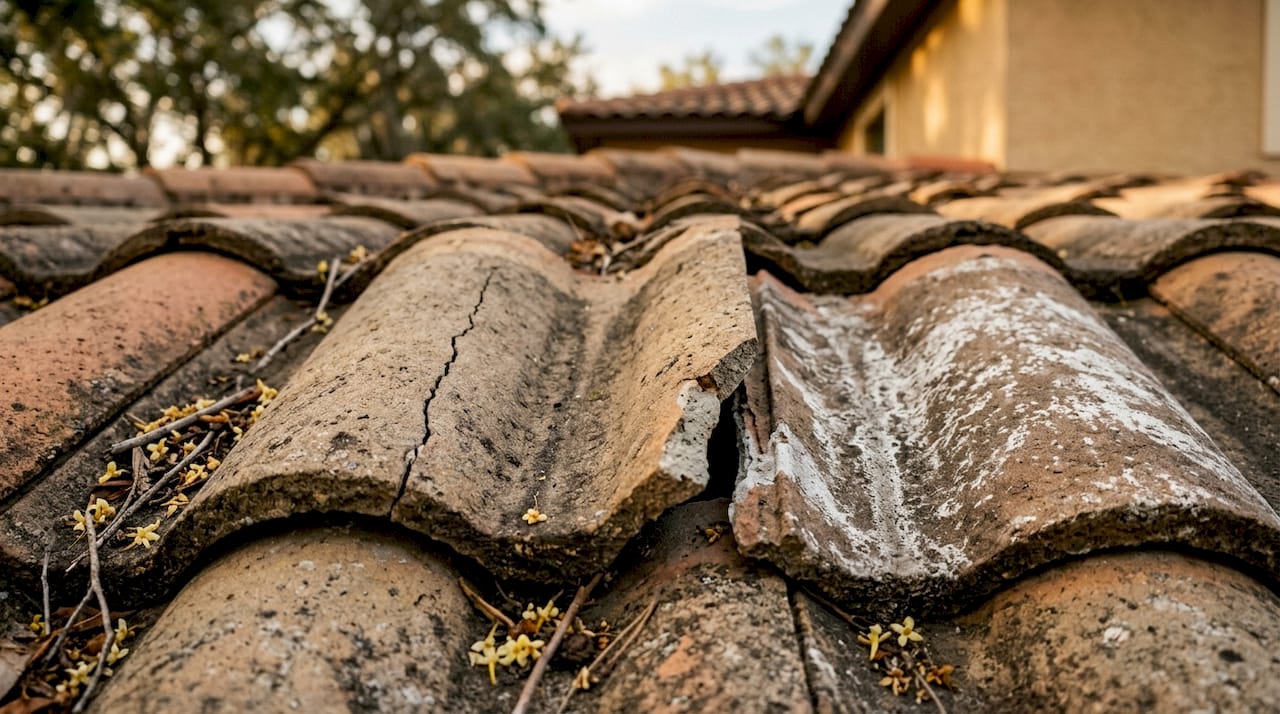
Concrete roof tile repair is defined as the controlled removal, sealing, or replacement of damaged tiles to restore a roof’s waterproof barrier and structural integrity. Central Florida homeowners face a specific challenge: the region’s intense UV exposure, hurricane-season winds, and daily heat cycles accelerate tile aging faster than most of the country. Homes with concrete tiles installed between 1995 and 2006 face a particularly high risk of underlayment failure, meaning isolated tile fixes often fail to stop water intrusion. Catching damage early and using the right repair method protects your property value and avoids far more expensive work down the road.
What tools and safety gear are needed for concrete roof tile repair?
The right tools make concrete roof tile repair safer and prevent you from creating new damage while fixing old. A flat pry bar, a non-magnetic hammer, a utility knife, and flexible urethane or silicone sealants that meet ASTM C920-21 standards are the core items for any tile repair job. ASTM C920-21 governs sealant flexibility and UV resistance, both of which matter enormously in Florida’s climate.
Safety gear is non-negotiable on a tile roof. OSHA-approved 5 kN harnesses and ANSI A14.1-2022 compliant ladders are the industry standard for this work. Add cut-resistant gloves, safety goggles, and soft-soled shoes to protect both you and the tiles beneath your feet.
One detail most homeowners miss: force control during tile removal is as critical as the tools themselves. Applying more than 150 N of force when prying up a tile can crack the adjacent tiles, turning a one-tile fix into a five-tile problem. Use slow, steady pressure and work the pry bar in small increments.
Pro Tip: Lay out all tools and inspect them before climbing onto the roof. A missing tool means an extra trip up and down, which multiplies your fall risk.
How do you identify damage and decide between repair and replacement?
Not every cracked tile needs the same response. The type and extent of damage determines whether you seal, replace, or call for a full roof evaluation.
Minor cracks
A hairline crack that does not intersect a nail hole and shows no surrounding erosion qualifies for sealant repair. Urethane or silicone sealants meeting ASTM C920-21 bond well to concrete and flex with temperature changes. Clean the crack thoroughly before applying sealant, and press it fully into the gap rather than spreading it across the surface.
Breaks, delamination, and underlayment damage
A tile that is broken through, shows chalky white residue, or has visible surface erosion has reached the end of its sealable life. Sealants only provide temporary relief once delamination begins. Delamination means the tile’s surface layers are separating, and no sealant reverses that process. Replacement is the only lasting fix.
Exposed aggregate, a rough sandy texture where the tile surface has worn away, signals the same problem. If you see it on multiple tiles in one area, the underlayment beneath likely needs inspection too.
| Damage type | Recommended action | Risk if ignored |
|---|---|---|
| Hairline crack, no nail hole | Seal with ASTM C920-21 sealant | Minor leak risk |
| Crack intersecting nail hole | Replace tile | Water tracks along nail into deck |
| Surface erosion or chalky residue | Replace tile | Accelerating delamination |
| Multiple broken tiles in one zone | Section repair or full evaluation | Widespread water intrusion |
| Soft spots or staining on deck | Underlayment repair required | Structural rot |
Pro Tip: Press gently on tiles around the damaged one. A tile that flexes or sounds hollow when tapped has lost its mortar bond and needs replacement even if it looks intact.
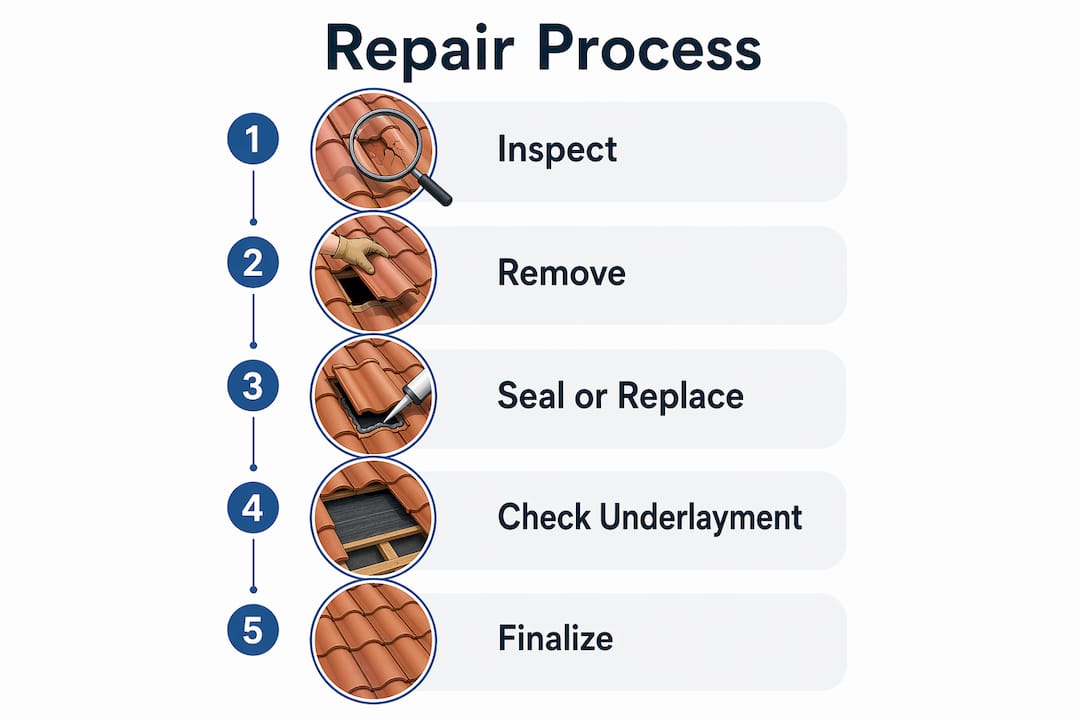
Step-by-step guide to repairing or replacing damaged concrete tiles
A proper repair sequence protects the tiles you are not replacing and gives the fix the best chance of lasting through Florida’s next storm season.
Preparation and access
- Start at the roof peak and work downward. This keeps you from stepping on tiles you have already loosened.
- Identify all damaged tiles before removing any. Mark them with chalk so you have a clear picture of the full scope.
- Set up your ANSI-compliant ladder on firm, level ground. Attach your safety harness anchor before stepping onto the roof surface.
Removing the damaged tile
- Slide the flat pry bar under the tile directly above the damaged one. Lift gently to expose the nail or clip holding the damaged tile.
- Remove the fastener with a nail puller or flat bar. Keep force below 150 N throughout this step to protect adjacent tiles.
- Slide the damaged tile straight down and out. Do not twist or angle it, as that motion transfers stress to neighboring tiles.
Cleaning and sealing or replacing
- Inspect the underlayment beneath the removed tile. Surface-only repairs trap moisture and accelerate rot, so address any tears or soft spots in the membrane before proceeding.
- For a sealable crack on a tile you are reinstalling: clean the crack with a wire brush, remove all dust and debris, and apply flexible urethane sealant into the full depth of the crack.
- For a replacement: slide the new tile into position from below, aligning it so the lap joints sit within 2 mm of the surrounding tiles. This precision maintains proper drainage flow and preserves the minimum 2-degree pitch needed to prevent water pooling.
- Fasten the tile with a corrosion-resistant nail or clip. Do not over-tighten. The tile should sit flush, not compressed.
Verification
- Run a garden hose over the repaired area at 45 psi flow for several minutes. Check the attic or ceiling below for any sign of moisture. A dry interior confirms a watertight seal.
Common mistakes to avoid:
- Patching surface cracks without lifting the tile to inspect the underlayment
- Using rigid caulk instead of flexible ASTM-rated sealant
- Skipping the water test and assuming the repair is sound
- Walking directly on tiles rather than on the tile edges or battens
What does concrete roof tile repair cost in Central Florida?
Repair costs in Central Florida vary based on damage extent, roof accessibility, and whether storm urgency is a factor. Professional tile repair pricing breaks down as follows: single tile replacement runs $250–$450, section repair costs $500–$1,400, and sectional underlayment repair can reach $3,500.
Those numbers assume normal conditions. Storm-season demand, steep roof pitches, and second-story access all push costs higher. A roof with widespread cracking may cross the threshold where full replacement becomes more cost-effective than piecemeal repairs. That calculation depends on the age of your underlayment as much as the tiles themselves.
Budgeting factors to keep in mind:
- Damage extent: A single cracked tile costs far less than a section with failed underlayment beneath it.
- Accessibility: Low-slope roofs on single-story homes cost less to work on than steep or multi-story structures.
- Storm timing: Emergency repairs after a named storm often carry premium labor rates due to high demand.
- Inspection costs: A professional inspection before committing to repair or replacement saves money by scoping the full picture upfront.
Written, itemized estimates with separate line items for labor, materials, and warranty terms protect you from surprise charges. Never accept a verbal quote for tile roof work. You can get a clear picture of Central Florida repair costs before committing to any contractor.
Pro Tip: Schedule your inspection in the spring before hurricane season begins. Contractors have more availability, and you avoid the post-storm pricing surge.
For homeowners managing roof repair budgeting, planning ahead consistently produces better outcomes than reacting to damage after a storm.
Key Takeaways
Concrete roof tile repair succeeds only when the underlayment is inspected and addressed alongside the tile itself, not treated as a surface-only fix.
| Point | Details |
|---|---|
| Inspect underlayment first | Lifting the tile to check the membrane prevents moisture from being sealed in beneath the repair. |
| Match sealant to the damage | Use ASTM C920-21 rated urethane or silicone only on hairline cracks; broken or delaminated tiles require replacement. |
| Control removal force | Keep pry bar force below 150 N to avoid cracking adjacent tiles during removal. |
| Budget by damage scope | Single tile repairs run $250–$450; underlayment section repairs can reach $3,500 in Central Florida. |
| Verify every repair with water | Test at 45 psi hose flow after any repair to confirm a watertight seal before closing the job. |
What I have learned after years of watching tile roofs fail
The most expensive tile roof repairs I have seen were not caused by storms. They were caused by surface patches applied years earlier that looked fine from the ground and were rotting the deck from the inside.
Concrete tile is a durable material, but it creates a false sense of security. Homeowners see a tile crack and reach for caulk. The tile looks sealed. The water, however, finds the nail hole, tracks down the underlayment, and sits on the deck for months before anyone notices a ceiling stain. By then, the repair cost has multiplied several times over.
Central Florida’s weather cycles make this worse than most markets. The combination of afternoon thunderstorms, intense UV, and hurricane-season wind loading puts more stress on tile and underlayment than almost any other climate in the country. Underlayment installed before 2006 was often a 15-year felt product. If your home has tiles from that era, the underlayment is almost certainly past its service life regardless of how the tiles look.
The repair-versus-replace decision is not really about the tiles. It is about the membrane beneath them. A tile roof’s lifespan in Florida depends on both layers working together. When the membrane fails, no number of tile replacements will keep water out for long.
My honest recommendation: if you are seeing cracked tiles on a roof older than 20 years, get the underlayment evaluated before spending money on individual tile repairs. A professional who lifts tiles and inspects the membrane gives you real information. One who quotes tile replacement without looking underneath is guessing.
— Thomasroofingandrepair
Thomasroofingandrepair: expert tile roof repair across Central Florida
Thomasroofingandrepair serves homeowners and property managers across Brevard, Volusia, and Orange counties with tile roof repairs built to handle Florida’s specific weather demands. Every job starts with a thorough inspection that covers both the tiles and the underlayment beneath them, so you get an accurate picture of what your roof actually needs.

Whether you are dealing with post-storm cracking, aging tile erosion, or a leak that has been getting worse each rainy season, Thomasroofingandrepair provides written, itemized estimates with clear warranty terms. For urgent situations, the emergency storm repair process gets your roof assessed and protected fast. For planned repairs, the Central Florida tile repair service covers everything from single tile replacement to full underlayment restoration. Contact Thomasroofingandrepair for a free estimate and find out exactly what your roof needs.
FAQ
What is the difference between sealing and replacing a concrete roof tile?
Sealing works only on minor hairline cracks with no structural damage. Tiles that are broken through, delaminated, or show surface erosion require full replacement to restore waterproof integrity.
How long does a concrete tile roof repair last?
A properly executed repair using ASTM C920-21 rated sealant or a correctly installed replacement tile can last many years. Longevity depends on underlayment condition and whether the repair addressed the full depth of the damage.
Can I repair concrete roof tiles myself?
Minor sealant repairs are possible for careful homeowners with proper safety gear, including an OSHA-rated harness and ANSI-compliant ladder. Any repair involving underlayment damage, multiple tiles, or post-storm structural concerns requires a licensed professional.
How much does it cost to repair a single concrete roof tile in Florida?
Single tile replacement by a professional in Florida typically costs $250–$450. Section repairs and underlayment work run significantly higher, reaching up to $3,500 for sectional underlayment repair.
When should I replace the whole roof instead of repairing tiles?
Full replacement becomes the better investment when multiple tiles are cracked across large sections or when the underlayment is extensively damaged. Piecemeal repairs on a failing membrane rarely prevent water intrusion for long.