
If rain is getting into your house right now, tarp or board the damaged area before it gets worse. If the roof is steep, wet, or the decking feels soft underfoot, don’t climb up there. Call a licensed emergency tarping contractor instead. Fall and electrocution hazards are real on a storm-damaged roof, and OSHA’s tarping safety guidance exists precisely because homeowners get hurt trying to fix this themselves in bad conditions.
Before anything else, work through this list:
- Check for downed power lines, gas smells, or sagging ceilings and stay away from them.
- Photograph the damage from inside and outside before you touch anything.
- Place buckets or tarps indoors to catch active drips.
- Call your insurance company to open a claim.
- Call a licensed tarping contractor if the roof is too steep, wet, or damaged to access safely.
Pro Tip: A five-minute video walkthrough of the damage, narrated with the date and what happened, often documents a claim better than a stack of still photos.
Key Takeaways
Emergency roof tarping works only when it combines safe, code-aligned installation with photo and invoice documentation that satisfies your insurer’s duty-to-mitigate requirements.
| Point | Details |
|---|---|
| Act within 24 to 48 hours | Faster tarping limits interior damage and satisfies your policy’s mitigation requirement. |
| Skip unsafe roofs entirely | Steep pitch, wet surfaces, or soft decking mean calling a licensed pro, not climbing up yourself. |
| Use battens, never nails | Screw tarps through 1×4 or 2×4 battens at 12-inch spacing for a fastening that survives wind. |
| Document before and after | Timestamped photos, itemized invoices, and fastener shots make claims far harder to dispute. |
| Choose Thomas Roofing for dispatch | Two-person crews, OSHA-aligned safety, and carrier-ready documentation on every emergency tarp job. |
Table of Contents
- First 24 Hours: What Order to Do Things In
- Can You Safely Tarp a Roof Yourself?
- What Materials Do Professionals Actually Use?
- What Does Insurance Actually Cover for Roof Tarping?
- How Do You Vet an Emergency Tarping Contractor Fast?
- Why Thomas Roofing Treats Tarping as an Insurance Document, Not Just a Patch
- Get a Crew on Your Roof Before the Next Storm Cell Rolls In
- Why Most Tarping Advice Skips the Part That Actually Costs Homeowners Money
- Sources
First 24 Hours: What Order to Do Things In
The first day after a roof takes damage sets the tone for your entire insurance claim, so the sequence matters as much as the speed.
Right now: Walk the property and check for hazards. Live wires, cracked framing, or a roof section that’s visibly bowing means you back away and call a professional, not a race to grab a tarp. Once the area is safe, document everything before you clean up a single shingle. Timestamped photos and a short video of standing water, ceiling stains, and exterior damage form the backbone of your claim.
- Shut off power to any affected circuits if water is near wiring or fixtures.
- Photograph and video the damage from multiple angles, inside and out.
- Move furniture, electronics, and valuables away from the leak path.
- Set buckets or tarps to catch water, and extract standing water if you can do it safely.
- Call your insurer within 24 to 48 hours to report the loss and confirm what temporary repairs they expect.
- Arrange emergency roof tarping, either yourself if conditions allow or through a licensed contractor.
Most homeowner policies include a duty to mitigate further damage, and insurers generally expect you to act fast. Reporting the loss and getting a tarp up within that first day or two isn’t just about keeping water out. It shows the carrier you took reasonable steps, which matters when the adjuster reviews your claim.
Pro Tip: Note the exact time you called your insurer in a notes app. Adjusters sometimes dispute mitigation timing, and a timestamp settles the argument fast.
Can You Safely Tarp a Roof Yourself?
Sometimes, yes. But only under specific conditions, and skipping the checklist below is how DIY tarping jobs end in emergency room visits or roof tarps that blow off by morning.
Before you climb anything, confirm the weather has cleared. Wind and rain make roof surfaces unpredictable, and OSHA’s guidance specifically warns against tarping work during active wind or rain. You’ll also want a second person on the ground, a ladder set at a 4:1 angle (one foot out for every four feet up), and a roof pitch gentle enough to stand on without a harness. Press on the decking near the damage first. If it feels soft or springy, stop. That’s a sign the structure underneath is compromised, and no tarp fixes that safely.
Once you’ve confirmed it’s safe:
- Measure the damaged area and add at least 4 feet of overlap on every side.
- If the damage is near the roofline, wrap the tarp over the ridge to block wind-driven rain from getting underneath.
- Lay the tarp flat and sandwich the edges between 2×4 battens, a method contractors call wrap-and-roll.
- Screw through the battens into solid decking at roughly 12-inch spacing along the edges, per field protocols from Restoration Intel.
- Seal around vent pipes, chimneys, and other penetrations with roofing tape.
The most common DIY mistake is nailing the tarp directly to the roof instead of sandwiching it under battens. Nails punch new holes and let the tarp tear loose in the next gust. A close second: skimping on overlap, or using thin painter’s plastic instead of an actual roofing tarp. Neither survives a follow-up storm.
What Materials Do Professionals Actually Use?
A tarp is not a tarp. The material and fastening method decide whether it lasts through the next storm or ends up in your neighbor’s yard.
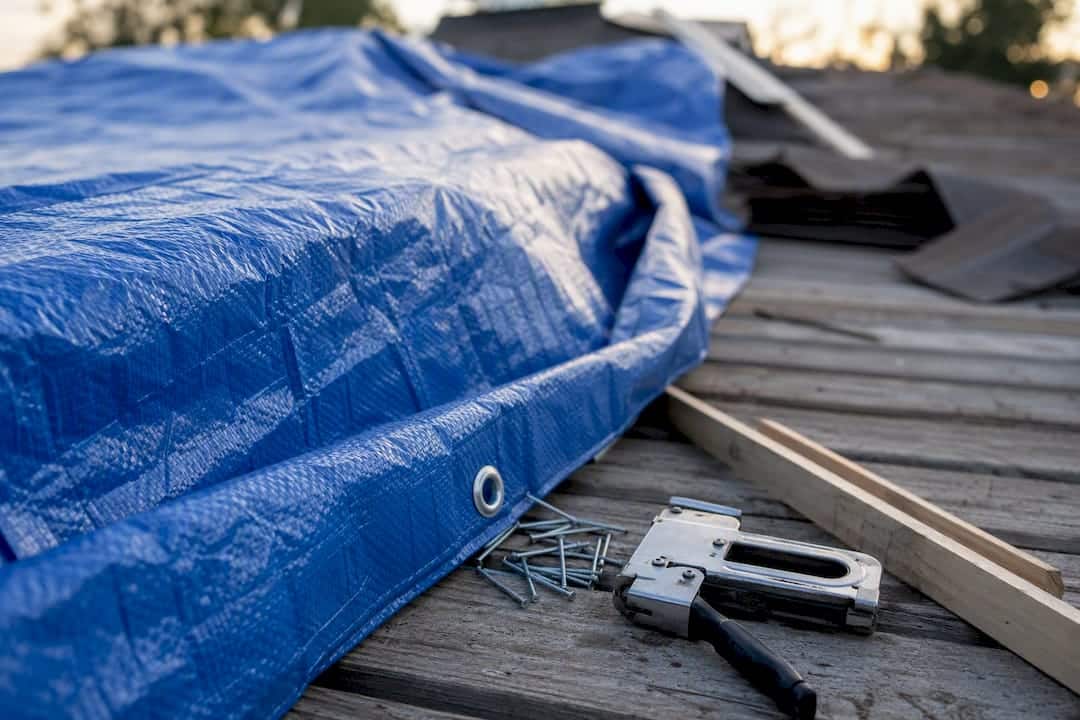
For a short wait until repairs, 6-mil polyethylene sheeting is the accepted minimum, according to Restoration Intel’s field protocol. If you’re looking at a longer delay, whether from contractor backlog or a slow adjuster visit, a woven, UV-inhibited poly tarp rated 10-mil or heavier holds up far better against sun and wind over multiple weeks.
Fastening matters more than the tarp itself. Screws through 1×4 or 2×4 battens, spaced at a maximum of 12 inches along the edges and roughly every 24 inches across the field, keep the tarp from flapping loose. The ridge wrap needs at least 4 feet of coverage past the peak.
| Spec | Standard |
|---|---|
| Short term material | 6-mil polyethylene minimum |
| Extended wait material | 10-mil+ woven, UV-inhibited poly |
| Batten fastening | 1×4 or 2×4, screws at up to 12-inch edge spacing |
| Ridge overlap | Minimum 4 feet past the peak |
| Damage perimeter overlap | Minimum 12 inches beyond visible damage |
For anything expected to last more than a few weeks, professional shrink-wrap systems are worth the extra cost. They can hold up for months at a stretch without the flapping and wear that ordinary tarps show after a couple of storms.
What Does Insurance Actually Cover for Roof Tarping?
Emergency tarping is normally reimbursable under standard homeowners policies as a reasonable repair, provided you document it well. That’s the good news. The costs vary more than most homeowners expect, and the documentation bar is higher than a single “after” photo.
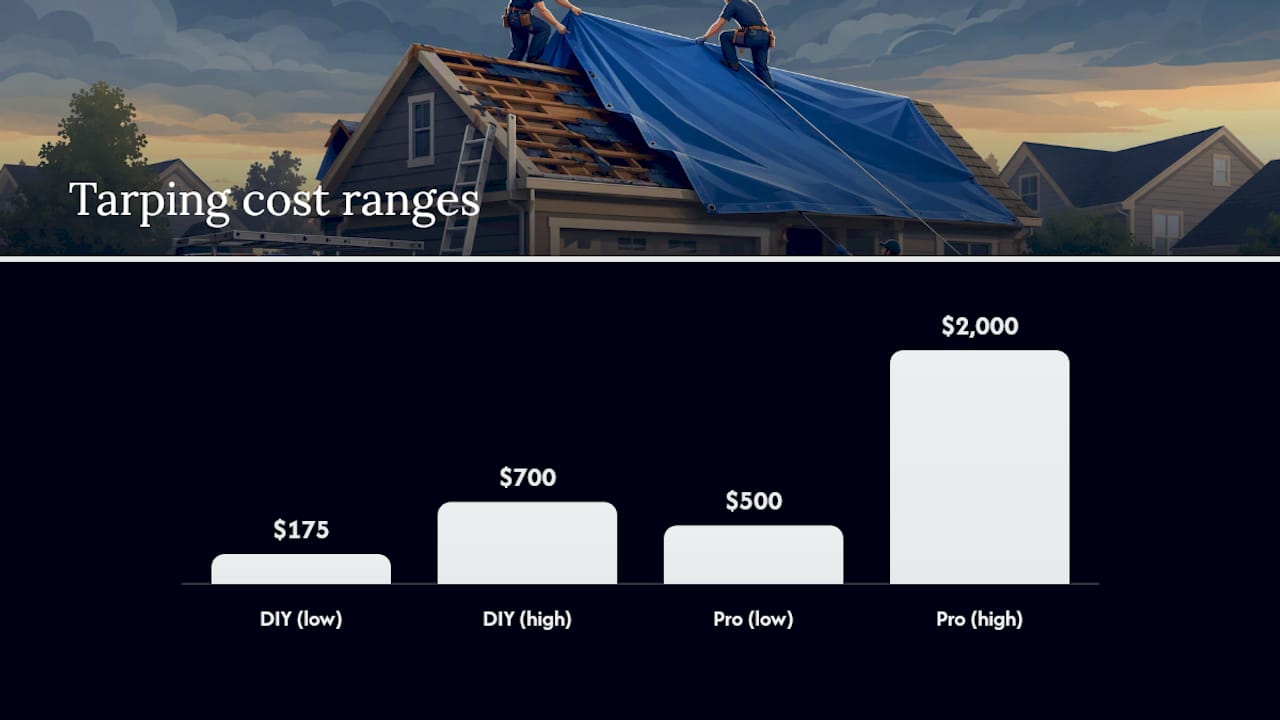
Basic DIY materials typically run $175 to $700, while professional emergency tarping crews usually charge $500 to $2,000 depending on roof size and access difficulty. Prices climb fast after a major storm hits a region, since demand outpaces available crews.
Keep this documentation on file no matter who does the work:
- Before photos showing the original damage.
- After photos showing the tarp installed, including visible batten fastening.
- An itemized invoice, not a vague lump-sum bill.
- A signed work authorization if a contractor did the job.
- A timeline showing when the storm hit, when you called your insurer, and when the tarp went up.
Watch for storm chasers who show up unsolicited offering to tarp your roof “for free” if you sign a permanent repair contract on the spot. That bundled pressure tactic is one of the most common complaints insurance-facing guides flag after major weather events. A legitimate crew gives you a tarping-only invoice and lets you decide on permanent repairs separately.
How Do You Vet an Emergency Tarping Contractor Fast?
You don’t have hours to research a contractor when water is coming through your ceiling, but a five-minute check saves you from a much bigger headache later.
- Ask for proof of license, general liability insurance, and workers’ compensation before anyone steps on your roof.
- Request a written, tarping-only estimate separate from any permanent repair proposal.
- Confirm the crew works in pairs at minimum and uses fall protection, consistent with OSHA’s own field guidance.
- Ask what documentation they’ll leave you with: photos, fastener locations, and a final invoice.
If a contractor insists you sign a full roof replacement contract as a condition of tarping today, that’s a red flag. Reputable crews handle emergency mitigation and the permanent repair as two separate decisions.
Pro Tip: Ask the crew lead directly, “Will you refuse to work if conditions turn unsafe?” A contractor who hesitates to answer yes probably isn’t following OSHA protocols in the first place.
Why Thomas Roofing Treats Tarping as an Insurance Document, Not Just a Patch
Most emergency crews slap up a tarp and leave. Our approach treats every tarp job as evidence your insurer will eventually scrutinize.
- Two-person crews with fall protection, following OSHA-aligned safety protocols on every call.
- Wrap-and-roll installation with proper batten fastening, not nails punched straight through plastic sheeting.
- A documentation package with dated photos, fastener locations, and an itemized invoice built for claims.
- Financing options and a direct path to permanent repair once the adjuster signs off.
Readers who need a crew today can start with our emergency roof repair workflow for fast local dispatch.
Get a Crew on Your Roof Before the Next Storm Cell Rolls In
Thomas Roofing and Repair is the direct alternative to guessing your way through a DIY tarp job or gambling on whoever answers the phone first after a storm. We show up with a two-person crew, proper battens instead of loose nails, and a documentation package built specifically for what your adjuster needs to see.

That last part matters more than most homeowners realize until they’re mid-claim. A tarp with no fastener photos and a scribbled receipt gives an adjuster room to push back on reimbursement. Ours doesn’t. We photograph the ridge overlap, the batten spacing, and the finished job, then hand you an itemized invoice you can submit the same day. Once the storm passes and the adjuster signs off, we’re already positioned to move you from temporary tarp to permanent roof repair or replacement, with financing available if the timing is tight.
If your roof is compromised right now, request emergency service through our tarping and storm response page and get a crew scheduled today.
Why Most Tarping Advice Skips the Part That Actually Costs Homeowners Money
The internet is full of tarping tutorials that treat this like a weekend project. Unroll plastic, weigh down the corners, done. That advice ignores the part that actually determines whether you get reimbursed: what happens after the tarp goes up.
I’ve seen the pattern play out the same way too often. A homeowner does everything right on the roof, wraps it tight, uses real battens, and then submits a claim with one blurry phone photo and a text message receipt from a neighbor’s cousin who “does roofing.” The adjuster comes back asking questions the homeowner can’t answer, and a claim that should have been a formality drags out for weeks.
The uncomfortable truth is that insurers don’t reward effort. They reward evidence. A rushed but well-documented tarp job beats a perfect tarp with no paper trail every time. That’s why the documentation habit matters more than the roofing skill itself, and it’s the one piece of advice most tarping guides leave out entirely.
The other overlooked point: storm chasers exploit exactly this gap. They know a scared homeowner just wants the leak stopped, so they offer free tarping bundled with a signature on a full replacement contract. Slow down on that decision even when the roof isn’t. Temporary and permanent repairs are two separate conversations, and treating them as one is how homeowners end up locked into a contractor before they’ve even talked to their adjuster.
— Results
Sources
- Roof Tarping (Blue Roof) Safety — OSHA
- Roof Damage Assessment and Emergency Tarping: Field Protocol and Insurance Documentation — Restoration Intel
- Emergency tarping and insurance guidance — RoofPolicy