TL;DR:
- Knowing your roof warranty type and documenting damage immediately can significantly improve your claim chances. Proper preparation, timely filing within deadlines, and thorough communication with adjusters ensure successful resolution. Maintaining ongoing documentation and understanding coverage details help homeowners avoid common pitfalls and denied claims.
When something goes wrong with your roof, knowing how to claim roof warranty coverage can save you thousands of dollars. Most homeowners assume the process is straightforward, only to find themselves confused by paperwork, missed deadlines, and coverage gaps. The average wind and hail claim payout is $14,747, so the stakes are real. This guide walks you through every stage of the roof warranty claim process, from reading your warranty documents to following up after submission, so you get what you are owed.
Table of Contents
- Key takeaways
- How to claim roof warranty: understanding your coverage first
- Preparing to file: documents and inspection steps
- Filing your roof warranty claim: step by step
- Managing and tracking your claim
- Common pitfalls and how to handle denied claims
- What I have learned after years of watching claims succeed and fail
- How Thomasroofingandrepair supports your warranty claim
- FAQ
Key takeaways
| Point | Details |
|---|---|
| Know your warranty type | Material, workmanship, and manufacturer warranties cover different issues and have separate claim processes. |
| Document damage immediately | Photos, videos, and timestamps from right after damage occurs are your strongest evidence. |
| File within the deadline | Most warranties require you to report damage within 60 to 90 days to avoid automatic denial. |
| Avoid unauthorized repairs | Letting uncertified contractors fix your roof before filing can void your coverage entirely. |
| Track every communication | Save all emails, call notes, and receipts throughout the claim to protect yourself in disputes. |
How to claim roof warranty: understanding your coverage first
Before you file anything, you need to know exactly what kind of warranty you have. There are three main types, and they work very differently from each other.
Material warranties come from the manufacturer and cover defective shingles or roofing products. If your shingles fail before their rated lifespan, the manufacturer owes you replacement materials. Workmanship warranties come from your roofing contractor and cover installation errors. If a leak develops because of how the roof was installed, that falls under workmanship. Manufacturer system warranties are premium policies that cover both materials and labor, but they are only available when a certified contractor installs the product.
Common coverage inclusions are defective materials, premature granule loss, and manufacturing defects. Common exclusions include damage from improper maintenance, storm events beyond normal wear, and modifications made by uncertified contractors.
Warranties require proper maintenance and registration to stay valid. Some manufacturers require you to register your warranty online within 30 to 90 days of installation, and annual inspections may be a written condition. Many homeowners skip this step entirely and discover the hard way that their coverage was never activated. Skipping even one scheduled maintenance visit can give a manufacturer grounds to reject a claim.
One widespread misconception: your warranty covers any roof damage. It does not. Storm damage is typically covered by homeowners insurance, not your roofing warranty. Warranty claims address product or installation failures. Knowing which coverage applies to your situation before you call anyone will save you a lot of time.
Pro Tip: Pull out your warranty documents before damage occurs. Confirm your registration status and note the expiration date, covered components, and required maintenance schedule so you are never caught off guard.
Preparing to file: documents and inspection steps
Strong preparation is what separates approved claims from denied ones. Skipping this phase is the most common reason claims fail.
Start the moment you notice the problem. Document roof damage immediately with timestamped photos and videos covering the roof surface, gutters, interior ceiling, and any debris on the ground. The more detailed your visual record, the harder it is for an adjuster to minimize the damage.
Here is a clear preparation checklist before filing:
- Photograph and video the damage from multiple angles with timestamps activated on your device.
- Note the date and time you first noticed the issue and any weather events that may have contributed.
- Locate your original installation contract, material receipts, and any existing inspection reports.
- Confirm your warranty registration status with the manufacturer or contractor.
- Schedule a professional roof inspection with a licensed contractor before submitting your claim.
Professional inspections before filing identify hidden damage that is easy to overlook during a visual walkthrough. A licensed contractor can produce a written damage report, which adds weight to your claim. Adjuster estimates alone often miss line items, so having an independent contractor report gives you a baseline to compare against.
One critical detail: if you need to make temporary repairs to stop further water intrusion, do them. Keep every receipt for materials like tarps or temporary patches. Temporary repair receipts can be submitted and are typically reimbursable under your claim, but only if you document them properly.
| Document | Why it matters |
|---|---|
| Timestamped photos and video | Primary evidence of damage scope and timing |
| Installation contract | Confirms workmanship warranty coverage |
| Material warranty certificate | Shows product warranty terms and expiration |
| Maintenance records | Proves you met upkeep requirements |
| Contractor inspection report | Independent verification of damage |
Pro Tip: Most warranties require you to report damage within 60 to 90 days of the event. Set a calendar reminder the day you notice a problem so the deadline does not slip past you.
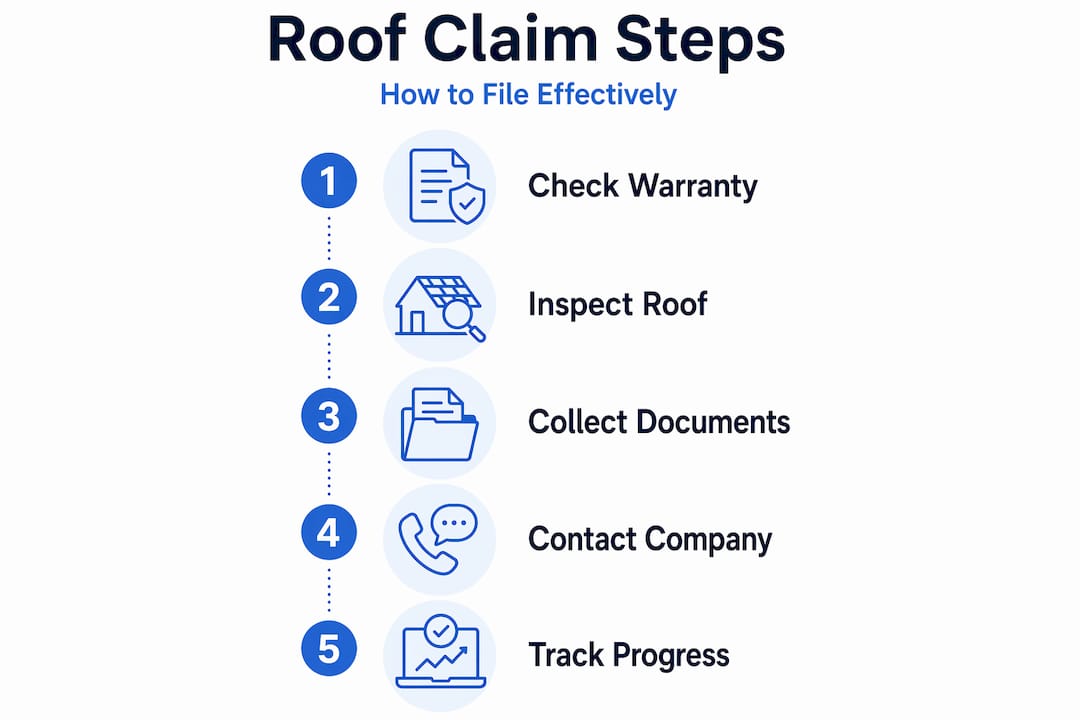
Filing your roof warranty claim: step by step
Once your documents are organized and your inspection is complete, you are ready to file. Here is exactly how to move through the process.
-
Identify the right contact. For workmanship issues, your first call goes to the original installation contractor. For product defects, you contact the manufacturer directly. Check your warranty document for the specific claim phone number or portal address.
-
Initiate the claim. Most manufacturers offer three ways to file: by phone, email, or an online claims portal. Online portals are preferable because they generate a confirmation number and timestamp. If you call, ask for a claim reference number before you hang up.
-
Submit your documentation package. Include your signed warranty certificate, the contractor’s inspection report, timestamped photos, proof of maintenance, and your purchase and installation records. A complete package at submission dramatically reduces back and forth delays.
-
Confirm receipt. Follow up within three to five business days if you have not received a written confirmation. Ask for the assigned claim number and the name of the adjuster or representative handling your file.
-
Know what forms to expect. Many manufacturers send a Claim Authorization Form and a Request for Information sheet. Fill these out promptly. Delays on your end reset the processing clock.
-
Understand response timing. Processing takes 30 to 120 days depending on the company and claim complexity. Ask your representative for an estimated timeline at the time of submission so you have a realistic expectation.
Knowing whom to contact first matters more than most people realize. Going to the manufacturer when you have a workmanship issue sends your claim to the wrong department and wastes weeks. Your warranty document should spell out the contact hierarchy clearly. If it does not, call your original contractor and ask.
Managing and tracking your claim
Filing is not the end. How you manage the claim after submission often determines the final payout or outcome.
When a company representative or adjuster schedules an on site inspection, be there in person. Bring your contractor’s written report and your photo documentation. Walk the adjuster through the damage yourself and point out every area your contractor identified. Do not leave them to form independent conclusions without context.
Ask these questions during every adjuster interaction:
- What specific items are you including in your damage assessment?
- Are there any coverage limitations that apply to this claim?
- What is the timeline for your written report?
- If there is a scope difference between your assessment and my contractor’s report, what is the appeals process?
Many claims are underpaid because adjusters miss line items like drip edge, flashing replacement, or code upgrade requirements. This is where having your own contractor’s estimate becomes powerful. Compare the adjuster’s findings line by line against your contractor’s assessment. If there are gaps, submit a supplement with the contractor’s estimate attached.
Keep detailed records of every phone call, email, site visit, and document exchange. Note the date, time, and name of whoever you spoke with. This record protects you if a dispute arises and you need to escalate.
Pro Tip: If your adjuster’s repair scope is lower than your contractor’s estimate, do not accept the difference as final. Request a supplemental review in writing and attach your contractor’s line item breakdown.
| Adjuster estimate | Contractor estimate |
|---|---|
| May exclude code upgrades | Includes all code compliance items |
| Often based on general rates | Based on current local labor and material costs |
| Submitted by insurer or manufacturer | Independent assessment you control |
| May miss secondary damage areas | Identifies all damage during thorough inspection |
Common pitfalls and how to handle denied claims
Most claim problems are preventable. These are the mistakes that most frequently derail the process.
- Delayed filing. Waiting months before reporting damage is the single most common denial reason. Many homeowners assume they have more time than they do.
- Unauthorized repairs. Unauthorized roof repairs or modifications by uncertified contractors can void your warranty outright. Never hire an unlicensed contractor to touch your roof while a claim is open.
- Incomplete documentation. Submitting a claim without photos, inspection reports, or maintenance records gives the company easy grounds to deny or reduce the payout.
- Skipped warranty registration. A manufacturer cannot look up your warranty if you never registered it. Check your registration status before you ever file.
- Missing maintenance records. If your warranty requires annual inspections and you cannot prove you had them done, coverage may not apply.
If your claim is denied, request the denial in writing and ask for the specific clause used to justify it. You have the right to appeal in most cases. Submitting additional documentation, such as a second independent inspection, is often enough to reverse a denial.
If the denial stands or your payout is significantly lower than expected, consider hiring a public adjuster, who typically charges 10 to 15% of the final settlement but can negotiate on your behalf. For claims involving large sums or bad faith conduct, consulting a property damage attorney is worth the investment.
What I have learned after years of watching claims succeed and fail
I have seen homeowners do everything right on the roof itself and then lose their claim entirely because of a paperwork mistake made years earlier. The documentation gap is almost always the problem. People treat warranty registration like a formality. It is not. It is the foundation your claim rests on.
The most successful claims I have seen share one thing: the homeowner treated documentation as an ongoing habit, not a reaction to damage. They kept their maintenance receipts, confirmed their registration, and knew their coverage terms before anything went wrong. When damage hit, they were ready to file within days, not weeks.
My honest take is that most people do not read their warranty until they need it. By then, they have often already voided a condition without knowing it. Read your Central Florida warranty terms the week the roof goes on and revisit them once a year. Treat it the same way you treat renewing your car insurance.
Proactive communication with your contractor also matters more than most guides acknowledge. A good contractor should be willing to walk you through your coverage at installation and answer questions when issues arise. If yours will not, that is information worth having before you need to file a claim.
— Thomasroofingandrepair
How Thomasroofingandrepair supports your warranty claim
When you are facing a roof warranty claim, having a trusted local contractor in your corner changes the outcome.

Thomasroofingandrepair provides detailed roof inspections that produce written reports designed to support your claim from day one. The team helps homeowners understand their coverage terms, organize their documentation, and communicate with manufacturers throughout the claim process. All repairs are completed by certified installers using manufacturer approved materials, so your warranty stays intact. For homeowners who need a full replacement, Thomasroofingandrepair’s storm ready roof replacement services include extended warranty options through certified installation. Serving Brevard, Volusia, and Orange counties, the team is built around the specific weather challenges Central Florida homeowners face every year. Reach out for a free estimate and let experienced local professionals take the complexity out of your claim.
FAQ
What is a roof warranty and what does it cover?
A roof warranty is a written guarantee from either a manufacturer or contractor that covers defective materials or faulty installation for a defined period. Coverage specifics vary, but most exclude storm damage, which typically falls under homeowners insurance instead.
How long does a roof warranty claim take to process?
Most roof warranty claims take between 30 and 120 days to process depending on the company and the complexity of the damage. Submitting a complete documentation package at the time of filing reduces delays significantly.
What are the most common reasons a roof warranty claim is denied?
The most frequent denial reasons include late filing, missing documentation, unauthorized repairs by uncertified contractors, and failure to register or maintain the warranty as required.
Can I file a roof warranty claim myself without a contractor?
Yes, you can file directly with the manufacturer or your original contractor, but having a licensed contractor’s inspection report dramatically strengthens your claim and reduces the chance of underpayment.
What should I do if my roof warranty claim is denied?
Request the denial in writing, identify the specific policy clause cited, and gather additional documentation such as a second independent inspection. If the denial is not reversed on appeal, a public adjuster or property damage attorney can help you negotiate a better outcome.