Professional roof inspections save money, protect your insurance and warranty coverage, and reduce the risk of catastrophic failure, making them one of the highest-return maintenance investments a homeowner or property manager can make.
The core advantages at a glance:
- Early detection of small defects before they become expensive failures
- Concrete cost avoidance: a $300–$600 repair caught early versus $7,000–$15,000 in emergency damage
- Documented records that support insurance claims and preserve manufacturer warranties
- Extended roof service life through systematic maintenance
- Safety risk reduction by catching structural and water-intrusion issues early
- Energy-efficiency gains from identifying ventilation and insulation gaps
- Higher property value and smoother real estate transactions
- 95%+ detection accuracy versus 40–60% for DIY checks
- Prioritized, photo-documented reports that insurers, buyers, and warranty providers accept
Organizations like the NRCA (National Roofing Contractors Association) and IIBEC (International Institute of Building Enclosure Consultants) have long emphasized systematic inspection as the foundation of responsible roof management. Thomasroofingandrepair applies that same component-level discipline to every residential and commercial property it serves.
Key Takeaways
Professional roof inspections are the highest-return maintenance investment available to homeowners and property managers, with documented ROI of $5–$10 saved for every $1 spent on preventive maintenance.
| Point | Details |
|---|---|
| Inspect twice a year, minimum | Schedule spring and fall inspections, plus immediately after any storm with winds above 50 mph. |
| Small repairs prevent large bills | A $300–$600 repair caught early avoids $7,000–$15,000 in emergency damage from rot and mold. |
| Documentation protects claims | Dated, photo-documented reports are the primary defense against insurer denials for deferred maintenance. |
| Match the inspector to the job | Use independent certified inspectors (InterNACHI, HAAG, IIBEC) for pre-purchase and insurance disputes. |
| Thomasroofingandrepair | Offers contractor inspections, emergency storm assessments, and transparent repair estimates across Central Florida. |
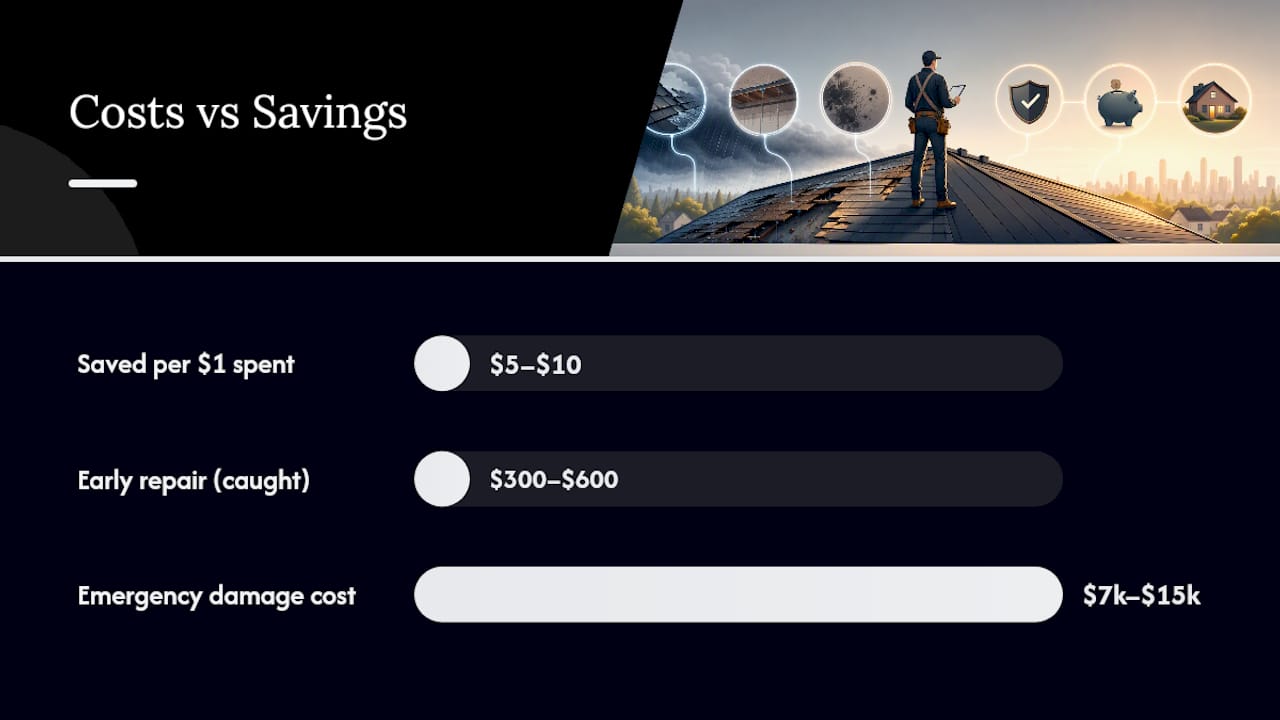
Table of Contents
- The real advantages of professional roof inspections, explained
- What a professional inspection actually covers
- How inspections protect your insurance claims and manufacturer warranties
- When to schedule an inspection: frequency and trigger events
- Inspection costs and ROI: what the numbers actually look like
- Choosing the right inspector for the job
- How to use the inspection report after you receive it
- Why transition points are where most leaks actually start
- A contractor’s honest view on inspections
- Thomasroofingandrepair handles inspections and what comes after
- Sources
The real advantages of professional roof inspections, explained
Early detection stops small problems from becoming large ones
A loose shingle or a hairline flashing crack looks minor. Left alone through one rainy season, it becomes a saturated deck, rotted sheathing, and mold in the attic. Regular inspections catch subtle indicators like loose shingles, flashing cracks, and attic moisture before interior damage sets in. The repair window is short and cheap; the remediation window is long and expensive.
Extended roof life
Every roofing system has a rated service life, but that number assumes the roof receives maintenance. Inspections identify the specific components wearing fastest and let you address them before they compromise surrounding materials. A roof that gets inspected and maintained regularly tends to reach or exceed its rated lifespan. One that doesn’t often fails years early, and replacement costs dwarf what maintenance would have cost. See how inspections extend roof life and when replacement typically becomes necessary.
Cost avoidance with a clear ROI
This is where the math gets hard to argue with. Industry guidance puts the preventive maintenance return at roughly $1 spent saving $5–$10 in future repair or replacement costs. A paid independent inspection typically runs a moderate fee. If it catches a flashing failure that would have led to deck rot, you’ve avoided a repair bill that can reach $7,000–$15,000 — and that’s before mold remediation.
Statistic to keep in mind: A $300–$600 patch caught during a routine inspection can prevent escalation into $7,000–$15,000 in damage including rot and mold remediation when ignored for even one season.
Pro Tip: When an inspection uncovers multiple issues, ask the inspector to prioritize them by urgency and cost impact — not every finding needs immediate action, but the safety and water-intrusion items do.
Property value and resale attractiveness
Buyers and their agents notice a roof with documented inspection history. A clean or recently repaired roof with a dated inspection report removes one of the biggest negotiating levers buyers use to push prices down. For property managers, a well-maintained roof reduces vacancy risk and supports higher rental rates because tenants notice leaks and ceiling stains immediately.
Safety and liability reduction
A failing roof isn’t just a financial problem. Structural deterioration, mold growth, and water intrusion create genuine safety hazards for occupants. For landlords and commercial property managers, a documented inspection history also limits liability exposure if a tenant or visitor is harmed by a roof-related failure. Showing that you scheduled regular professional checks and acted on findings is a meaningful legal defense.
Energy-efficiency gains
Professionals evaluate ventilation and insulation gaps that owners routinely miss. Poor attic ventilation traps heat in summer and moisture in winter, driving up energy bills and accelerating shingle degradation. Catching and correcting these issues during an inspection pays dividends on the utility bill and extends the roof’s service life simultaneously.
What a professional inspection actually covers
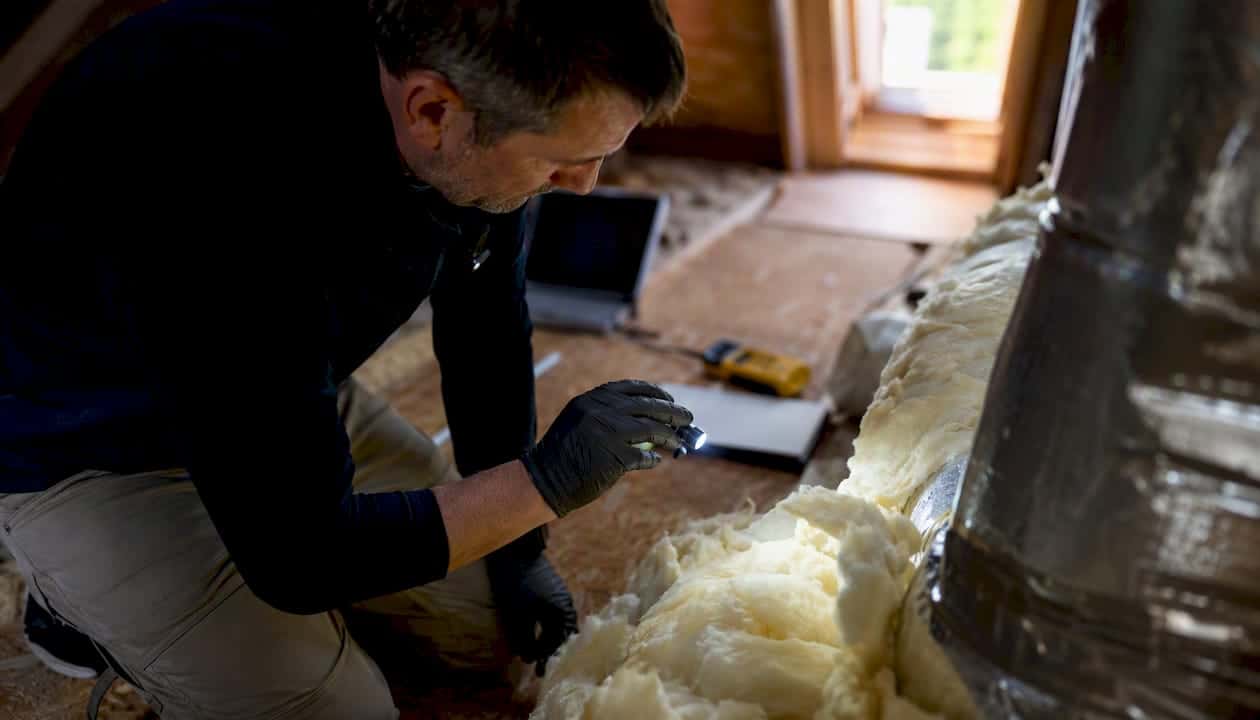
A professional inspection is a systematic, component-level evaluation that goes well beyond a visual scan from the driveway. Inspectors access the roof surface, examine the attic, and document conditions with dated photos and measurements. The output is a prioritized report that insurers and buyers can rely on.
| Roof Component | What Inspectors Evaluate |
|---|---|
| Shingles / membrane | Cracking, curling, granule loss, blistering, punctures, open seams |
| Flashings | Separation, corrosion, improper laps, sealant failure at walls and valleys |
| Penetrations (pipes, vents, HVAC curbs) | Boot condition, caulk integrity, standing water around curbs |
| Gutters and drainage | Blockages, slope, fastener condition, downspout discharge |
| Ventilation (ridge, soffit, power vents) | Blockages, balance, signs of moisture buildup |
| Attic and insulation | Moisture staining, mold, insulation compression, deck condition |
| Roof decking | Soft spots, delamination, rot, fastener pull-through |
| Edge details (drip edge, fascia, rake) | Rust, separation, improper installation |
Checklist: confirm your inspector covered these areas
- Walked or safely accessed the full roof surface
- Examined all flashings at walls, valleys, and penetrations
- Checked every pipe boot and HVAC curb seal
- Inspected gutters and downspouts for blockages and slope
- Entered the attic to check for moisture, mold, and deck condition
- Documented findings with dated, labeled photos
- Delivered a written report with prioritized recommendations
Photo documentation matters beyond just having a record. A dated photo showing a flashing in good condition before a storm is the evidence that separates a paid insurance claim from a denied one. Inspectors who use measurement tools and thermal cameras produce reports that carry significantly more weight with insurers than a handwritten note.
How inspections protect your insurance claims and manufacturer warranties
Insurers commonly exclude damage that results from deferred maintenance. If a claim arrives without any inspection history and the adjuster determines the damage was gradual, the denial is almost automatic. Documented inspections and timely repairs are the paper trail that proves you maintained the property and that the damage was sudden, not neglected.
Manufacturer warranties carry similar conditions. Most require periodic professional maintenance and prohibit unauthorized repairs. An inspection by a certified contractor keeps you in compliance and preserves the warranty’s value, which matters enormously when a defect claim arises years into the coverage period.
For landlords managing multiple properties, the stakes are higher. A single denied claim on a rental property can mean out-of-pocket costs for repairs plus lost rent during remediation. Independent inspectors who charge a flat fee and provide standardized, photo-documented reports are particularly valuable here because their reports carry no contractor bias and are accepted by insurers and, when necessary, courts.
Pro Tip: Keep a dedicated folder for each property — physical or digital — containing every inspection report, dated photos, repair receipts, and the inspector’s name and certification. When a claim arises, this file is your first line of defense.
Statistic: Industry data shows preventive roof maintenance returns roughly $1 spent for every $5–$10 saved in future repair or replacement costs — a ratio that makes consistent documentation one of the most cost-effective risk-management tools available to property owners.
When to schedule an inspection: frequency and trigger events
Baseline frequency
Biannual inspections — spring and fall — cover the two highest-risk transition periods. Spring checks catch winter damage before summer storms compound it. Fall checks identify vulnerabilities before cold weather and heavy rain arrive. Property managers with rental portfolios should treat this as a non-negotiable calendar item, not an optional expense.
Trigger events that require an immediate inspection
- Hail or wind events above 50 mph — impact damage to shingles and flashings is often invisible from the ground but shows clearly on a close inspection.
- Hurricane or tropical storm passage — even a near-miss can lift flashings and shift ridge caps.
- Heavy snow or ice accumulation — weight stress and ice dams create deck and flashing damage that worsens through the thaw cycle.
- Visible ceiling stains or interior moisture — by the time water appears inside, the roof assembly has already been compromised for some time.
- Roof age milestones — asphalt shingles typically warrant increased inspection frequency after 15 years; flat or low-slope membranes after 10.
- Pre-sale or pre-purchase — buyers and sellers both benefit from an independent inspection before listing or making an offer.
- Insurance company request — some carriers require a current inspection report for policy renewal on older roofs.
For homeowners, a spring-and-fall calendar works well. For property managers, layer event-driven inspections on top of that schedule. A storm that passes through your market at 2 AM on a Tuesday still warrants a next-day inspection call.
Inspection costs and ROI: what the numbers actually look like
Free contractor inspections are common for routine maintenance and repair estimates. Paid independent inspections typically run $150–$400. Drone and infrared thermal options often fall in the $200–$600 range depending on roof size and scope. These are not large numbers relative to what they protect.
The ROI case is straightforward. A $300 inspection that catches a failing pipe boot costs $150–$250 to repair. The same pipe boot, missed for a year, allows water into the decking. Now you’re looking at deck replacement, insulation removal, and potentially mold remediation — a bill that routinely reaches $7,000–$15,000. That’s the escalation pattern that makes preventive maintenance the financially rational choice.
Cost reality check: Inspection cost data puts independent paid inspections at $150–$400 and drone/infrared options at $200–$600. Against a potential $7,000–$15,000 emergency repair, the math is not close.
Pro Tip: If a contractor offers a free inspection tied to a repair estimate, that’s useful for routine maintenance. For pre-purchase, insurance disputes, or any situation where objectivity matters, pay for an independent inspector — the flat fee is worth the unbiased report.
Choosing the right inspector for the job
Not every inspection situation calls for the same type of inspector. Matching the inspector to the purpose saves money and produces more useful results.
Contractor-provided inspection: Appropriate for routine maintenance checks and repair estimates. The inspector is experienced and the service is often free or low-cost. The limitation is objectivity — a contractor has an interest in finding work. For straightforward maintenance on a familiar roof, this is efficient and practical.
Independent certified inspector: The right choice for pre-purchase evaluations, insurance documentation, and warranty compliance checks. Organizations like InterNACHI (International Association of Certified Home Inspectors) and HAAG Engineering certify inspectors who provide standardized, photo-documented reports with no contractor affiliation. These reports carry weight with insurers and, when disputes arise, with attorneys.
Licensed engineer or building enclosure consultant (IIBEC): Reserved for high-stakes situations: forensic investigations, major insurance disputes, litigation support, or complex commercial roofs where the failure mode is ambiguous. A PE-stamped report is the gold standard for legal proceedings.
Questions to ask before hiring any inspector:
- Are you certified by InterNACHI, HAAG, or IIBEC?
- Will the report include dated photos and prioritized recommendations?
- Do insurers in this market accept your reports?
- Can you provide a sample report so I can review the format?
- Do you carry errors and omissions insurance?
Pro Tip: For a pre-purchase inspection, never use the seller’s contractor. Hire your own independent inspector — the $200–$400 fee is cheap compared to inheriting a roof problem that wasn’t disclosed.
How to use the inspection report after you receive it
A report sitting in a drawer does nothing. Here’s how to turn it into an action plan.
Step 1: Categorize every finding. Safety issues (structural, active leaks) go to the top. Urgent items (flashings, pipe boots, damaged shingles) get addressed within 30 days. Monitor items get a calendar reminder for the next inspection.
Step 2: Get 2–3 bids for urgent repairs. Use the report’s photos and descriptions as the scope of work. Contractors bidding against a written scope give more accurate and comparable estimates.
Step 3: Schedule and document repairs. Get a written receipt that includes the date, contractor name, and work performed. Attach it to the inspection report in your property file.
Step 4: Update your inspection log. A simple log with four columns — date, inspector name and certification, findings summary, and completed actions — is enough. This log is what you hand to an insurer, a buyer, or an attorney when documentation is requested.
The report also has direct value in real estate transactions. A seller with a clean inspection report and a documented repair history has a negotiating advantage. A buyer who orders an independent inspection before closing avoids inheriting deferred maintenance that the listing price didn’t reflect.
Documentation note: Routine photo-documented reports with prioritized recommendations are the single most effective trust signal for insurers and buyers — more persuasive than any verbal assurance about roof condition.
Why transition points are where most leaks actually start
The roof field — the broad expanse of shingles or membrane — gets most of the attention. But industry data shows that the majority of leaks originate at transition points: flashings, pipe boots, HVAC curbs, and wall terminations. These are the locations where two different materials meet, where movement occurs, and where sealants age fastest.
A professional inspector spends disproportionate time at these points for exactly that reason. A field shingle can fail gradually and visibly. A flashing separation at a wall can admit water invisibly for months before a ceiling stain appears.
For complex or large roofs, inspectors escalate to diagnostic tools. Infrared thermography locates trapped moisture non-destructively by detecting temperature differentials between wet and dry insulation. Core sampling confirms what the infrared suggests — it removes a small plug of the roof assembly to verify insulation saturation and deck condition before a repair-versus-replace decision is made. Drone imaging adds a photographic record of steep or large roofs without putting an inspector at risk on a difficult surface.
Pro Tip: If an inspector’s report doesn’t specifically address every flashing, pipe boot, and penetration on your roof, ask for a supplemental evaluation of those points. That’s where the money is.
A contractor’s honest view on inspections
The most useful thing an inspection does is give you a prioritized list of what actually needs attention — not a list of everything that could theoretically be done. At Thomasroofingandrepair, the inspections we conduct are designed to produce exactly that: a clear triage of safety issues, urgent repairs, and items to monitor, with honest estimates attached to each category.
There are situations where a contractor-provided inspection is the right call: routine maintenance, post-storm damage assessment, or a repair estimate on a familiar roof. There are also situations where an independent inspector is the better choice — pre-purchase evaluations, insurance disputes, or any case where the homeowner needs a report with no contractor interest attached to it. We’ll tell you which one fits your situation, because a homeowner who gets the right inspection is a homeowner who makes better decisions about their property.
Thomasroofingandrepair handles inspections and what comes after
When an inspection uncovers urgent repairs, the next step matters as much as the inspection itself. Thomasroofingandrepair offers contractor inspections, emergency storm inspections, and repair services across Central Florida — with transparent estimates and no pressure to replace when repair is the right answer.
For storm-affected properties, the emergency roof repair workflow covers rapid assessment and same-day tarping when needed. For homeowners who want a full picture of their roof’s condition before a sale or after a major weather event, the team provides detailed, photo-documented reports with prioritized recommendations.
Pro Tip: Before a scheduled inspection, clear gutters, trim overhanging branches, and locate any past repair records. An inspector who knows what’s been done before can focus on whether those repairs held.
Request a free estimate or schedule an inspection at Thomasroofingandrepair. For storm damage specifically, the Central Florida storm damage repair guide walks through the full recovery process step by step.
Sources
- Roof Maintenance for Landlords: Inspection and Repair Guide | VerticalRent
- Commercial Roof Inspection Guide (2026) | Commercial Roof Guide
- What Does a Commercial Roof Inspection Include? | NOVA (USAnova)
- Roof Inspection Cost & Checklist 2026: Free vs Paid (Full Guide) | WeatherShield Roofers
- Roof Inspection Cost: Professional vs DIY Assessment Guide 2026 | Premium Roofing Corp
- Benefits of regular roof inspections | NRCIA