TL;DR:
- Proper project management prevents homeowner chaos during storm damage or roof replacement.
- Deciding between repair and replacement relies on age, damage, repair history, and cost assessments by certified contractors.
- Thorough planning, inspection checkpoints, and documentation ensure a successful, stress-free roofing process with long-term warranties.
A summer afternoon in Brevard County can turn into a homeowner’s worst nightmare in under an hour. A fast-moving thunderstorm strips shingles off your roof, water starts seeping into your living room, and then you realize you have no idea who to call, what your insurance covers, or whether your roof even needs a patch or a full replacement. That moment of chaos is exactly what good roofing project management prevents. This guide walks you through every stage, from the first inspection decision to the final warranty check, so you can protect your home and your budget without the stress.
Table of Contents
- What to know before starting your roofing project
- Step-by-step roofing project management process
- Budgeting, risk management, and storm-prevention tips
- Verification and post-project best practices
- Why most roofing project headaches are avoidable: Our experience
- Ready to make your roofing project stress-free?
- Frequently asked questions
Key Takeaways
| Point | Details |
|---|---|
| Plan before you start | Collect roof details, evaluate repair needs, and choose a certified contractor to prevent costly change orders or upgrades later. |
| Follow a defined process | Use checkpoints and clear communication to keep your roofing project on budget and schedule. |
| Budget for risks | Allow for unexpected weather or storm impacts by including contingencies in your roofing budget. |
| Protect with maintenance | Regular inspections and small repairs can prevent major storm damage and extend your roof’s life. |
| Insist on final verification | Secure warranties and confirm every detail with a final walkthrough before making final payment. |
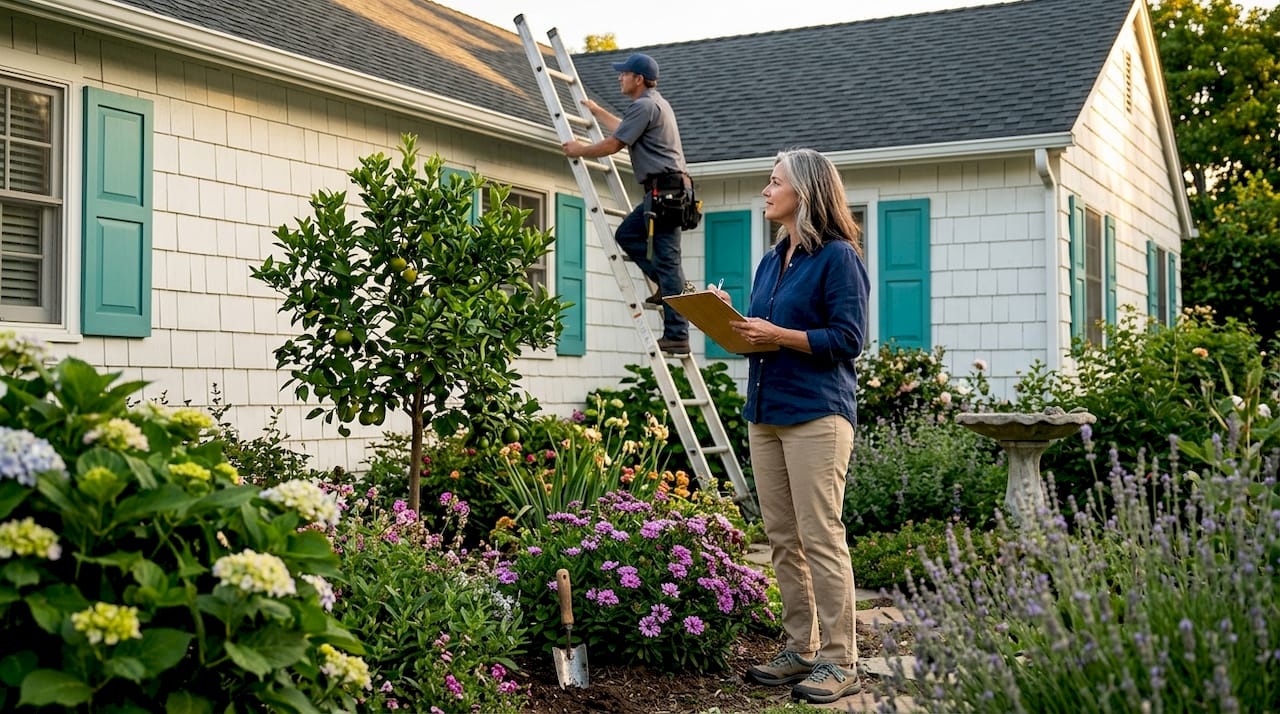
What to know before starting your roofing project
Before a single shingle gets lifted, the decisions you make upfront will shape every outcome that follows. The most critical choice is whether you need a repair or a full replacement. Getting that wrong is expensive either way: under-investing in a failing roof leads to repeat repairs, while replacing a roof that still had years left wastes thousands of dollars.
Manufacturer guidance on repair vs replace points to four core decision factors: the roof’s age, the extent of the current damage, the history of past repairs, and the comparative cost between fixing and replacing. A 10-year-old asphalt shingle roof with isolated damage after a storm is a strong repair candidate. A 22-year-old roof that has been patched three times in five years is almost always better off replaced, especially when you factor in Florida’s relentless UV exposure and hurricane season.
Working through the roof repair process means you also need to understand Florida-specific building code requirements. Broward County and Orange County, for example, have stricter wind-resistance standards than many other states. A contractor unfamiliar with local permitting requirements can slow your timeline by weeks.
Key preparation checklist:
- Gather at least 3 years of maintenance and repair records for your roof
- Pull your homeowner’s insurance policy and review storm damage coverage limits
- Confirm the roof age and original material specifications
- Research roofing certifications before contacting contractors
- Document current damage with timestamped photos for insurance purposes
Here’s a quick reference for the repair-vs-replace decision:
| Factor | Lean toward repair | Lean toward replacement |
|---|---|---|
| Roof age | Under 10 years | Over 20 years |
| Damage area | Less than 30% of roof | More than 30% of roof |
| Repair history | No prior repairs | Multiple past repairs |
| Comparative cost | Repair under 35% of replacement cost | Repair over 50% of replacement cost |
| Insurance status | Claim covers targeted damage | Adjuster recommends full replacement |
Pro Tip: Always request that your contractor pull the permits. In Florida, unpermitted roof work can void your homeowner’s insurance and create serious complications when you sell the property. This one step protects you legally and financially.
Certified contractors are not just a nice-to-have. They carry manufacturer-backed credentials that unlock system warranties, which are far more valuable than basic labor warranties. Those warranties often require certified installation as a condition of coverage.
Step-by-step roofing project management process
With solid preparation behind you, managing the actual execution of your project comes down to clear phases and consistent communication. The biggest source of conflict between homeowners and contractors is scope creep: work that was never agreed upon shows up on the final invoice. Locking scope after the estimate is approved is the single most important operational step you can take.
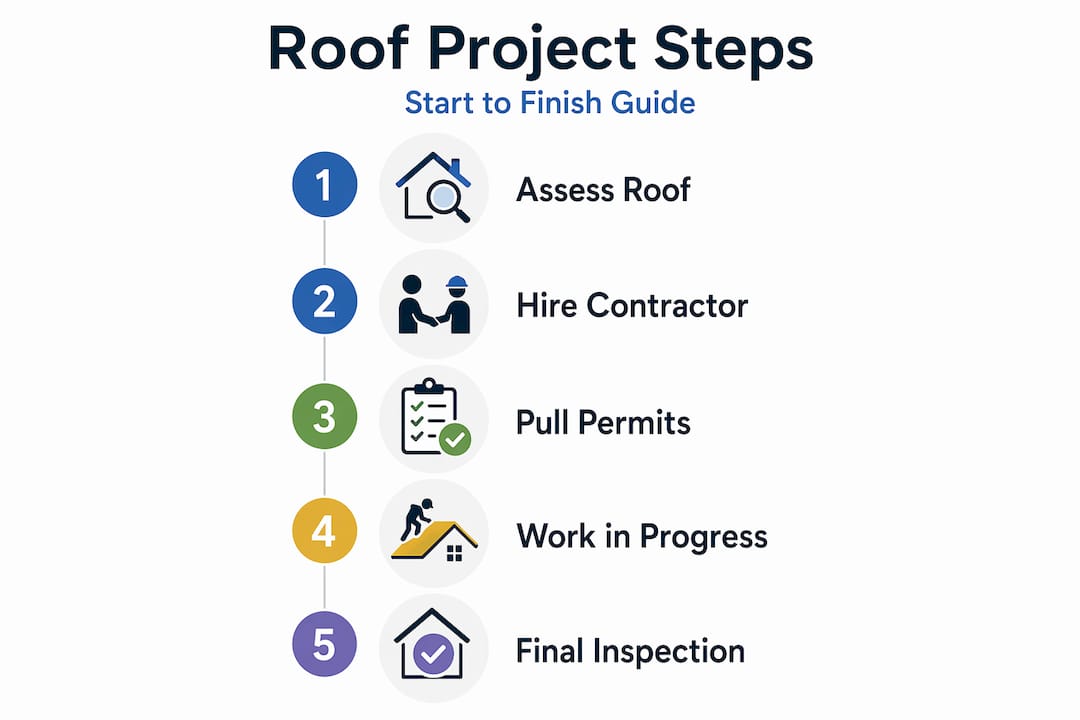
Established roofing project management principles cover exactly this: locking scope after estimate approval, coordinating crews with real weather windows, controlling material delivery timing, tracking progress updates, and running structured checkpoints at the start, middle, and end of the job. These aren’t just contractor best practices. They’re tools you as a homeowner should be demanding.
The four project execution phases:
-
Scope lock and contract review. Before signing, confirm every line item in the estimate matches the agreed scope. Verify material specifications, brand names, and color choices are documented. Request a written change order process for anything that arises during the job.
-
Scheduling and weather coordination. In Central Florida, the wet season runs roughly from June through September. Smart scheduling means booking exterior tear-off and installation work during confirmed dry windows, not just hoping for good weather. Ask your contractor how they handle weather delays and whether you will be notified.
-
Material delivery and site security. Shingles, underlayment, and flashing should arrive the day before or morning of installation, not days in advance. Materials left on-site overnight are vulnerable to theft and moisture damage. Confirm the delivery window in writing.
-
Checkpoint inspections. Professional roofing project management tips reinforce that structured checkpoints catch problems before they multiply. There should be a pre-start walkthrough to confirm site readiness, a kickoff check on day one to verify materials, a mid-job review to inspect underlayment and flashing before they’re covered up, and a final closeout walkthrough with a punch list.
“The mid-job inspection is the one homeowners most commonly skip—and it’s the one that matters most. Once the final layer goes down, hidden installation errors become hidden warranty headaches.”
Here’s how structured checkpoints compare to unmanaged projects:
| Project stage | Managed project | Unmanaged project |
|---|---|---|
| Scope changes | Documented change orders | Verbal agreements, billing surprises |
| Material delivery | Timed to crew schedule | Early delivery, weather exposure risk |
| Mid-job review | Underlayment and flashing verified | Issues buried under final materials |
| Final walkthrough | Punch list completed before payment | Callbacks, disputes, and delays |
| Warranty activation | Documentation submitted at closeout | Missing paperwork, voided coverage |
Pro Tip: Take your own photos at each checkpoint. Contractors expect this from informed homeowners, and it creates a shared visual record that resolves disputes quickly if they arise later.
Your roof project guide should also clarify how payment is structured. Avoid paying more than 10 to 15 percent upfront. Stagger payments to milestones so your contractor has a financial incentive to complete each phase correctly.
Budgeting, risk management, and storm-prevention tips
Understanding the process is critical, but managing your budget and protecting your roof from Florida’s unpredictable storms takes your project from good to great. Many homeowners budget for the base estimate and nothing else. That approach leaves you financially exposed when reality arrives.
A realistic roofing project budget should include the base estimate, a contingency of 10 to 15 percent for hidden damage discovered during tear-off, permit fees, and any costs for temporary protection like tarps if the project spans multiple days. For larger commercial properties, add line items for site management and crew coordination time.
Florida-specific risk factors that affect every roofing project include:
- Storm interruptions. June through November is hurricane season. A project that starts in August needs a weather contingency plan baked in.
- Material shortages. After major storms, shingles and underlayment can become regionally scarce. Lock in your materials before the work begins.
- Labor delays. Demand for roofers spikes after storm events. Booking a certified contractor in advance of storm season is far cheaper than calling urgently in October.
- Permit processing delays. Some Florida counties have backlogged permit offices. Factor an extra one to two weeks into your timeline for permitting.
Annual roof maintenance is the most cost-effective risk management strategy available to homeowners. Routine actions like checking shingles, cleaning gutters, addressing flashing gaps, inspecting attic ventilation, and trimming overhanging trees significantly reduce the chance of small vulnerabilities becoming catastrophic failures.
The step-by-step roof maintenance approach works because it catches minor issues before they escalate. A loose piece of flashing around a chimney costs $150 to fix. Left unaddressed through a wet season, that same issue can cause interior water damage exceeding $10,000.
A good prevention calendar for Central Florida homeowners looks like this:
- March/April: Pre-storm-season inspection, gutter cleaning, check attic ventilation
- June: Confirm roof is clear of debris before wet season begins
- Post-storm (any time): Visual inspection from ground level; call for professional check if you see lifted shingles or debris impact
- November: Post-hurricane-season inspection, document condition for insurance records
According to insurance industry data, homes with documented annual roof maintenance face significantly lower claim rejection rates after storm events than those with no maintenance records.
Use the roof maintenance checklist as your baseline. Spending a few hundred dollars per year on preventive maintenance is the single best return on investment a Florida homeowner can make relative to the cost of reactive storm repairs.
Pro Tip: Store your maintenance records alongside your insurance policy documents. If you ever need to file a storm damage claim, a clear maintenance history demonstrates due diligence and can accelerate claim approval.
Verification and post-project best practices
Bringing the project to a close isn’t just about finishing the work. It’s about confirming quality and setting up for long-term roof success. A project isn’t complete when the crew drives away. It’s complete when you have verified quality, activated warranties, and scheduled your next maintenance check.
Operational risk control frameworks are built around defined closeout procedures: a final walkthrough, a punch list of any remaining items, and confirmation that all documentation is in order. These aren’t formalities. They are your last opportunity to catch installation issues before the contractor is no longer on-site.
Final walkthrough checklist:
- Confirm all debris and old roofing material has been removed from the property
- Inspect ridge caps and edge details for uniform installation
- Check all flashings around chimneys, vents, skylights, and valleys
- Verify gutters and downspouts are clear and properly reattached
- Review attic interior for any signs of daylight, moisture, or improper ventilation
- Confirm all permit signoffs and inspections are complete
- Collect manufacturer warranty registration documentation
- Receive a copy of the contractor’s labor warranty in writing
Warranty activation often requires specific documentation: proof of certified installation, registered product serial numbers, and sometimes a third-party inspection. If any of these steps are skipped, you could lose years of coverage without realizing it.
| Post-project task | Why it matters | Deadline |
|---|---|---|
| Warranty registration | Activates manufacturer coverage | Within 30 days of completion |
| Permit final inspection | Confirms code compliance | Before contractor demobilizes |
| Insurance notification | Updates replacement value records | Within 30 days of completion |
| First maintenance check | Catches installation settling issues | 6 months after project close |
| Photo documentation | Creates baseline for future claims | Immediately at closeout |
“A completed project without documented proof of warranty registration is a liability, not an asset. The paperwork is as important as the shingles.”
Use the roof maintenance guidance to build your post-project maintenance schedule. The first year after a new roof installation is actually when many small issues surface, from minor flashing adjustments to caulk gaps around penetrations. A six-month check-in inspection catches these while they are still inexpensive to address.
Why most roofing project headaches are avoidable: Our experience
Here’s the uncomfortable truth we’ve learned working across Brevard, Volusia, and Orange counties: almost every difficult roofing project we’ve seen could have been prevented at the planning stage. Homeowners often assume that delays, failed inspections, and leak callbacks are just part of the roofing experience. They aren’t. They are symptoms of poor scope definition and skipped checkpoints.
The conventional wisdom says you shop for the lowest bid and hope for the best. We’ve seen that approach cost homeowners two and three times the original project price when the first contractor cuts corners that require fixing later. The lowest bid is rarely the best value in a market where labor quality and process discipline are invisible until something goes wrong.
Certified roofers in Florida aren’t just contractors with extra marketing. Certification programs require documented training, quality audits, and ongoing accountability to manufacturer standards. The result is measurably fewer defects, better insurance claim outcomes, and warranties that actually hold up. The certification is the proof of process, not just a logo on a business card.
What we’ve also learned is that homeowners who stay engaged through checkpoints get dramatically better outcomes than those who hand over a deposit and check back in at the end. You don’t need to be a roofing expert. You just need to ask the right questions at each phase, show up for the mid-job walkthrough, and insist on documentation at every step. That engagement signals to any contractor that you’re an informed client, and that alone changes how much care goes into the work.
The long-term value of your roof is built from process and documentation, not just materials. A premium shingle installed carelessly will fail faster than a mid-grade shingle installed by a certified contractor following every checkpoint. Process is the real product.
Ready to make your roofing project stress-free?
Managing a roofing project in Central Florida doesn’t have to feel like guesswork. When you combine the right planning approach, certified professional support, and consistent documentation, you eliminate most of the stress, cost overruns, and post-project surprises that trip up homeowners every year.

Thomas Roofing and Repair has spent years helping homeowners and property managers across Brevard, Volusia, and Orange counties navigate exactly these challenges. Whether you’re dealing with fresh storm damage or planning a proactive replacement before hurricane season, our team brings certified expertise, transparent process management, and a genuine commitment to getting it right the first time. Check out our Central Florida storm repair guide for storm-specific guidance, browse roof repair examples to see real project outcomes, or request a free estimate for roof installation in Horizon West. We’re here to make your next roofing project the last one you have to worry about.
Frequently asked questions
How do I decide whether to repair or replace my roof?
Base the decision on the roof’s age, the extent of damage, prior repair history, and comparative cost between options. Manufacturer guidance consistently points to these four factors and recommends consulting a certified contractor for a thorough on-site inspection before committing to either path.
What are the main causes of roofing project delays in Florida?
Florida projects are most often delayed by weather disruptions, regional material shortages after storm events, and crew coordination issues around permitting. Sound project management practices like locking scope early, synchronizing material deliveries, and using structured checkpoints significantly reduce how often these issues derail a timeline.
How often should I schedule roof inspections in Central Florida?
You should schedule a professional inspection at least once per year and immediately after any major storm passes through your area. Annual maintenance protocols that include shingle checks, gutter cleaning, and attic ventilation reviews catch early vulnerabilities long before they become costly failures.
Why should I use a certified roofing contractor?
Certified contractors deliver fewer installation defects, better support during insurance claims, and access to manufacturer system warranties that standard labor guarantees can’t match. Manufacturer standards specifically encourage certified contractor use because certification is tied directly to quality accountability and warranty eligibility.
What should be included in a roofing project contract?
A solid roofing contract should clearly specify the full scope of work, exact materials with brand and product names, the complete project timeline, total cost with a payment schedule, the process for change orders, and all warranty details for both labor and materials. Missing any one of these elements creates the conditions for billing disputes and unresolved defects after the project closes.