
Photograph every point of damage from the ground with GPS and timestamp data turned on, save the original files, pull the county storm report from the National Weather Service, and start a dated claim folder before you do anything else. This single habit, more than any other, determines whether an adjuster approves your full scope or a partial one.
Insurers want proof, not impressions. That means:
- Wide, context shots of every roof slope and elevation
- Close-ups of each damage point with a scale reference like a ruler or a coin
- A narrated video walkthrough tying the photos together
- Photos of soft metals (gutters, downspouts, AC condenser fins) as backup evidence
The rest of this guide walks through exactly how to build that file, including the NOAA and NWS reports, InterNACHI-style inspection methods, and the paper trail that keeps a claim from getting picked apart.
Key Takeaways
A successful roof damage claim depends on photographing everything from the ground with metadata intact, pairing that evidence with an official NOAA storm report, and backing it all with a written paper trail.
| Point | Details |
|---|---|
| Photograph before you touch anything | Shoot wide context shots and close-ups before moving debris or starting mitigation work. |
| Pull the official storm record | Download the NOAA/NWS county report for your date to independently confirm the weather event. |
| Check soft metals and the attic | Gutters, downspouts, AC fins, and attic staining all corroborate exterior roof damage. |
| Keep a labeled paper trail | Maintain a storm timeline, communications log, and contractor estimate in one dated folder. |
| Call a licensed roofer early | Thomas Roofing and Repair provides inspections, aerial imagery, and written estimates that match what adjusters expect. |
Table of Contents
- Start With a Safe Ground-Level Inspection
- How Do You Take Photos Insurers Will Actually Accept?
- What Interior Signs Prove the Roof Caused the Damage?
- Should You Pull the Official Storm Report?
- Building the Paper Trail Adjusters Expect
- What Should You Say (and Not Say) to the Adjuster?
- The First 72 Hours: A Quick-Action Checklist
- How Thomas Roofing and Repair Supports Your Claim
- Frequently Asked Questions
- Sources
Start With a Safe Ground-Level Inspection
Do not get on the roof yet. Walk the perimeter first and look for sagging rooflines, visible holes, missing shingles, debris scattered across the yard, and downed power lines. If you see live wires or structural collapse, call emergency services before you touch a camera.
Wet decking, active leaks, or any visible sag are your signal to stay off the roof entirely. A licensed roofer inspection with proper harness gear is worth the wait; a fall is not a risk worth taking for a few extra photos.
On your first walk-around:
- Shoot wide establishing photos from all four elevations of the house
- Photograph where shingles or debris landed, without moving them yet
- Check gutters, downspouts, and AC fins for dents or granule buildup, both commonly used to confirm hail impact
- Note anything unusual, like a satellite dish knocked loose or a vent cap missing
Pro Tip: Do not move debris until it’s photographed in place. If safety forces you to tarp the roof before an adjuster arrives, photograph the tarp itself, including its edges and anchor points, and keep every receipt tied to that emergency work.
How Do You Take Photos Insurers Will Actually Accept?
Start wide, then go tight. Shoot the whole slope first to establish scope, then move to close-ups of each individual damage point, then soft metals, and finish with one narrated video that connects all of it.
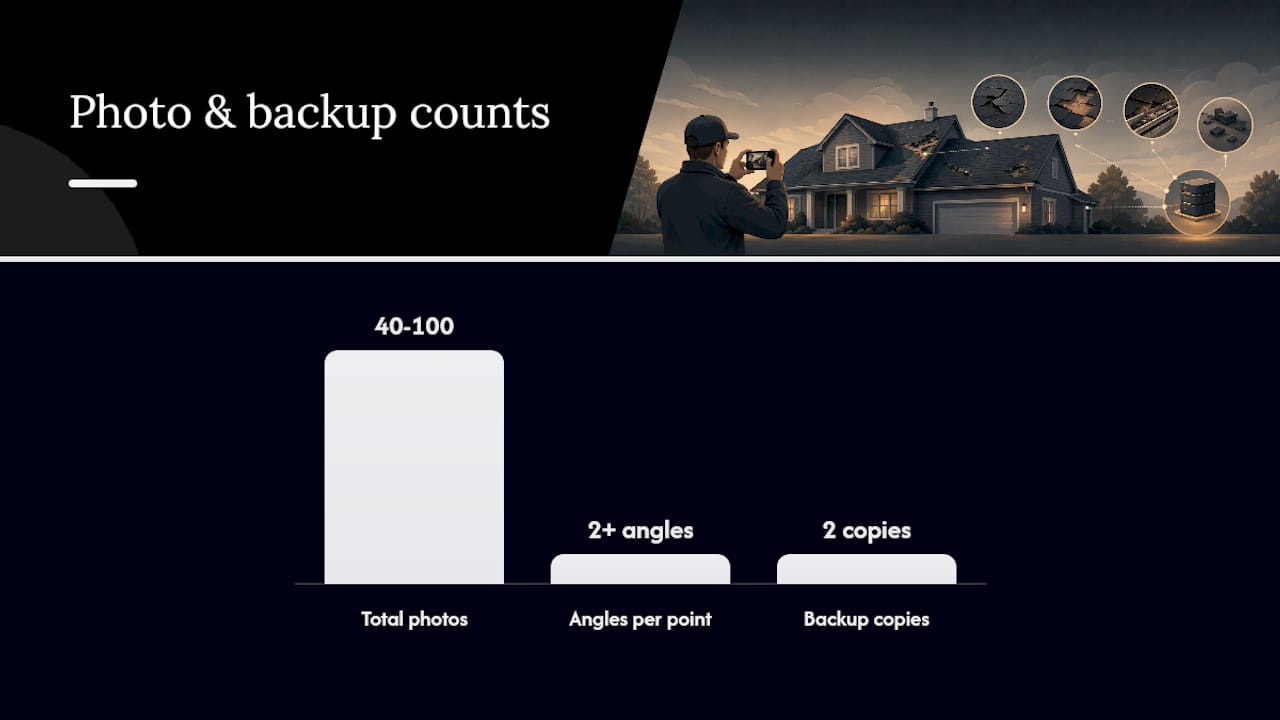
A structured shot list matters more than raw photo count, though most adjusters expect a number of images appropriate for the roof size and damage complexity for an average residential roof. Depending on roof size, plan for 40 to 100 total photos.
Before you start shooting, run this checklist:
- Set your phone to its highest resolution and turn on location services so GPS and timestamp data attach automatically
- Keep original files. Never send screenshots or images pulled from text messages or social media, since compression strips the metadata adjusters rely on
- Include a scale reference (a ruler, a quarter, a tape measure) next to small dents or punctures so size is verifiable
- Shoot each damage point from at least two angles
Videos should stay under five minutes and get backed up in two places, your phone and a cloud drive, since a lost phone should never mean losing a claim.
Drones add real value for full-roof coverage, but check for active FAA flight restrictions in your area before flying one after a major storm. If you don’t own a drone, ask a licensed roofer to share their aerial imagery instead. Most storm-response contractors already carry one.
Pro Tip: Narrate your walkthrough video out loud with the date, your address, and a description of each slope as you scan it. The audio track gives context that timestamp metadata alone can’t provide, and it’s the kind of detail that makes a file hard to dispute.
What Interior Signs Prove the Roof Caused the Damage?
Insurers need a continuous story from roof to living room. That story starts in the attic.
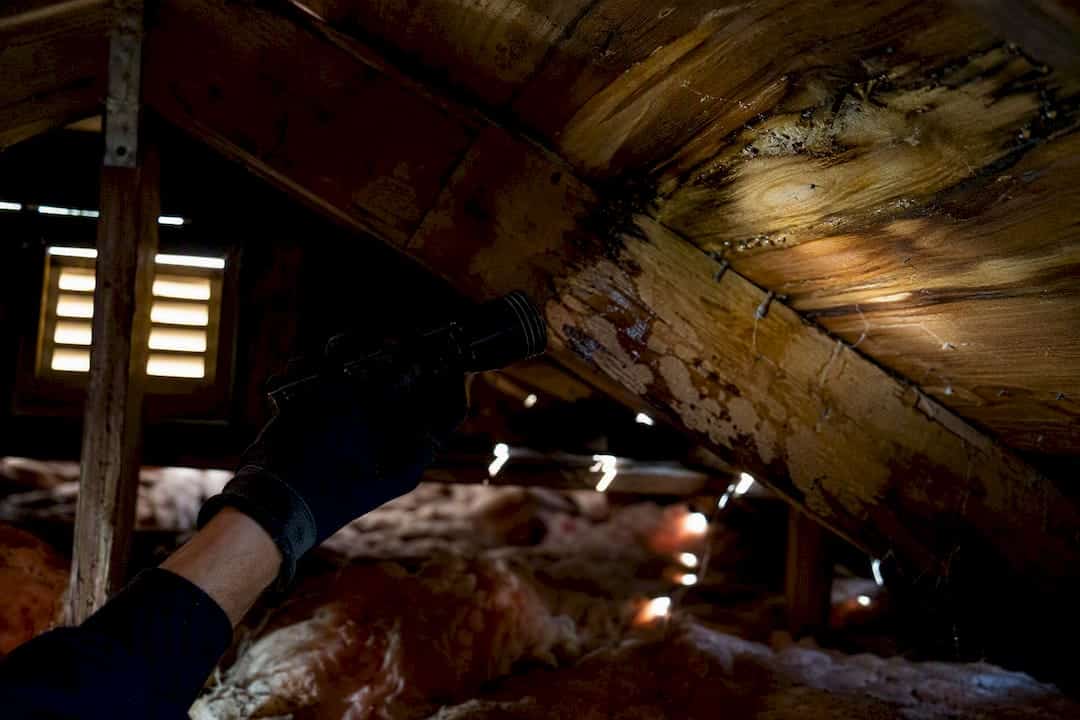
Climb up with a flashlight and look for wet insulation, visible daylight coming through the decking, and dark water staining on the rafters. Photograph each finding twice, once as a wide context shot and once as a tight close-up, and pair every attic photo with the corresponding ceiling shot from the room directly below it.
Downstairs, document ceiling stains, bulging drywall, and warped flooring the same way, wide first, then close. That pairing is what lets an adjuster trace a leak path from the roof deck to the living room floor.
If HVAC equipment, ductwork, or personal property got wet, photograph serial numbers and receipts wherever you still have them. Never poke at exposed wiring or suspected electrical damage. Photograph it from a safe distance and call an electrician or your contractor instead.
Should You Pull the Official Storm Report?
Yes, every time. The NOAA Storm Events Database is the one piece of evidence in your file that no adjuster can argue with, because it’s independent government data confirming a specific storm hit your county on a specific date.
Here’s how to get it:
- Search the NOAA Storm Events Database by state, county, and date range, and check the local NWS forecast discussion for the same window
- Save both the PDF and a screenshot of the record, since formats occasionally change on government sites
- Label the file clearly (something like
NOAA_County_StormDate.pdf) and drop it straight into your claim folder
The fields that matter most are confirmed hail size, peak wind gusts, and the storm’s tracked path through your county. Those three data points are what adjusters cross-reference against your photos.
Pro Tip: Reference the storm report directly in your written timeline. A sentence like “NOAA confirmed 1.5-inch hail in [county] on [date], matching the impact pattern documented in photos 12 through 20” does more work than the photos alone.
Building the Paper Trail Adjusters Expect
Photos prove damage happened. Paperwork proves you handled the claim correctly. You need four written records:
- A storm timeline log noting the date, time, and observed conditions
- A damage description sheet using objective language (no assumptions about cause)
- A communications log tracking every call and email, including claim numbers and adjuster names
- A contractor inspection report with a line-item estimate
Name your files consistently. A folder labeled [Date]_[Address]_RoofClaim with photos named by pattern, something like North_Shingle_Crease.jpg, saves hours when an adjuster asks for specific evidence later.
A licensed roofer’s written scope carries real weight in negotiations, and it’s often the document that supports a supplement when the initial insurance estimate misses damage. If you had to tarp or make temporary repairs, photograph the before-and-after and keep every invoice. Those costs are usually reimbursable.
Pro Tip: Email yourself the entire zipped evidence package once it’s assembled. That creates a server-side, timestamped copy you can forward directly to your carrier, which settles any dispute about when documentation was delivered.
What Should You Say (and Not Say) to the Adjuster?
Be present for the joint walk-around, and bring your full file with you. Get the adjuster’s name, company, and license number, and ask for written scope notes before they leave.
Before that meeting happens:
- Have your photo set, storm report, contractor estimate, and communications log ready to share by email or cloud link
- Call a licensed roofer within 48 hours if you see exposed decking, missing shingles, creased shingles, or active interior leaks
- Take your own photos during the joint walk-around, side by side with the adjuster’s
Stick to observations, not conclusions. Saying “the damage is definitely from the storm” invites pushback. Saying “here’s the NOAA report for that date, and here’s the damage pattern that matches it” does the arguing for you.
Pro Tip: If the adjuster mentions a scope change on-site, ask them to confirm it by email that same day. Verbal promises tend to disappear once the adjuster is back at their desk.
The First 72 Hours: A Quick-Action Checklist
- Check for safety hazards, and stop immediately if you see downed lines or structural collapse
- Shoot perimeter and elevation photos
- Photograph soft metals: gutters, downspouts, AC fins
- Check the attic and ceilings for water intrusion
- Pull the NOAA/NWS storm report for your date and county
- Call a licensed roofer if the roof is unsafe or decking is exposed
- Save original files and back them up to the cloud
Keep these on hand for the claim: original photo and video files, the storm report PDF, contractor estimates, tarping receipts, and every message exchanged with your insurer.
Pro Tip: Copy this checklist into your phone’s notes app before a storm season even starts. Scrambling to find a template while standing in your yard costs you time you don’t have.
From Our Experience: Common Mistakes and Quick Fixes
The claims that stall usually share the same gaps: no soft-metal photos, debris moved before it’s shot, no original files, no weather report. The fix is almost always the same, too. Shoot more than feels necessary, pair every attic photo with its ceiling match, date everything, and get a roofer’s written scope the moment the adjuster’s number looks short.
How Thomas Roofing and Repair Supports Your Claim
Thomas Roofing and Repair is the alternative to piecing together your own inspection report from scratch. Rather than guessing what an adjuster wants to see, our licensed crews document your roof the same way insurance carriers expect it documented, ladder-level photos, drone imagery where it’s safe and legal, and a written scope with line-item pricing.

When we inspect a storm-damaged roof, you get the full package: photos matched to each elevation, aerial coverage when conditions allow it, a documented estimate, and receipts for any emergency tarping we perform. That’s the same file structure this article just walked you through, built by people who’ve stood on thousands of Central Florida roofs after a storm rolled through.
If your roof has exposed decking, missing shingles, or an active interior leak, don’t wait on a phone call. Reach out to our emergency roof repair workflow team within 48 hours. We serve homeowners and property managers throughout Central Florida, including Brevard, Volusia, and Orange counties, and we can typically get a licensed inspector out fast enough to catch damage before secondary leaks make the claim more complicated.
Frequently Asked Questions
What are the most important ways to document roof damage for an insurance claim?
Photograph the roof from the ground first, capture close-ups of every damage point with a scale reference, check soft metals like gutters and AC fins, inspect the attic and ceilings for water intrusion, and pull the official NOAA storm report for your date and county.
How many photos should I take of roof damage?
Plan for 40 to 100 photos depending on roof size and damage extent. A structured shot list covering all four elevations, close-ups, and soft metals typically produces 40 to 75 usable images.
Do I need a professional roof inspection before filing a claim?
Yes, especially if you see exposed decking, missing shingles, or interior leaks. A licensed roofer’s written estimate carries weight with adjusters and can support a supplement if the initial offer falls short.
Can I use my phone to document roof damage, or do I need special equipment?
A phone with GPS and location services enabled is enough for most homeowners. Keep GPS on so timestamps and location data attach automatically, and always save the original files rather than compressed copies.
What should I avoid saying to an insurance adjuster?
Avoid stating definitively that damage was caused by a specific storm. Present your photos, the NOAA storm report, and your contractor’s estimate, and let that documentation make the connection for you.
This article is general information, not a substitute for advice from a qualified financial advisor. Consult a qualified financial professional about your own circumstances before acting on anything here.
Sources
- Filing a claim — documentation — RoofPolicy
- Roof storm damage photos for insurance — Econo Roofing
- Documenting roof damage for your insurance claim — Teague Roofing Plus
- Storm damage roof documentation: the first 72 hours — Roofing IT