
Roof sheathing, also called roof decking, is the structural base layer of boards or panels fastened directly to your rafters or trusses. It holds your shingles in place, gives underlayment something to nail into, and carries every load your roof faces, from snow and foot traffic to wind uplift during a storm. Without sound sheathing, nothing above it performs the way it should. If you’re planning a roof replacement or evaluating a contractor’s estimate, understanding what’s underneath the shingles is the difference between a smart decision and an expensive surprise.
Thomasroofingandrepair works with homeowners across Brevard, Volusia, and Orange counties who often don’t think about their decking until a contractor mentions rot or soft spots during tear-off. This guide covers everything you need to know: materials, installation, code guidance, inspection signs, and cost impacts.
Table of Contents
- What does roof sheathing actually do?
- Plank sheathing vs sheet sheathing: which does your roof have?
- Plywood vs OSB: which sheathing material is right for your roof?
- How to install roof sheathing correctly
- Building codes, span ratings, and panel thickness
- When does sheathing need to be replaced?
- How sheathing condition affects your roof replacement cost
- Maintenance practices that extend sheathing life
- Climate and regional considerations for Florida homeowners
- Key Takeaways
- What contractors notice that homeowners usually miss
- Thomasroofingandrepair can inspect and repair your decking
- Authoritative sources and further reading
What does roof sheathing actually do?
Roof sheathing serves four distinct functions inside a complete roof system. First, it acts as the structural plane that ties your rafters or trusses together, giving the roof assembly its rigidity. Second, it’s the nailing substrate for both underlayment and your finish roofing material, whether that’s asphalt shingles, metal panels, or tile. Third, it distributes point loads across multiple framing members, so foot traffic during installation or a heavy snow load doesn’t concentrate on a single rafter. Fourth, it contributes to diaphragm action, meaning it helps the roof plane resist lateral forces and transfers wind loads down to the walls.
When sheathing fails, the symptoms show up everywhere above it:
- Wavy or rippled roofline caused by delamination or edge swelling pushing panels out of plane
- Ridge telegraphing, where the pattern of the panels shows through the shingles
- Fastener pull-through, where nails lose their grip in soft or rotted wood
- Attic water stains that indicate moisture has been sitting on or in the decking for some time
A useful way to picture the system: rafters or trusses → sheathing → underlayment → shingles. Each layer depends on the one below it. Sheathing is the layer that makes the rest possible.
Plank sheathing vs sheet sheathing: which does your roof have?
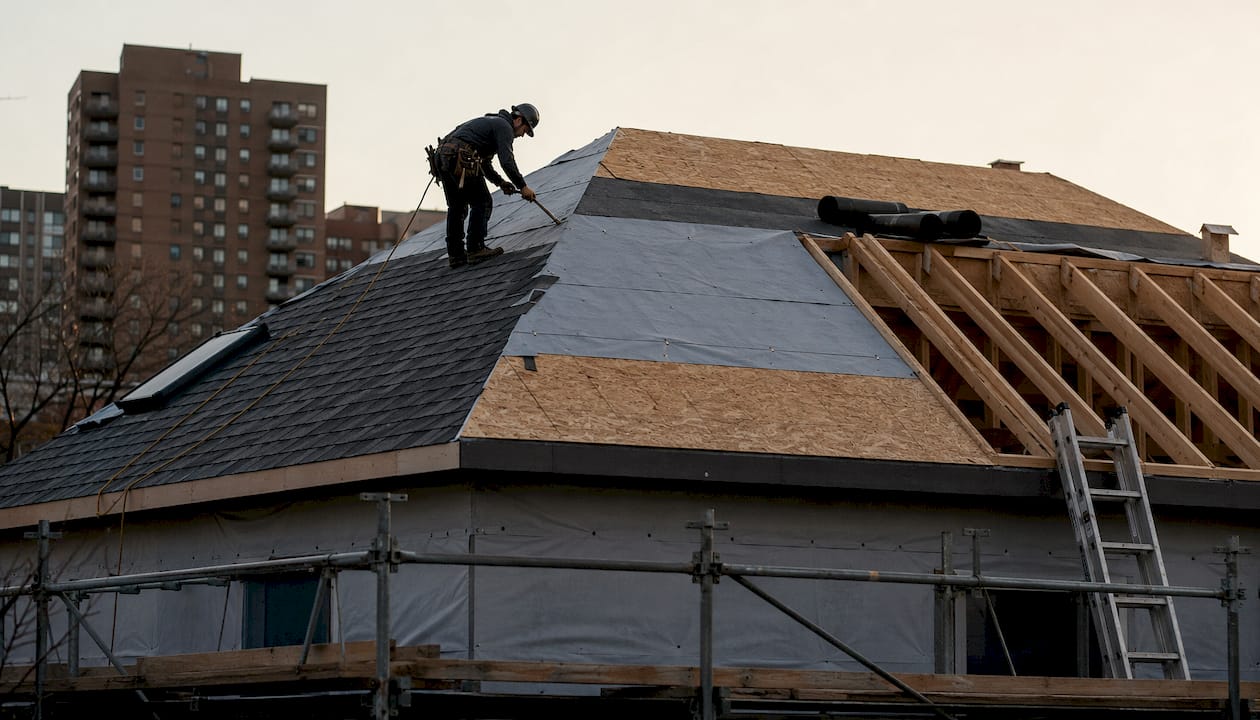
Older homes, particularly those built before the 1960s, typically have plank or board decking. These are individual boards, usually 1×6 or 1×8 nominal lumber, nailed across the rafters with small gaps between them. Old-growth lumber used in that era is often remarkably dense and durable. Many of these roofs are still structurally sound decades later, though the gaps between boards can complicate re-roofing with modern underlayment systems.
Modern construction uses sheet sheathing: large panels (typically 4×8 feet) of plywood or oriented strand board (OSB) installed in a staggered pattern across the framing. Sheet panels are faster to install, more dimensionally consistent, and compatible with every modern roofing material.
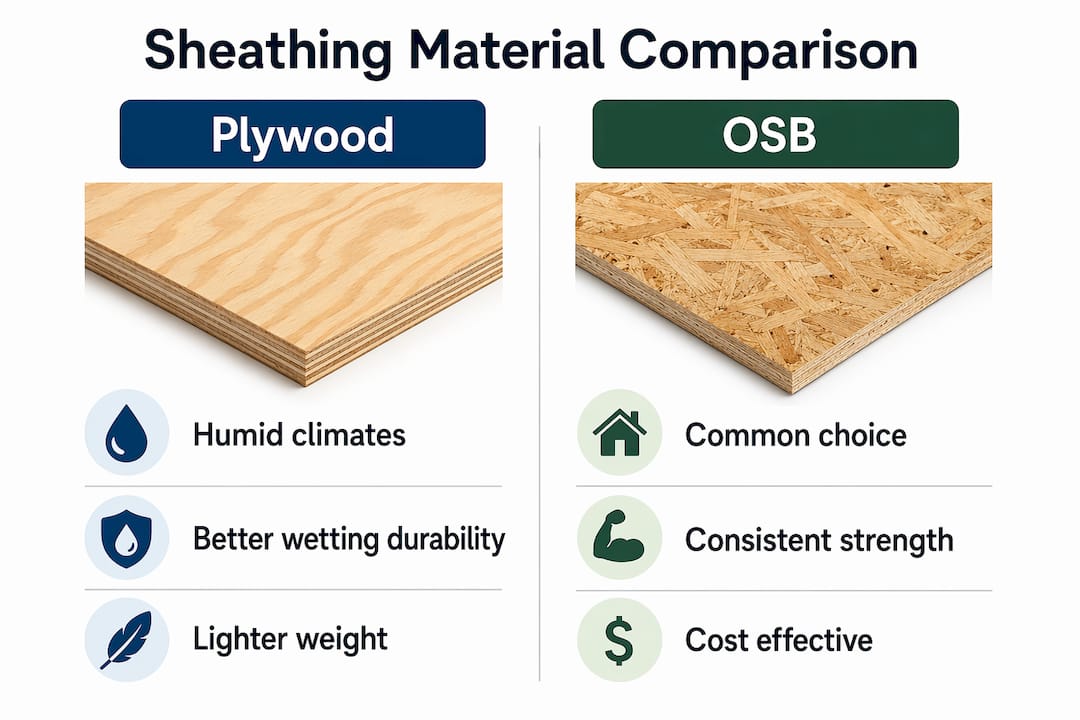
How to tell which you have: Go into your attic on a bright day and look up. If you see individual boards with visible gaps between them, you have plank decking. If you see large, continuous panels with no gaps and a rough or layered surface texture, it’s sheet sheathing. The eave edge of your roof, if exposed, also reveals the panel cross-section clearly.
Pro Tip: If you have plank decking and you’re planning a full re-roof, the Asphalt Roofing Manufacturers Association recommends considering a layer of code-compliant sheet sheathing over the existing boards before installing new shingles, especially if any boards are warped or have gaps wider than 1/4 inch.
Plywood vs OSB: which sheathing material is right for your roof?
Roof sheathing materials break down into two dominant options for modern residential construction: CDX plywood and OSB. Both meet code, both are widely available, and both have real tradeoffs worth understanding before you sign an estimate.
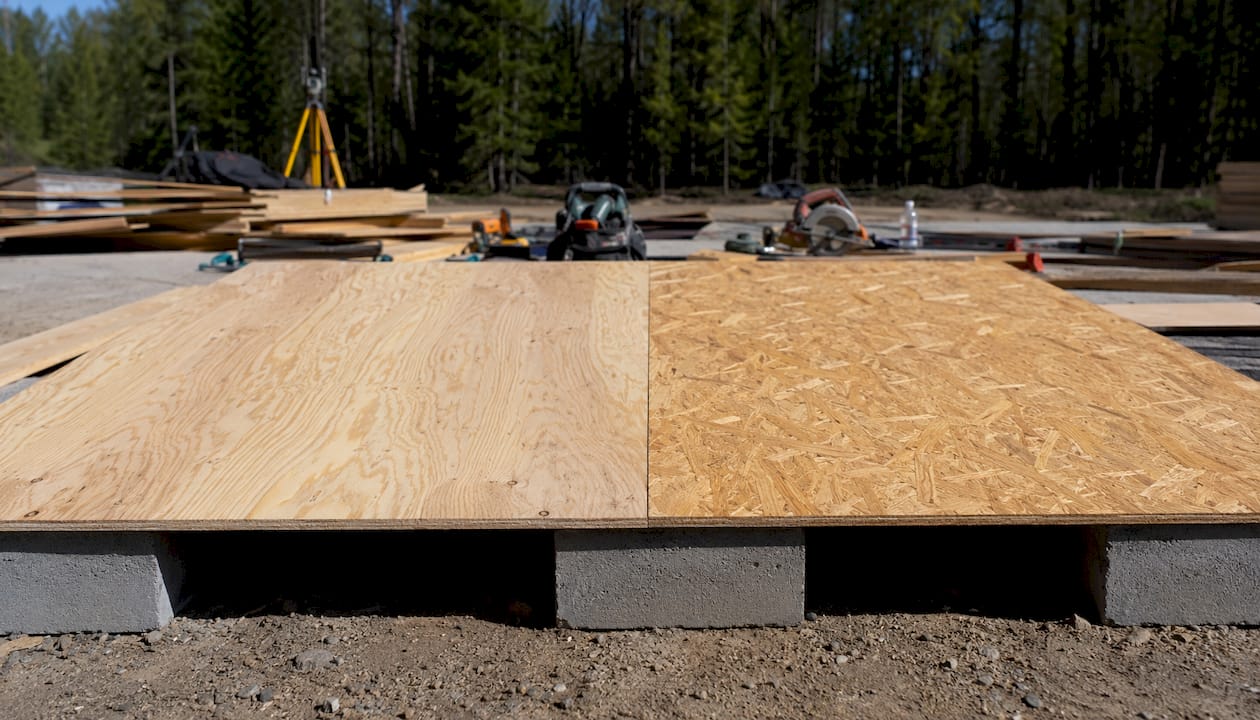
| Feature | CDX Plywood | OSB |
|---|---|---|
| Best for (climate/use-case) | Humid climates, repeated wetting | Dry climates, new construction |
| Moisture resistance | Dries back closer to original shape | Swells at cut edges when wet; recovers slowly |
| Typical residential thickness | 1/2" and 5/8" common | 7/16" and 1/2" common |
| Cost | Higher | Lower |
| Fastening/installation ease | Slightly lighter; familiar to crews | Consistent density; holds fasteners well |
OSB is the most common sheathing material for new residential roofs because it’s strong, dimensionally consistent, and costs less than plywood. The tradeoff is at the cut edges: when OSB stays wet, those edges swell and may not return to their original dimensions. In a climate like Central Florida’s, where humidity is high and storm exposure is frequent, that matters.
Plywood handles repeated wetting and drying more gracefully. It’s lighter than OSB and tends to dry back closer to its original shape after getting wet, which is why many experienced contractors in humid regions prefer it for replacements or premium builds.
Other options exist for specific applications. Plank boards remain in place on older homes and are often left as-is if structurally sound. Gypsum or cementitious panels appear in commercial or fire-rated assemblies but are rarely used in standard residential roofing.
Pro Tip: In Florida and other Gulf Coast states, ask your contractor specifically whether they’re pricing plywood or OSB. The cost difference is real, but so is the performance difference in a humid environment. For roof decking in Central Florida, plywood is often the stronger long-term choice.
How to install roof sheathing correctly
Most homeowners won’t install their own sheathing, but knowing the basics lets you evaluate a contractor’s work and ask the right questions on an estimate.
- Orient panels with the strength axis perpendicular to the rafters. The long dimension of a 4×8 panel runs across the framing, not parallel to it. This is the direction of greatest bending strength.
- Stagger the joints. End joints between panels should not line up in a continuous row across the roof. Staggering by at least one rafter bay distributes stress and prevents a weak line across the deck.
- Leave a minimum 1/8-inch gap at all panel edges. Panels expand with heat and moisture. Tight installation causes buckling and the wavy ridge telegraphing that shows through shingles. This gap is a code-practice requirement, not optional.
- Follow the fastening pattern. Edge nailing (nails along the panel perimeter) is typically spaced closer than field nailing (nails in the panel interior). Tighter edge spacing increases uplift resistance, which matters significantly in high-wind zones.
- Use the correct fastener type. Ring-shank nails hold better than smooth-shank in wind events. The IRC specifies minimum shank diameter and penetration depth for different sheathing thicknesses.
- Start from the eave and work up. Panels should be installed so that upper rows overlap lower rows in the direction of water flow.
Pro Tip: Ask your contractor to show you the nailing pattern they plan to use before work starts. In wind-exposed areas, the difference between standard and enhanced fastening patterns can determine whether your deck stays attached in a major storm. This is a line item worth confirming in writing.
Building codes, span ratings, and panel thickness
The IRC’s roof deck sheathing guidance focuses on span rating, not just nominal thickness, and that distinction matters for every homeowner comparing estimates.
A panel stamp indicates the panel’s allowable span on roof and floor applications without specifying exact numeric values. That stamp is what a building inspector looks for, not the thickness printed on the estimate. A contractor who specifies “1/2-inch OSB” without referencing the span rating may be leaving a compliance gap if your trusses are spaced at 24 inches on center rather than 16 inches.
Common residential thicknesses cover a range suitable for different truss spacing and roofing materials, with specific thickness selected based on structural and material requirements.
Focus on panel span rating and orientation rather than nominal thickness alone. A panel that’s the right thickness but the wrong span rating for your framing spacing is a code problem waiting to surface at inspection. For local code context specific to Florida, Thomasroofingandrepair’s guide to roofing building codes covers what applies in your county.
Pro Tip: Ask your contractor to include the panel brand and APA span rating stamp in the estimate line item. If they can’t or won’t, that’s worth a follow-up conversation before you sign.
When does sheathing need to be replaced?
Not every roof replacement requires new decking. Sound, dry sheathing can be reused. The problem is that you often can’t know the full picture until the old shingles come off.
Signs you can check before tear-off:
- Soft spots when walking the attic floor (or when a contractor walks the roof): spongy areas indicate moisture-compromised wood beneath
- Wavy or uneven roofline visible from the ground, especially along the ridge or field of the roof
- Attic water stains on the underside of the decking, particularly around penetrations (vents, chimneys, skylights)
- Visible rot, mold, or discoloration on the attic-side face of the panels
- Delamination, where plywood layers separate, or edge swelling in OSB panels
- Nail pull-through, where fasteners have worked loose from softened wood
After tear-off, contractors can see additional problems: rot around flashing penetrations, delamination hidden under the felt, and edge damage that wasn’t visible from below. This is why the decision to re-deck is often made during tear-off, not before. Installing new shingles over soft or delaminated sheathing is one of the most common causes of premature roof failure.
A thorough pre-replacement roof inspection checklist can surface many of these issues before work begins, giving you a clearer picture of what to budget.
How sheathing condition affects your roof replacement cost
Sheathing is where unexpected costs in a roof replacement usually originate. The variables that drive the number:
- Material choice: Plywood costs more per sheet than OSB. On a large roof, that difference adds up.
- Extent of damage: Partial replacement (a few sheets around a chimney or valley) costs far less than full re-decking.
- Accessibility: Steep pitches and multi-story homes increase labor time for both removal and installation.
- Disposal: Rotted or delaminated panels have to be hauled away, which adds to the job cost.
- Local labor rates: Central Florida rates differ from national averages, and they vary by county.
The most important thing to ask for: a per-sheet line item for decking replacement in your estimate. Reliable contractors list this separately so you can see exactly what you’re paying if hidden damage is found during tear-off. A lump-sum estimate with no decking line item means you have no baseline for comparison if the contractor comes back mid-job asking for more money.
Pro Tip: When comparing two estimates, confirm both specify the same panel material and span rating. An estimate using 7/16" OSB and one using 1/2" CDX plywood are not apples-to-apples, even if the total price looks similar. Also ask each contractor for their per-sheet replacement rate so you can compare change-order exposure fairly.
For a full breakdown of what goes into a replacement project, Thomasroofingandrepair’s Central Florida roof replacement guide walks through each cost component.
Maintenance practices that extend sheathing life
Most sheathing damage is preventable. The causes are almost always moisture-related, and moisture problems almost always start with something a homeowner can control.
- Keep attic ventilation clear. Blocked soffit vents trap humid air against the underside of the decking. Over months and years, that humidity degrades the wood fiber and adhesives in both plywood and OSB.
- Fix roof leaks immediately. A small leak that drips onto sheathing for one season can rot a panel that would otherwise last decades. Speed matters more than most homeowners realize.
- Clear gutters regularly. Clogged gutters cause water to back up under the eave, which is one of the most common entry points for moisture into the decking at the roof’s edge.
- Inspect after every major storm. Wind events can lift shingles and expose sheathing to direct rain. A post-storm attic check for new water stains takes ten minutes and can catch damage before it spreads.
- Avoid leaving tarps on the roof long-term. Tarps trap moisture against the surface and accelerate the edge swelling that weakens OSB panels.
What a homeowner can handle: clearing vents, cleaning gutters, and doing attic visual checks. What requires a pro: any repair to flashing, penetrations, or sheathing panels themselves.
Pro Tip: In Florida, schedule a professional roof inspection every year, ideally before hurricane season in June. A contractor who catches a soft spot in April can repair it before a storm turns it into a full re-decking job. Thomasroofingandrepair’s roof maintenance guide covers the seasonal tasks worth putting on your calendar.
Climate and regional considerations for Florida homeowners
Florida’s combination of high humidity, intense UV exposure, and hurricane-force winds creates a more demanding environment for roof sheathing than most of the country faces. The material and installation choices that work fine in a dry northern climate can fail prematurely here.
Moisture behavior: OSB’s cut-edge swelling becomes a real problem in climates with repeated wetting and drying cycles. Plywood tends to dry back closer to its original shape after getting wet, which is why it’s often the preferred choice for replacements in humid regions. In Central Florida, where afternoon thunderstorms are routine from June through September, that recovery behavior matters over the life of the roof.
High-wind performance: Fastening pattern is the single biggest variable in how well sheathing survives a hurricane. Tighter edge nailing and ring-shank fasteners increase uplift resistance substantially. The APA and IRC both provide guidance on enhanced fastening schedules for high-wind zones, and Florida’s building code incorporates wind-speed maps that determine which schedule applies to your location.
For homes in hurricane-exposed areas, the scope of work for a re-roofing project should explicitly state the fastening pattern, fastener type, and panel span rating. Vague specifications leave room for shortcuts that only become visible after a storm.
Pro Tip: If your home is in a wind-speed zone above 130 mph (much of coastal Brevard and Volusia counties), ask your contractor to reference the Florida Building Code wind-speed map and confirm the fastening schedule in writing. Thomasroofingandrepair’s team handles storm damage repair across Central Florida and can walk you through what the code requires for your specific address.
Key Takeaways
Roof sheathing is the structural foundation of every roof system, and its condition, material, and installation quality directly determine how long your roof lasts and how it performs in a storm.
| Point | Details |
|---|---|
| What sheathing is | Boards or panels fastened to rafters that support underlayment, shingles, and all roof loads. |
| Top replacement signs | Soft spots, wavy roofline, attic water stains, delamination, and nail pull-through all signal compromised decking. |
| Material choice matters | Plywood handles repeated wetting better than OSB; OSB costs less and suits drier climates and new construction. |
| Span rating over thickness | A panel stamped — must match your truss spacing; nominal thickness alone does not confirm code compliance. |
| Thomasroofingandrepair | Provides photo-documented inspections, per-sheet decking estimates, and re-decking services across Central Florida. |
What contractors notice that homeowners usually miss
The deck is where roofing jobs get honest. You can walk a roof, look at shingles, and feel reasonably confident about what you’re buying. Then the tear-off starts, and the real story is in the wood underneath.
The most common surprise: moisture damage that’s concentrated around penetrations, valleys, and the first two feet of the eave, while the field of the roof looks fine. Homeowners often expect either “all bad” or “all good.” The reality is usually patchy, and that patchiness is exactly why per-sheet pricing matters. A contractor who quotes a flat re-decking fee without seeing the deck is guessing. A contractor who quotes per-sheet and documents every replaced panel with photos is giving you something you can verify.
…
Thomasroofingandrepair can inspect and repair your decking
Sheathing problems are almost always fixable when caught early. The cost of replacing a few sheets during a planned re-roof is a fraction of what it costs when hidden rot forces a mid-job change order, or when a storm exposes decking that should have been replaced two years ago.

Thomasroofingandrepair serves homeowners across Central Florida, including Brevard, Volusia, and Orange counties, with photo-documented inspections, per-sheet decking replacement line items, and full re-roofing services. The team provides clear estimates that separate decking costs from labor and materials so you’re never surprised by a change order. Financing options and insurance claim assistance are available for qualifying projects.
If you’re planning a roof replacement or want a professional eye on your current decking condition, schedule a roof installation consultation or reach out directly for a free estimate. For urgent situations after storm damage, the emergency repair workflow page explains how to get fast service across the region.
Authoritative sources and further reading
- IRC 2024 Roof Deck Sheathing Guidance (Jaspector) — span rating requirements and panel installation code reference
- 2018 International Residential Code, Chapter 9: Roof Assemblies (ICC) — fastener specifications and sheathing requirements by roofing material
- ICC Digital Codes: IRC 2021, Section R803.1 — roof ceiling construction and sheathing provisions
- ARMA Technical Bulletin: Reroofing Replacement vs Recover — industry guidance on when to re-deck over plank boards
- What Is Roof Sheathing? OSB vs. Plywood (IBEX Roof) — material overview and function explanation
- Types of Roof Sheathing (Presidio Roofing) — OSB and plywood performance comparison including moisture behavior
- Will My Roof Decking Get Replaced During a Roof Replacement? (Bill Ragan Roofing) — per-sheet pricing guidance and change-order transparency
- Roof Sheathing Guide: Types, Damage & Replacement (RoofQuotes) — inspection checklist and damage signs for homeowners