
TL;DR:
- Immediate assessment and documentation are crucial to prevent further damage and facilitate insurance claims.
- Preparedness with proper tools, materials, and professional relationships improves storm damage recovery.
- Regular roof maintenance and upgrades enhance resilience against future Florida storm damage.
A Central Florida storm can strip shingles, punch holes through decking, and send water pouring into your home in a matter of minutes. The stress that follows is real, and the decisions you make in the next few hours matter more than most homeowners realize. Acting fast, staying safe, and following a clear plan can dramatically cut your repair costs and prevent long-term structural damage. This guide walks you through every stage of storm roof recovery, from your first post-storm inspection to coordinating professional repairs and protecting your home against the next big storm.
Table of Contents
- Assessing roof damage after a storm
- Essential tools and materials for emergency roof repairs
- Step-by-step guide to temporary roof repairs
- Coordinating professional roof repair and insurance claims
- Preventing future storm roof damage
- What most homeowners miss about storm repair success
- Work with Central Florida’s roof repair experts
- Frequently asked questions
Key Takeaways
| Point | Details |
|---|---|
| Act fast | Quick roof inspections and repairs after a storm reduce the risk of costly damage. |
| Use proper supplies | Emergency tarps, roofing tape, and safety gear help prevent further water intrusion. |
| Hire local pros | Central Florida roof repair experts ensure repairs are safe, compliant, and long-lasting. |
| Document everything | Take clear photos and notes for your insurance claim to streamline the process. |
| Maintain regularly | Annual inspections and storm-ready upgrades can prevent repeat damage and headaches. |
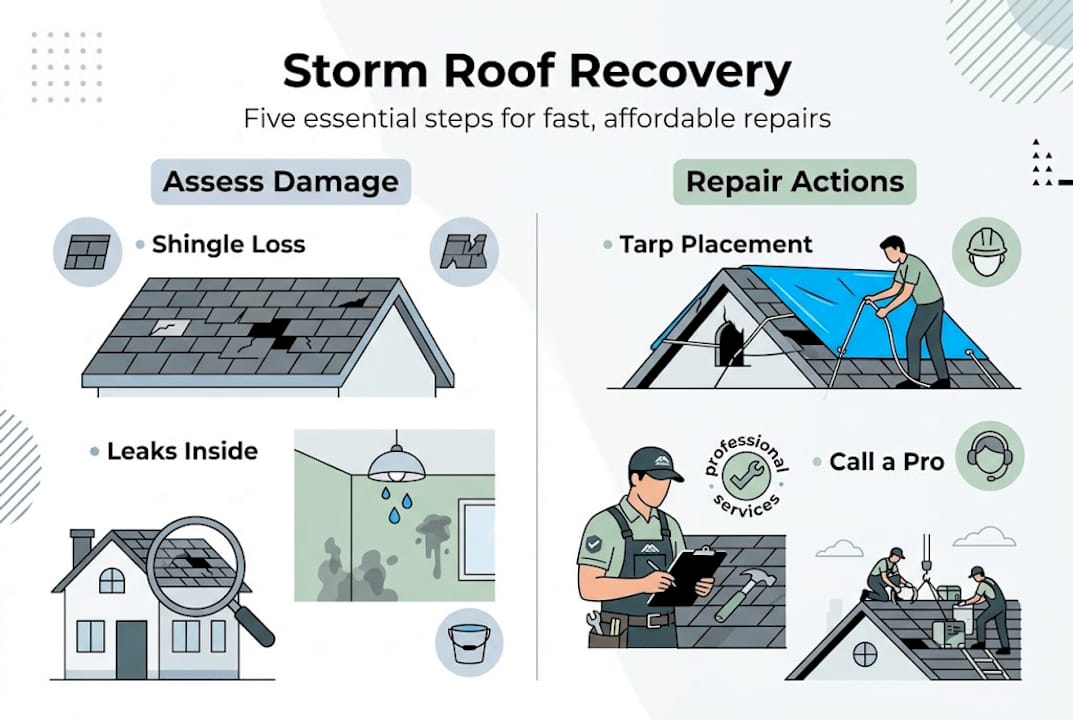
Assessing roof damage after a storm
Once you understand the urgency, the first step involves evaluating the level of damage safely. Before you step outside or climb anywhere, make sure the storm has completely passed. Check the post-storm safety guidance from the National Weather Service to confirm conditions are safe in your area.
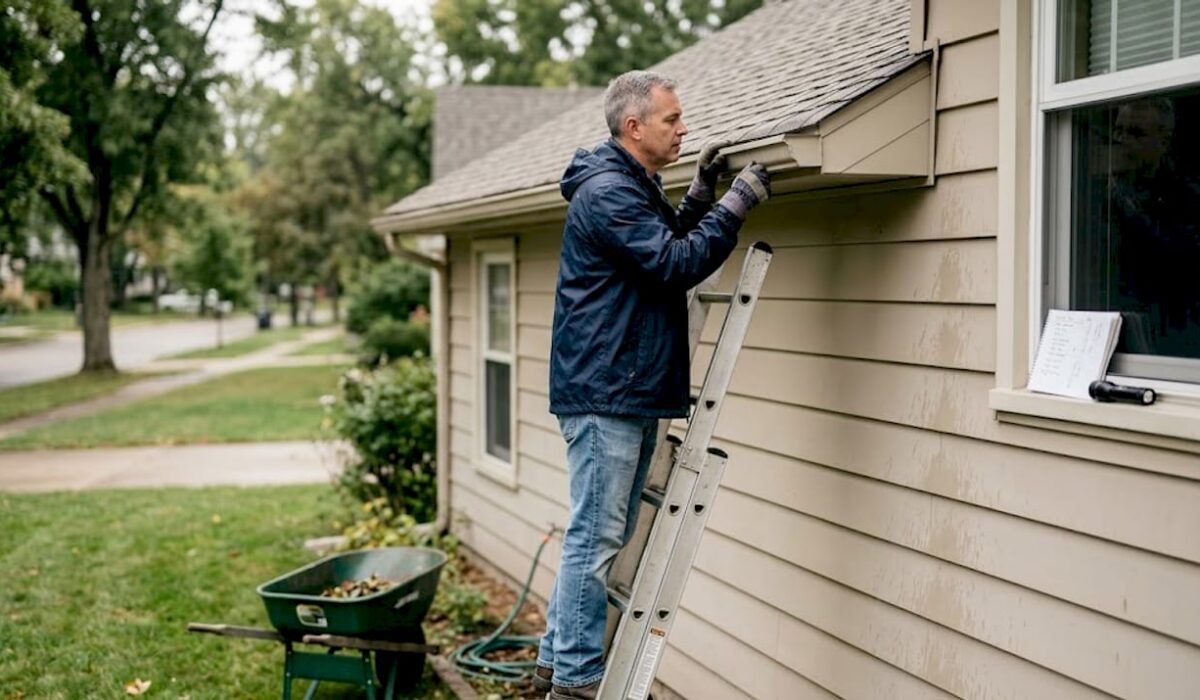
Start your assessment from the ground. Walk the perimeter of your home and look up. You’re scanning for missing shingles, visible gaps, bent flashing, sagging areas, or debris sitting on the roof. Do not climb onto the roof unless you have proper safety equipment and experience. Most damage is visible from the ground or through upper-floor windows.
Here are the most common types of roof damage Central Florida homeowners see after storms:
- Missing or cracked shingles from high winds
- Punctures or tears caused by falling branches
- Lifted flashing around chimneys, vents, or skylights
- Granule loss on asphalt shingles, visible in gutters
- Interior water stains on ceilings or walls
- Sagging decking indicating structural stress
Knowing how to identify roof storm damage early gives you a head start on repairs and documentation.
Warning: If you see large holes, exposed wood decking, or water actively entering your home, treat it as an emergency. Do not wait to call a professional.
The table below helps you quickly sort damage by severity:
| Damage type | Severity | Recommended action |
|---|---|---|
| 1-2 missing shingles | Low | Document and monitor |
| Multiple missing shingles | Moderate | Temporary patch + pro call |
| Puncture or hole | High | Emergency tarp + pro call |
| Sagging or structural damage | Critical | Vacate area, call immediately |
| Active interior water leak | Critical | Emergency repair required |
Roof damage inspected promptly prevents more costly repairs down the line, and acting within the first 24 to 48 hours makes a significant difference in total recovery cost.
Essential tools and materials for emergency roof repairs
After assessing your roof’s condition, you’ll need the proper tools and materials for safe, effective emergency repairs. Having the right supplies ready before storm season is one of the smartest things you can do as a Central Florida homeowner.
Emergency roof repairs may prevent water intrusion and save on extensive repairs, but only if you use the right materials and approach them correctly.
Here’s what to keep in your emergency kit:
- Heavy-duty polyethylene tarps (at least 6 mil thickness)
- Roofing nails and a hammer
- Waterproof roofing tape or butyl tape
- Utility knife
- Caulking gun with roofing sealant
- Wooden furring strips to secure tarps without puncturing more of the roof
- Bucket and towels for interior water collection
Not all materials perform equally under Florida’s sun and rain. Here’s a quick comparison:
| Material | Best use | Durability | Cost |
|---|---|---|---|
| Heavy-duty tarp | Large exposed areas | 2-4 weeks | Low |
| Roofing tape | Small cracks or seams | 1-2 weeks | Low |
| Roofing sealant | Flashing gaps, nail holes | 4-8 weeks | Moderate |
| Temporary patch kit | Punctures up to 12 inches | 2-4 weeks | Moderate |
Always wear non-slip footwear, work gloves, and eye protection before handling any roofing materials. Wet surfaces are extremely dangerous, and sharp debris is everywhere after a storm. Review FEMA disaster supplies recommendations for additional guidance on what to keep on hand.
Pro Tip: Assemble your emergency roof kit at the start of every hurricane season, not after the storm hits. Store it in an accessible location so you’re not scrambling when minutes count.
Using low-quality materials, like thin plastic sheeting or standard duct tape, can make things worse by trapping moisture or tearing loose in the next rain. Invest in proper supplies once and they’ll serve you for multiple seasons.
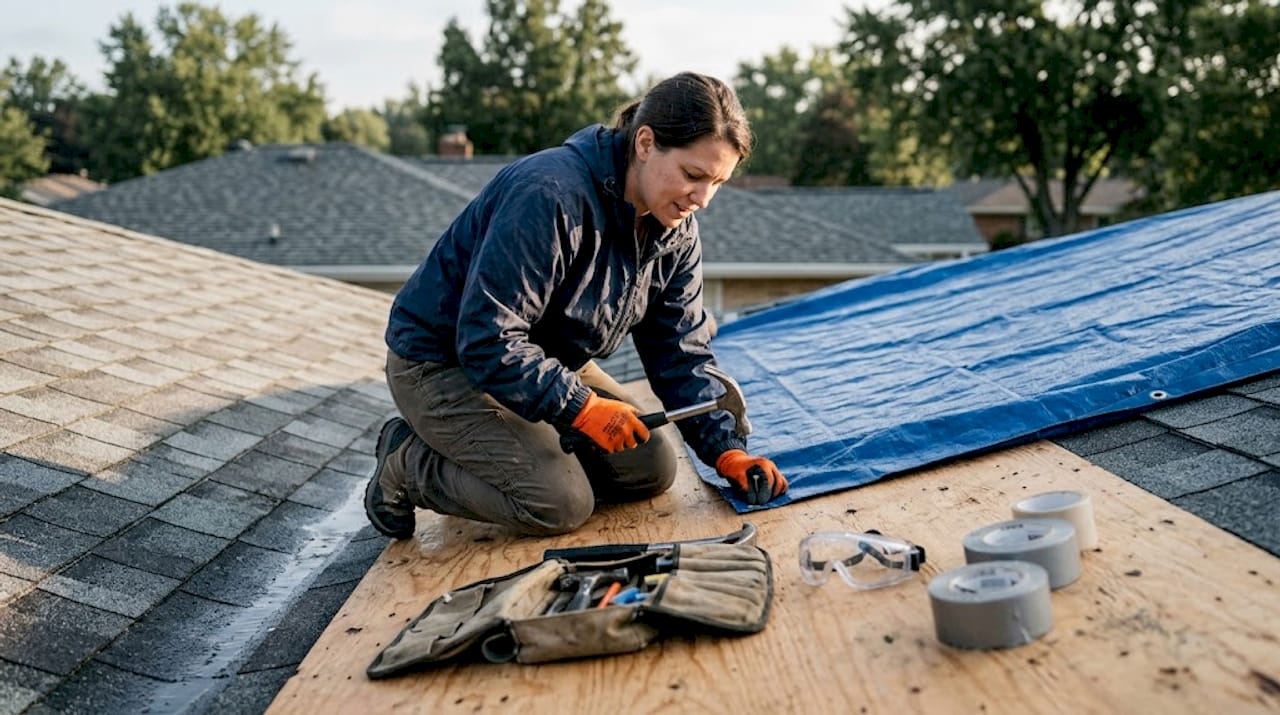
Step-by-step guide to temporary roof repairs
With your supplies ready, you can now take action using practical, step-by-step instructions. Temporary repairs are not permanent fixes, but they are essential for protecting your home until a professional can complete a full restoration.
Temporary repairs minimize further home damage and buy critical time before professional crews arrive.
Follow these steps carefully:
- Confirm safe conditions. Only work when the storm has fully passed, winds are calm, and surfaces have had time to dry.
- Gather your tools and safety gear. Gloves, non-slip shoes, and eye protection are non-negotiable.
- Place buckets inside under active leaks to protect flooring and belongings.
- Lay the tarp over the damaged area. Extend it at least 4 feet past the damaged section on all sides.
- Secure the tarp with wooden furring strips and nails. Never use nails alone directly into the tarp, as they will tear through under wind pressure.
- Apply roofing sealant or tape to small cracks, gaps around flashing, or exposed nail holes.
- Photograph everything before, during, and after your temporary repairs for insurance documentation.
- Avoid walking on wet or visibly soft areas of the roof. Damaged decking can give way without warning.
Safety note: If winds are above 15 mph, the roof is wet, or the damage is near the ridge line or covers more than a few square feet, do not attempt the repair yourself. Call a professional immediately.
Common mistakes include using too-small tarps, failing to secure edges properly, and ignoring interior damage. Also, never attempt temporary repairs after dark or in wet conditions.
For a look at the complete roof repair process from temporary patch to full restoration, it helps to understand what comes next so you’re not caught off guard.
Pro Tip: Take a short video walkthrough of the damage before covering anything. Video evidence is often more compelling than photos alone when filing an insurance claim.
Coordinating professional roof repair and insurance claims
Once the immediate emergency repairs are completed, it’s vital to move quickly on professional restoration and navigating your insurance claim. This stage is where many homeowners lose time and money by being unprepared or choosing the wrong contractor.
Start by documenting everything thoroughly. Your insurance adjuster will want:
- Date and time of the storm
- Photos and video of all visible damage, inside and outside
- A written description of what you observed and when
- Records of any emergency repairs you made, including materials used and costs
- Receipts for supplies purchased
Using damage examples for insurance claims can help you organize your documentation and make sure nothing gets missed.
When vetting roofing contractors, check for these qualities:
- Valid Florida roofing license
- Local references and verifiable reviews
- Experience with storm damage repairs specifically
- Written estimates with itemized costs
- No pressure to sign immediately or waive your right to review the contract
Understand the insurance claim process so you know what to expect from your adjuster’s visit and timeline.
Timely professional repairs lower costs and improve long-term roof performance, which is why speed matters even after the temporary patch is in place.
| Repair timing | Contractor quality | Likely outcome |
|---|---|---|
| Within 48 hours | Licensed local pro | Best cost and result |
| Within 1 week | Licensed local pro | Good outcome |
| Delayed 2+ weeks | Any contractor | Higher cost, more damage |
| Delayed 2+ weeks | Unlicensed or out-of-state | Risk of poor work, claim issues |
Preventing future storm roof damage
Learning from each storm, you can reduce risks and cut costs by focusing on prevention. Central Florida’s storm season is predictable in one sense: it will come back every year. What changes is how prepared your roof is when it does.
Routine maintenance makes roofs more resilient and reduces future repair costs significantly. Investing in pre-storm roof maintenance before hurricane season is one of the highest-return decisions a Florida homeowner can make.
Here are the most effective prevention strategies:
- Schedule annual professional roof inspections, ideally in the spring before storm season begins
- Trim trees and branches within 10 feet of your roofline to reduce impact risk
- Upgrade to storm-rated shingles or metal roofing materials rated for high-wind zones
- Clear gutters and downspouts at least twice a year to prevent water backup
- Inspect and reseal flashing around chimneys, vents, and skylights annually
- Check attic ventilation to prevent moisture buildup that weakens decking over time
For homeowners interested in structural upgrades, research on roof design for high-wind areas from the Insurance Institute for Business and Home Safety offers science-backed guidance on materials and construction methods that hold up better in Florida conditions.
A well-maintained roof does more than survive storms. It lowers your insurance premiums, extends the life of your roofing system, and gives you confidence heading into every storm season.
What most homeowners miss about storm repair success
Here’s something we’ve seen repeatedly after years of working through Central Florida storm seasons: the homeowners who recover fastest and spend the least are almost never the ones who reacted quickest. They’re the ones who prepared before the storm hit.
Most people wait until water is dripping from the ceiling before they call anyone. By then, the damage has already spread into the decking, insulation, and sometimes the framing. The visible leak is just the last symptom of a problem that started weeks or months earlier with a small crack, a loose shingle, or worn flashing.
The deeper lesson is about relationships, not repairs. Homeowners who have an established connection with a trusted local roofer get faster callbacks, more honest assessments, and better pricing when disaster strikes. When a major storm hits the region, licensed contractors get booked within hours. If you’re calling someone for the first time in a panic, you’re already behind.
Browsing real-life repair examples before a storm season helps you recognize damage early and have an informed conversation with your roofer when it matters most. Building that relationship now, not after the next storm, is the single most underrated move a Central Florida homeowner can make.
Work with Central Florida’s roof repair experts
If you’ve just come through a storm and your roof needs attention, you don’t have to figure it out alone. Thomas Roofing and Repair serves homeowners across Brevard, Volusia, and Orange counties with fast response times, licensed crews, and honest assessments.

Start with our Central Florida storm repair guide for a full overview of the recovery process. If you need help right now, our emergency roof repair service is built for exactly this situation. You can also browse real roof damage photos to compare what you’re seeing on your own roof. Contact us today for a free estimate and get a local team working for you.
Frequently asked questions
What should I do first if my roof is damaged in a storm?
Ensure safety, check for visible hazards, and take photos for insurance before attempting any temporary repairs. Post-storm safety is critical before any inspection or repair.
Can I perform temporary roof repairs myself?
Minor issues like small leaks or missing shingles can be temporarily patched, but major or unsafe situations require professional help. DIY repairs are suitable for minor damage when you have proper tools and safety gear.
How do I know if my roof damage needs emergency professional repairs?
If you see large holes, exposed underlayment, or water entering your home, call a qualified roofer right away. Serious storm damage requires emergency professional intervention.
How quickly should I contact my insurance company after storm damage?
Report storm roof damage as soon as possible to speed up claim processing and avoid coverage issues. Prompt reporting to insurance is vital after a loss to protect your claim.
What maintenance can prevent future roof storm damage?
Regular inspections, trimming trees, and upgrading to storm-rated materials can protect your roof against future storms. Routine maintenance increases roof durability and resilience over time.