
TL;DR:
- Hidden storm damage can lead to costly roof repairs if left unnoticed and unaddressed.
- Proper inspection requires safety gear, tools, and knowledge of your roof material and damage signs.
- Early professional assessment and documentation are essential to prevent small issues from escalating.
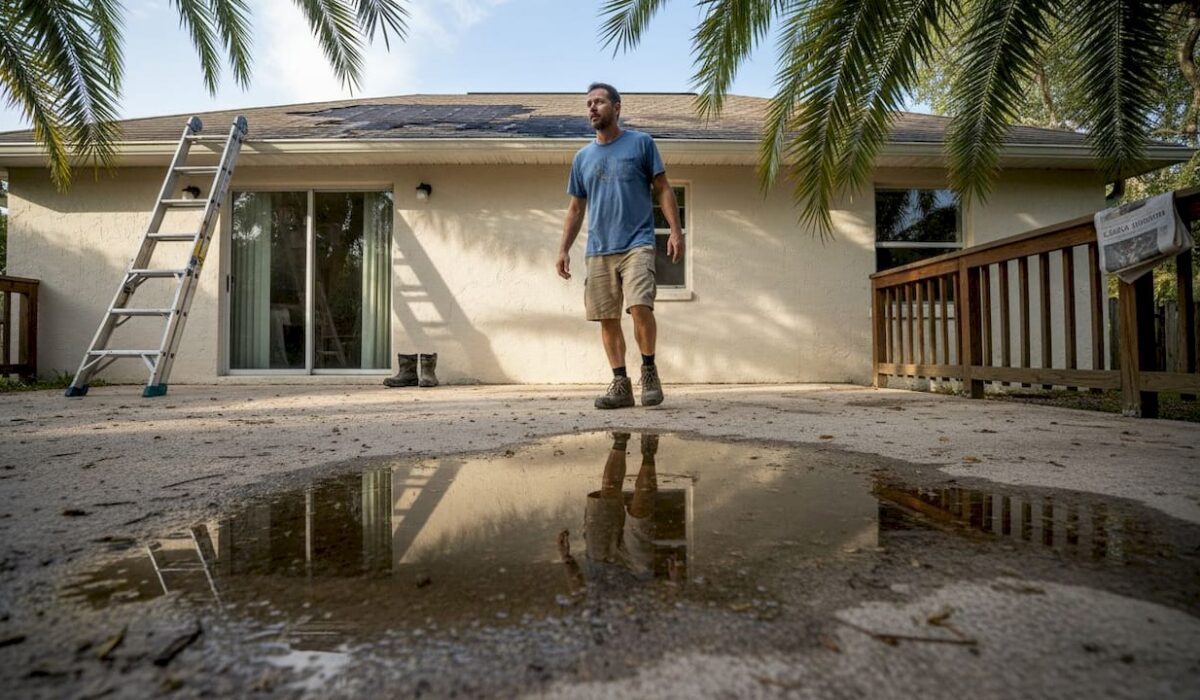
After a Central Florida storm, the damage you can’t see is often the most expensive. A few missing shingles or a hairline crack in a tile can let water into your attic, rot your decking, and turn a $500 repair into a $15,000 replacement before you even notice a stain on your ceiling. Acting fast matters. This guide walks you through everything you need to know: how different roof types hold up to storms, what gear to bring, exactly what to look for, and when to stop inspecting and call a professional. If your roof took a hit, this is where you start.
Table of Contents
- What to know before you inspect: storm risks and roof types
- Gather your tools and safety gear: what you need for a roof inspection
- Step-by-step inspection: spotting storm damage on your roof
- What to do after finding damage: troubleshooting, common mistakes, and next steps
- What most homeowners miss about storm roof inspections
- Get help from trusted Central Florida roofing experts
- Frequently asked questions
Key Takeaways
| Point | Details |
|---|---|
| Know your roof type | Asphalt, metal, and tile roofs have different vulnerabilities to Florida storms. |
| Inspect thoroughly and safely | Use proper tools and document every sign of damage for repairs and insurance. |
| Don’t ignore minor damage | Even small storm effects can quickly worsen; early detection saves money. |
| Florida codes matter | High-velocity wind codes affect inspection and repair strategies. |
| Call professionals when needed | For urgent or hidden issues, contact trusted Central Florida roofing experts. |
What to know before you inspect: storm risks and roof types
Not every roof responds to a storm the same way. Before you climb a ladder or even walk your property line, it helps to understand what your specific roof material is up against. Central Florida homes are most commonly covered with asphalt shingles, metal panels, or clay and concrete tile. Each one has a different track record when storms roll through.
Asphalt shingles are the most common and, unfortunately, the most vulnerable. Post-Hurricane Ian data showed a ~50% damage rate for asphalt shingle roofs, with older roofs over 10 years showing the worst outcomes. Metal roofs performed significantly better, with only a ~12% damage rate, while tile roofs landed in the middle at roughly 40% affected. Those numbers matter because they shape what you should be looking for on your own home.

| Roof type | Post-storm damage rate | Most common failure point |
|---|---|---|
| Asphalt shingles | ~50% | Granule loss, lifted edges, blow-off |
| Clay or concrete tile | ~40% | Cracked or displaced tiles |
| Metal panels | ~12% | Fastener pull-out, seam separation |
Roof age is a major factor on top of material type. A 15-year-old asphalt shingle roof and a brand-new one will respond very differently to the same wind event. Older roofs have degraded sealant strips, brittle granule bonds, and weakened underlayment. Even a moderate storm can expose those weaknesses. You can learn more about how materials hold up over time in our roofing materials guide.
Here are signs unique to each material type to watch for:
- Asphalt shingles: Missing tabs, exposed black mat, granules collecting in gutters
- Tile roofs: Visible cracks, hollow sound when tapped, shifted or missing tiles
- Metal roofs: Lifted panel edges, rust streaks near fasteners, dented panels from hail
One thing homeowners consistently underestimate: a minor storm can still cause major problems on an older roof. Staying proactive with roof maintenance tips before storm season is always the smarter move.
Gather your tools and safety gear: what you need for a roof inspection
Once you understand how storms affect your roof type, it’s time to get ready. A good inspection is only as thorough as the preparation behind it. Showing up without the right gear means you’ll miss things, and in Central Florida’s post-storm environment, missing things is costly.
Here’s your basic inspection toolkit:
- Flashlight (for attic and eave inspection)
- Stable extension ladder (rated for your weight plus gear)
- Work gloves (protect hands from sharp shingle edges and debris)
- Non-slip footwear (rubber soles only)
- Notepad or phone (for written notes and photos)
- Camera or smartphone (high resolution for documentation)
- Binoculars (optional but useful for steep pitches)
| Tool | Inspection task |
|---|---|
| Flashlight | Attic moisture, staining, soft spots |
| Ladder | Access to roof surface and gutters |
| Camera | Document damage for insurance claims |
| Binoculars | Scan steep sections from the ground |
| Notepad | Record location, size, and type of damage |
Pro Tip: Use your phone’s video mode to do a slow sweep of the roof surface. Video captures texture and shadow better than still photos, making granule loss and lifted shingles much easier to see when you review footage later.
Safety precautions before you go up:
- Never inspect immediately after rain. Wet roofs are dangerously slippery.
- Have someone present to stabilize the ladder and call for help if needed.
- Avoid walking on tile roofs. Tiles crack under foot pressure, adding damage.
- Stay off the roof entirely if wind is above 15 mph.
Florida’s high-velocity wind codes require enhanced roof attachment systems, which means inspections here involve checking more than just the surface. Understanding your local Central Florida roofing codes helps you know what a compliant, storm-ready roof should look like. Keep a copy of your roof maintenance checklist handy as a reference during your walkthrough.
Step-by-step inspection: spotting storm damage on your roof
With tools and safety gear ready, follow these steps to assess damage systematically. Random walkarounds miss things. A structured approach does not.
- Start at the perimeter. Walk the entire exterior of your home before going up. Look for shingle debris, granule piles near downspouts, displaced tiles, and bent gutters. What’s on the ground tells you a lot about what happened above.
- Inspect gutters and downspouts. A significant amount of dark, gritty material in your gutters means granule loss. Granules protect the asphalt layer from UV and moisture. Losing them accelerates aging fast.
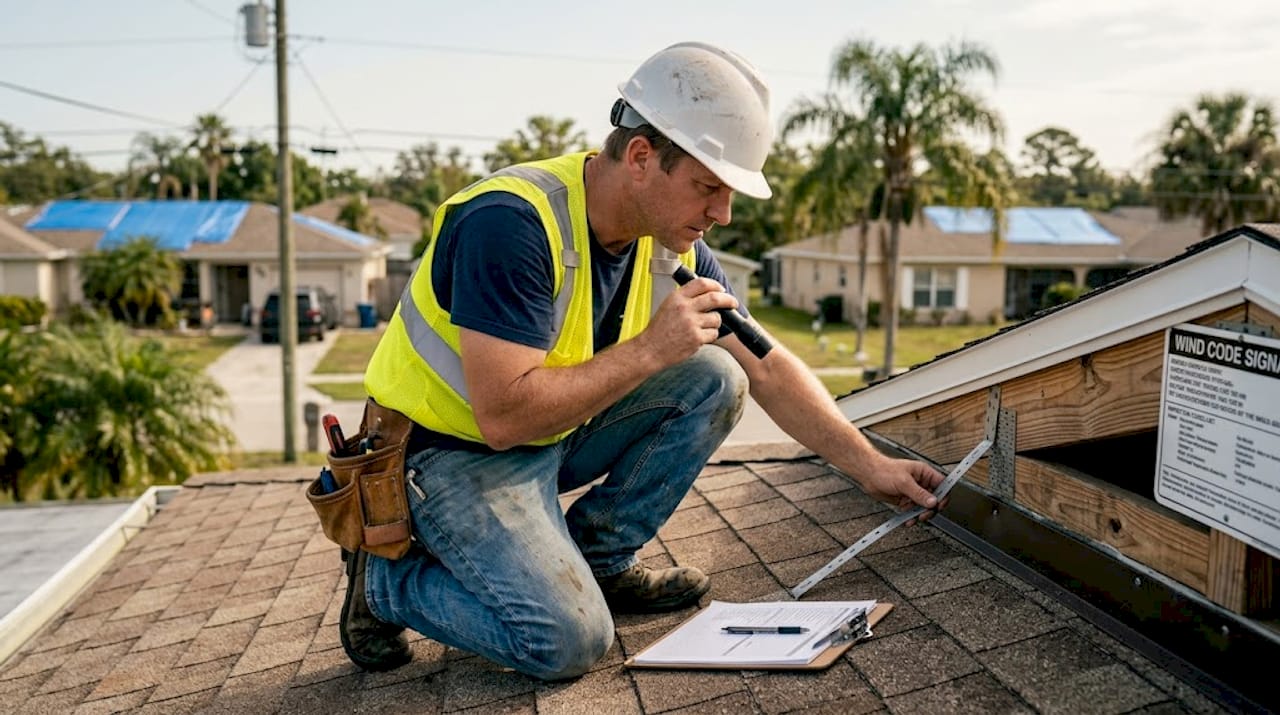
- Check the roof surface from the ladder. Look for lifted shingle edges, exposed underlayment, cracked tiles, or dented metal panels. Pay extra attention to ridges, valleys, and areas around chimneys or vents.
- Go into the attic. This is where hidden damage shows up first. Look for daylight coming through the decking, water stains on rafters, soft or spongy wood, and any active dripping.
- Document everything. Photograph every area of concern with a scale reference (a coin or ruler works). Note the location, size, and what you observed.
Pro Tip: Document damage after every storm, even minor ones. Sub-severe hail accelerates granule loss and aging, making roofs up to 10 times more vulnerable to serious damage in the next storm. Your photos from today become critical evidence in a future insurance claim.
Knowing the difference between cosmetic and functional damage changes how urgently you respond. Professionals distinguish cosmetic from functional damage by testing hail resistance ratings and checking for fractures or structural creep, not just surface wear.
- Cosmetic damage: Granule loss, surface scuffs, minor discoloration. Doesn’t immediately threaten the roof’s waterproofing ability.
- Functional damage: Cracks, fractures, active leaks, lifted sections. These need immediate attention.
Even if a storm seemed minor, don’t assume your roof escaped unscathed. Hidden functional damage often hides behind what looks like a cosmetic issue on the surface.
For real-world examples of what each type looks like, review our storm damage roof examples and our guide on roof damage documentation.
What to do after finding damage: troubleshooting, common mistakes, and next steps
After completing your inspection, here’s how to respond and avoid the mistakes that turn manageable repairs into major expenses.
Common mistakes homeowners make after storms:
- Ignoring small leaks because they seem minor
- Skipping documentation because the damage looks cosmetic
- Waiting weeks before contacting their insurance company
- Attempting permanent repairs without professional assessment
- Assuming a neighbor’s undamaged roof means yours is fine too
Once you’ve identified damage, follow this sequence:
- Apply temporary protection. Use a heavy-duty tarp to cover exposed areas. Secure it with sandbags or weighted boards, not nails through the roof. This prevents additional water intrusion while you arrange professional help.
- Contact your insurance company. Report the damage as soon as possible. Most policies have time limits on storm claims. Provide your photos, notes, and dates.
- Schedule a professional inspection. Your visual check is a starting point. A licensed roofer can identify structural issues, underlayment damage, and code compliance problems that aren’t visible from the surface.
Pro Tip: While waiting for professional help, check your attic daily for new moisture. A small drip can become a soaked rafter in 48 hours during Florida’s humid conditions.
Older roofs over 10 years are the most vulnerable, and quick action after a storm is the single most effective way to prevent a repair from escalating into a full replacement. If you’re unsure where to start, our emergency roof repair steps walk you through the process clearly. For homes with more extensive damage, our roof replacement advice covers what to expect from that process.
What most homeowners miss about storm roof inspections
Here’s something we’ve seen repeatedly: homeowners complete a solid inspection, find what looks like minor damage, and then wait. They tell themselves it’s not bad enough to call anyone yet. That delay is where the real cost accumulates.
There’s also a psychological piece that doesn’t get talked about enough. After a stressful storm event, the last thing most people want to do is find more problems. So they look, see nothing obvious from the ground, and move on. But the damage that costs the most is almost never visible from the ground.
Cosmetic damage is another trap. Granule loss looks harmless. It isn’t. It’s your roof aging years ahead of schedule, and the next storm will find that weakened spot. Insurance companies also see it differently than homeowners do. What you consider minor, an adjuster may classify differently, and thorough documentation is the only thing that bridges that gap in your favor.
Florida’s storm frequency makes proactive inspection a financial strategy, not just home maintenance. Roofs here face more cumulative stress than nearly anywhere else in the country. Treating every storm as an inspection trigger, not just the big named ones, is the mindset that protects your investment long term.
Get help from trusted Central Florida roofing experts
If your inspection turned up damage or left you with questions, a professional assessment is the safest next step. At Thomas Roofing and Repair, we serve homeowners across Brevard, Volusia, and Orange counties with thorough inspections, rapid storm repairs, and honest guidance on whether repair or replacement makes more sense for your situation.

Our storm damage repair guide covers the full repair process so you know what to expect. If you need urgent help, our fast storm repair workflow outlines how we respond quickly to protect your home. You can also browse our 2026 storm damage examples to compare what you found with real documented cases. Contact us for a free estimate and get your roof secured before the next storm arrives.
Frequently asked questions
How do I tell if roof damage is cosmetic or functional after a storm?
Cosmetic damage affects surface layers like granule loss without compromising waterproofing, while functional damage includes cracks, fractures, or active leaks that require immediate repair to prevent further deterioration.
Should I inspect my roof even after minor storms?
Absolutely. Sub-severe hail and minor wind events can accelerate aging and make your roof up to 10 times more vulnerable to serious damage in future storms, even when no obvious damage is visible right away.
Do Florida roofing codes affect storm repairs and inspections?
Yes. Florida’s high-velocity wind codes require enhanced roof attachment systems, which means both inspection criteria and repair techniques must meet higher standards than many other states.
Is it safe for homeowners to inspect their roofs after storms?
You can safely conduct a ground-level and ladder-based inspection using proper gear, but avoid walking on wet or steep surfaces and call a professional if you’re uncertain about any area.
What is the best way to document roof storm damage for insurance?
Photograph every affected area with a date stamp, write detailed notes on location and size, and keep all records organized. As outlined in our homeowner’s documentation guide, thorough records significantly improve the outcome of insurance claims.