
What is a roof appraisal report and why does it matter?
A roof appraisal report is a structured document produced after a formal inspection of your roof. It details the damage found, the scope of repairs needed, and the estimated cost to restore the roof to its pre-loss condition. For property owners and insurance claimants, this document is the foundation of every repair decision and claim negotiation that follows.
The report serves a specific purpose: it translates physical damage into dollar figures and documented scope. Without it, you are negotiating blind against an insurer who has their own numbers. With a solid, independent report in hand, you have evidence that can be reviewed, challenged, and used to support a fair settlement.
Here is why the report matters in practical terms:
- It establishes a documented baseline of damage before any repairs begin.
- It supports or disputes the insurer’s adjuster estimate with independent findings.
- It identifies repair scope that adjusters may have missed or undervalued.
- It gives roofing contractors a clear picture of what the job actually requires.
- It protects you legally if the claim goes to formal appraisal dispute resolution.
Property owners, insurers, and licensed appraisers all rely on this document. Getting a copy you can actually read and interpret is the first step toward protecting your investment.
Core components you will find in a roof appraisal report
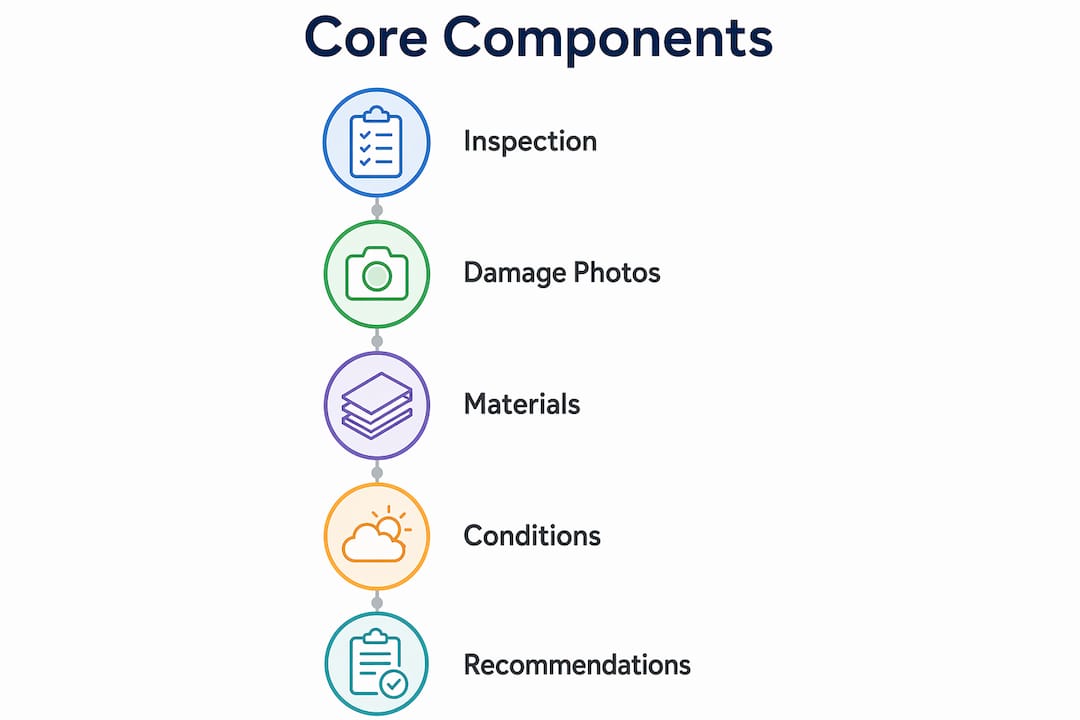
Most roof appraisal reports follow a consistent structure, though the depth of each section varies by appraiser and claim complexity. Knowing what each section contains helps you spot gaps before they cost you money.
- Inspection summary: A brief overview of when the inspection occurred, who conducted it, the roof’s age, material type, and general condition. This section sets the context for everything that follows.
- Damage description: A detailed, written account of every damaged area found. Good reports describe damage by slope, location, and type, such as hail strikes, wind lifting, cracked flashing, or granule loss.
- Photographs: Timestamped photos organized by roof section. Visual evidence and detailed line items improve clarity and directly support claims. Photos should show both wide shots for context and close-ups for damage detail.
- Roof diagrams: Annotated sketches or aerial diagrams marking damage locations on each slope. These help adjusters, contractors, and umpires understand the spatial distribution of damage without revisiting the site.
- Repair recommendations: A section outlining what work is needed, whether that is a partial repair, slope replacement, or full replacement. This is where the 25% rule may come into play, since replacing a significant portion of any slope within a 12-month period typically triggers a code-compliant full replacement.
- Cost estimates: Line-item pricing for labor, materials, and any code-required upgrades. The more granular this section, the stronger your negotiating position.
- Terminology glossary: Some reports include definitions for terms like ACV (actual cash value), RCV (replacement cost value), and depreciation. If yours does not, ask for clarification before signing anything.
Pro Tip: Request that the appraiser organize photos by slope and label each image with the damage type. An unorganized photo dump is nearly useless in a claim dispute.
How to read and interpret the details in your report
Reading a roof appraisal report critically is a skill most property owners never develop until they need it. The difference between a well-read report and a skimmed one can be thousands of dollars in claim recovery.

Start with the damage description and cross-reference every item against the photographs. Each described damage point should have a corresponding photo. If the report mentions wind lifting on the rear slope but shows no photo of it, that is a documentation gap your insurer will notice.
Pay close attention to these common terms and what they signal:
- Functional damage vs. cosmetic damage: Functional damage affects the roof’s ability to keep water out. Cosmetic damage affects appearance only. Insurers often try to classify hail dents as cosmetic; a strong report will argue functional impact.
- Granule loss: Significant granule loss on asphalt shingles accelerates aging and is a legitimate damage indicator, not just wear and tear.
- Flashing condition: Damaged or improperly sealed flashing is a leading cause of leaks. Reports that omit flashing details are incomplete.
- Decking condition: Soft spots, rot, or delamination in the roof deck often only appear during tear-off. A good report flags visible signs and notes that hidden decking damage is possible.
- Code upgrade items: Look for mentions of drip edge, ice-and-water shield, ventilation, and underlayment. These are often required by current building codes but left out of initial adjuster estimates.
For the cost estimate section, review each line item against your contractor’s estimate. Gaps between the two documents reveal exactly what the insurer’s adjuster omitted or undervalued. Common omissions include steep-slope charges, starter strip, ridge cap, and waste factors.
“Roofing appraisal is not just about who argues louder. It is about which side presents a cleaner, more defensible roof story tied to a coherent build scope.” — Roofing Appraisal Process Guide 2026
Pro Tip: Before accepting any report’s findings, get an independent contractor to walk the roof with you and compare their observations against the written report. Discrepancies are common and worth documenting.
You can also review storm damage roof examples to familiarize yourself with the types of damage that typically appear in appraisal reports for Florida properties.
How roof appraisal reports influence insurance claim outcomes
The appraisal report is the most important evidentiary document in a roof insurance claim. Adjusters use their own inspection report as a baseline, and that baseline is almost always conservative. Adjusters typically use their inspection report as a baseline; homeowners need independent evidence to avoid low-ball offers.
Understanding how insurers use the report changes how you approach the entire claim process.
When an adjuster reviews your claim, they compare your submitted documentation against their own findings. If your independent appraisal report documents damage they missed, you have grounds for a supplement. If the gap between their offer and your contractor’s estimate is large enough, you can formally invoke the appraisal clause in your policy. Insurance appraisers do not determine coverage; they strictly focus on the amount and scope of covered loss. That distinction matters because it means appraisal cannot resolve a coverage denial, only a dollar dispute.
“An insurance roof inspection is not a pass-fail test but an assessment of risk for coverage decisions; documentation separating storm damage from wear-and-tear is crucial.” — Roof Policy
Best practices for claimants using their appraisal report:
- Never accept the insurer’s first estimate as final without comparing it line by line against your independent report.
- Submit your independent report as a formal supplement request, referencing specific line items the adjuster omitted.
- Avoid volunteering information about the roof’s age or maintenance history during adjuster interactions. Phrases like “the leak has been there a while” can trigger wear-and-tear exclusions that reduce your claim scope.
- Keep copies of every version of the report, every adjuster estimate, and every written communication with your insurer.
- Know your policy’s appraisal clause. Insurance appraisal clauses vary by state and policy; some require a formal demand letter referencing specific policy provisions before the process can begin.
For a practical walkthrough of how to document your claim from the start, the insurance claim documentation steps guide covers the full process in detail.
What to do after you receive your roof appraisal report
Receiving the report is not the finish line. It is the starting point for everything that follows, and how you act in the first few days shapes the outcome of your claim.

Review the report with a licensed insured cleaning company professional before responding to your insurer. A licensed contractor can identify omissions, incorrect measurements, or misclassified damage that you might miss reading it alone. Bring specific questions: Is the scope complete? Are code upgrade items included? Does the cost estimate reflect current material prices in your area?
Document any discrepancies in writing. If the report omits a damaged slope, understates granule loss, or ignores flashing damage you can see yourself, note each item with a reference to the corresponding photo or contractor observation. This written record becomes your supplement request.
Here are the most effective next steps after receiving your report:
- Compare the report’s cost estimate against at least one independent contractor estimate, line by line.
- Check whether the 25% rule applies to your damage. If more than 25% of any slope requires replacement, code-compliant full replacement may be required, and your ordinance or law coverage should apply.
- File a supplement request promptly if the adjuster’s estimate falls short. Most policies have time limits for supplements.
- Organize your claim timeline: date of loss, first inspection, adjuster visit, report receipt, and any supplements already filed. Keeping detailed chronological documentation avoids delays and strengthens your position.
- If the gap between offers is significant, consult a public adjuster before invoking the formal appraisal clause. A public adjuster can sometimes negotiate a settlement without the full appraisal process.
- Review your policy’s appraisal clause for deadlines. Missing the window to demand appraisal can forfeit your right to use it.
The storm damage workflow guide walks through each of these steps in the context of a full claim, from initial damage through final payment.
Expert advice on using your appraisal report to strengthen your claim
The single most common mistake property owners make is confusing a real estate appraisal with an insurance appraisal. They are entirely different processes. A real estate appraisal values your property for sale or refinancing. An insurance appraisal resolves a specific dispute: how much does it cost to repair the covered damage? Appraisal is a dispute resolution tool restricted to amount-of-loss disagreements, legally binding when concluded, and cannot address coverage exclusions.
Selecting the right independent appraiser is where most homeowners either win or lose the process before it starts. You want someone with hands-on roofing knowledge, experience with insurance claim valuations, and ideally a track record in your local market. Your roofing contractor can provide documentation and attend the inspection, but they typically should not serve as your formal appraiser. A separate, independent professional carries more credibility with umpires and insurers.
Here is what separates a strong appraisal report from a weak one:
- Slope-by-slope photo documentation with each image labeled by location and damage type.
- Precise measurements of damaged areas compared to total slope area, especially when the 25% threshold is in question.
- Code documentation for any required upgrades, including drip edge, ventilation, and underlayment standards.
- Material availability notes if discontinued shingles or matching issues affect the repair scope.
- A clear build logic explaining why repair is or is not practical given the damage pattern and roof geometry.
Most appraisal awards fall between the insurer’s initial offer and the homeowner’s contractor estimate, and they are binding once two of the three parties sign off. That outcome is almost always better than continued informal negotiation, and the process typically costs far less than litigation.
Watch your language during adjuster interactions. Homeowners inadvertently weaken claims by volunteering age or maintenance details that give adjusters grounds to apply wear-and-tear exclusions. Answer questions directly and specifically, but do not offer context that was not asked for.
Pro Tip: Before the formal appraisal inspection, prepare a complete evidence package: contractor estimates, timestamped photos organized by slope, weather verification data for the date of loss, any prior supplement correspondence, and a written summary of what the carrier’s estimate omitted and why. Your appraiser’s effectiveness depends directly on the quality of the file you hand them.
A few insider notes on timing and expectations: the appraisal process typically takes 30–90 days from the date of your written demand. Simple claims with cooperative appraisers can close faster; complex claims involving umpire disputes or multiple inspections can stretch longer. Once the award is signed, your insurer is required to pay within the timeframe your policy specifies, and failure to pay can trigger regulatory complaints or legal action. Knowing that timeline helps you plan repairs without letting the process stall indefinitely.
For property owners in Central Florida, working with a contractor who understands both the physical scope of damage and the insurance documentation process makes a real difference. Thomas Roofing and Repair provides roof repair services in Titusville and across the region, with experience in storm damage claims and the documentation standards that support them. If you need professional installation after your claim settles, roof installation in Horizon West is also available.

Key Takeaways
A roof appraisal report is your primary tool for securing a fair insurance settlement, and its value depends entirely on how completely it documents damage and how well you use it in negotiations.
| Point | Details |
|---|---|
| Report purpose | A roof appraisal report documents damage scope and costs, forming the evidentiary foundation for insurance claims. |
| Critical components | Strong reports include slope-by-slope photos, precise measurements, code upgrade items, and line-item cost estimates. |
| Insurance appraisal scope | Insurance appraisers resolve amount-of-loss disputes only; they cannot overturn coverage denials or exclusions. |
| Appraisal timeline | The formal appraisal process typically takes 30–90 days and costs significantly less than litigation. |
| Claim protection | Avoid volunteering maintenance history or age details to adjusters, as these statements can trigger wear-and-tear exclusions. |